Browser Isolation
The Browser Isolation component of Oplon Secure Access enables secure access to internal websites and applications without exposing traffic directly to the web. Page rendering takes place on an isolated remote server, protecting the user’s device from threats like malware, ransomware, and phishing, while keeping the corporate network sealed off from the outside.
Single Node Architecture (Base)
The base architecture of Oplon Secure Access with Browser Isolation consists of a single node that acts both as an orchestrator and as a Browser Isolation node. This configuration is ideal for environments with moderate load requirements and offers a simple and compact solution to implement secure website browsing.
As a quick check that Browser Isolation is actually installed, verify that:
-
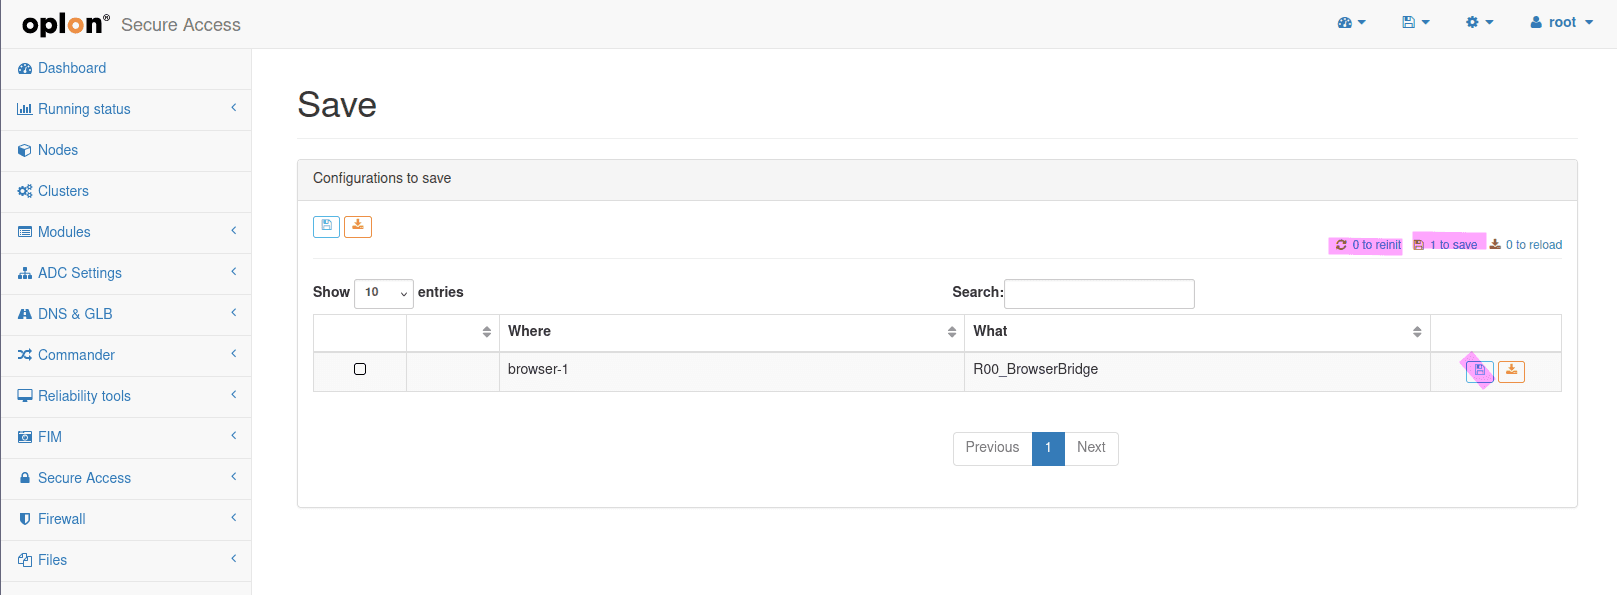
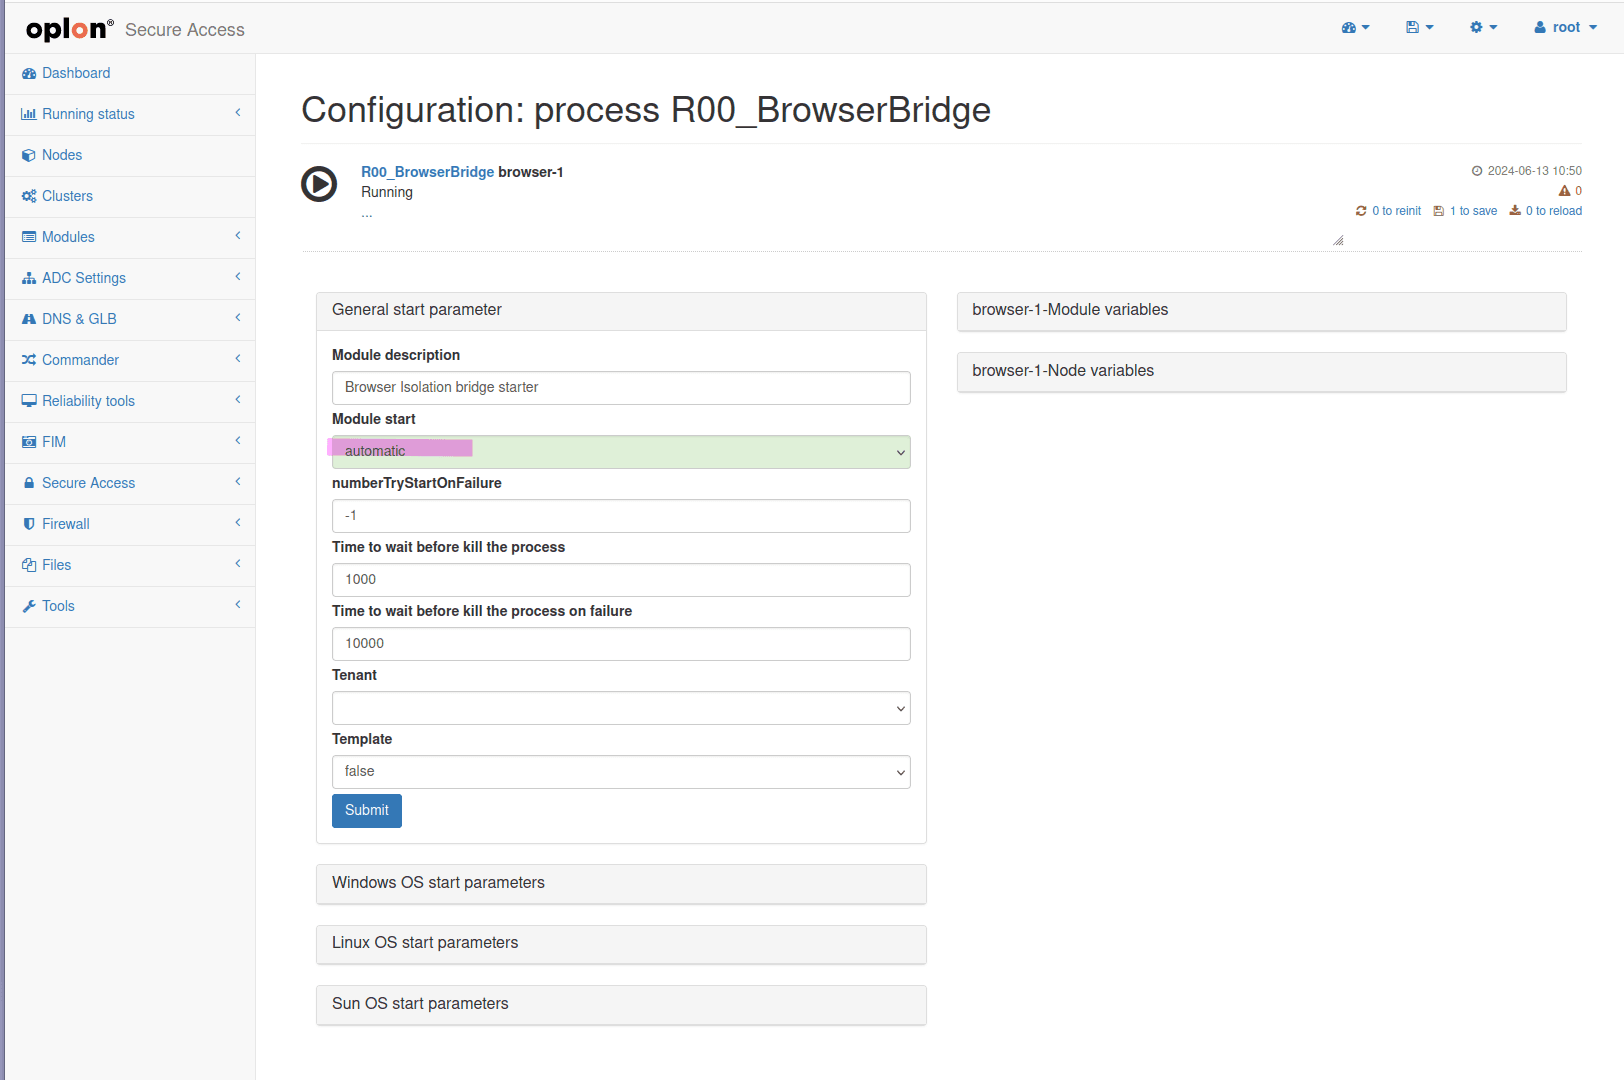
The R00_BrowserBridge module is started (and set to automatic startup)
-
The SecureAccess grouping applied to the OSA listener is configured as follows:
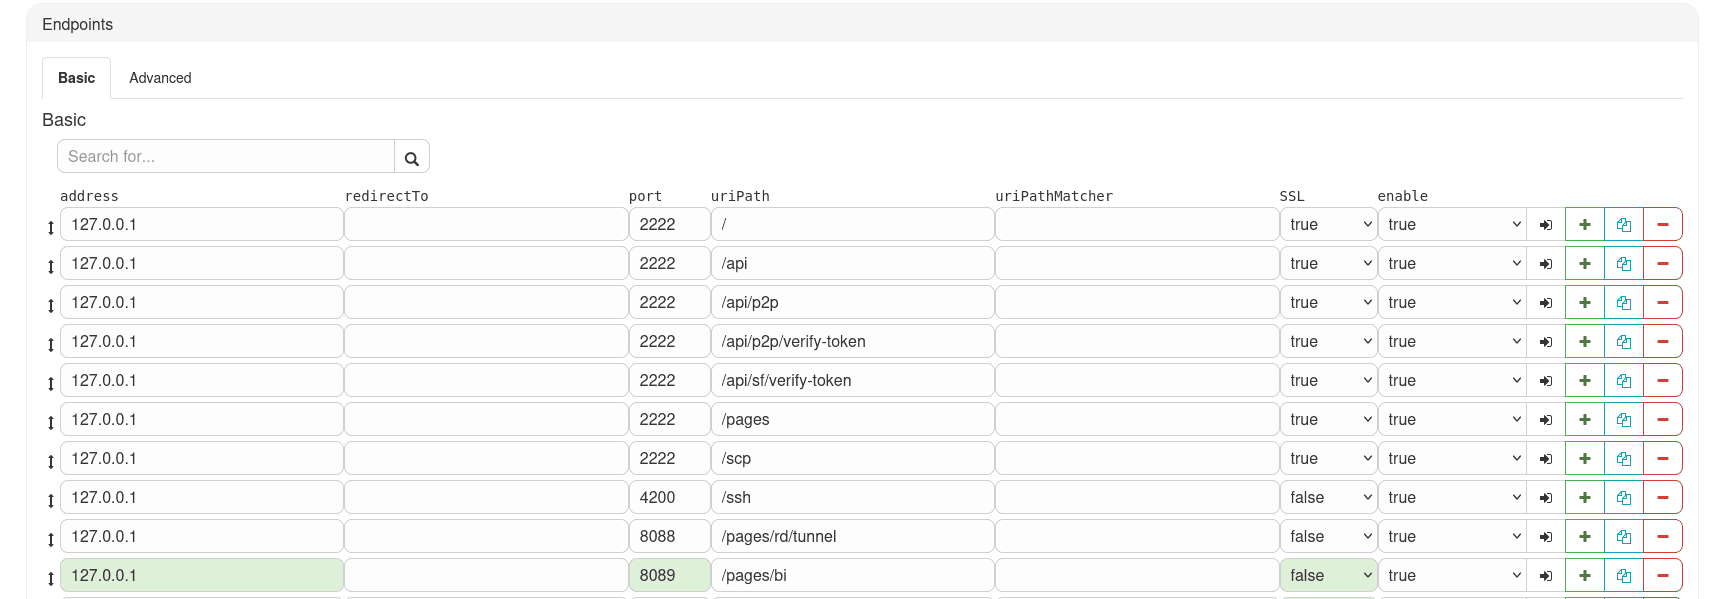
Secure Access Grouping Browser Isolation Single Node -
The Browser Isolation listener is enabled on
localhost, port8089, with SSL set tofalse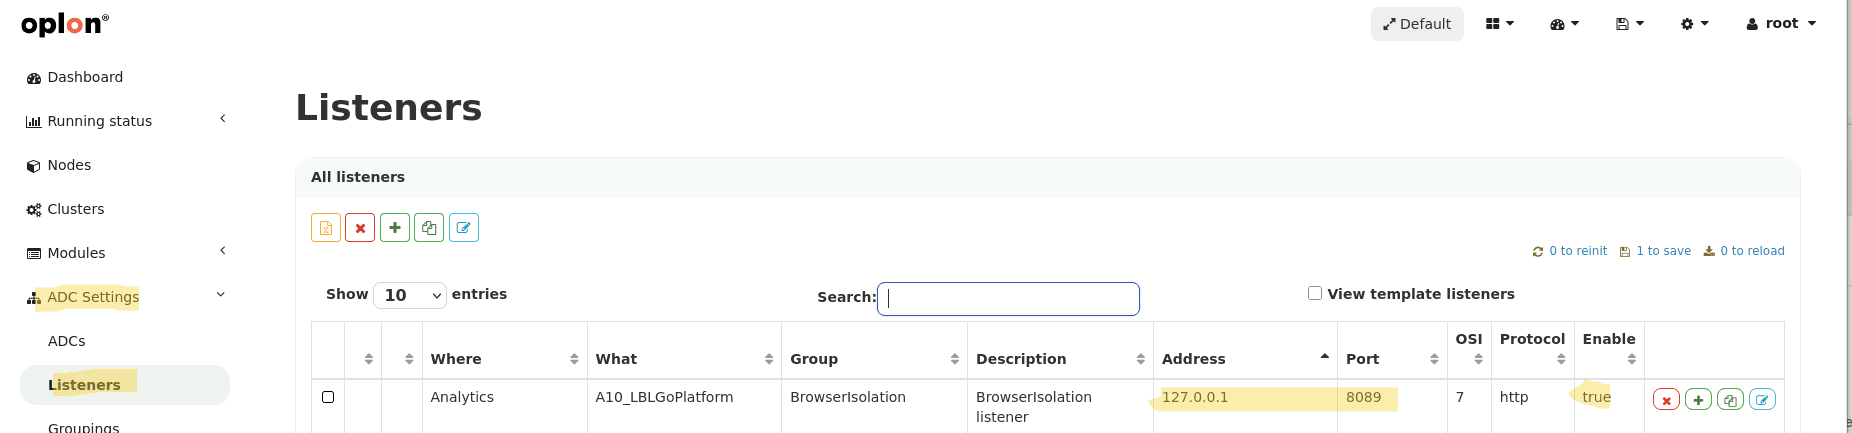
Secure Access Listener Browser Isolation Single Node
Multi Node Architecture (Advanced)
To install the Browser Isolation component (after installing the basic Oplon Secure Access appliance), you need at least one dedicated node. Oplon’s architecture for Browser Isolation is in fact scalable, balanced, and multi-node.
         +---------------------------+
         |    Oplon Secure Access    |
         |      (Orchestrator)       |
         +------------+--------------+
                      |
      +-----------------------------------+
      |                                   |
      v                                   v
 +-------------+    ...  ...  ...   +-------------+
 |   Browser   |    ...  ...  ...   |   Browser   |
 | Isolation   |    ...  ...  ...   | Isolation   |
 |   Node 1    |    ...  ...  ...   |   Node n    |
 +-------------+                    +-------------+
Before continuing with the guide, you need to complete the following:
- Deploying or cloning the Oplon Secure Access appliance:
- Make sure you have deployed (or cloned) an Oplon Secure Access appliance with a basic configuration. Follow the instructions here up to accessing the dashboard.
- Installing licenses:
- Install the provided licenses by following the directions in this guide.
- Opening ports from the Oplon Secure Access node(s) (orchestrators) to the Browser Isolation nodes:
80893322
Configure Orchestrator Node(s)
If you are upgrading from an installation prior to the release of Browser Isolation, make sure that the rewrite rule SecureAccessRWHeaderRDConnect has the flow set to BOTH.
Unlike the single node architecture, you also need to add or change, in the SecureAccess grouping, the address used for Browser Isolation. To do this:
- if the
/pages/biendpoint is already present in the OSA Virtual Domain, edit it by entering the address of the Browser Isolation node and set SSL totrue.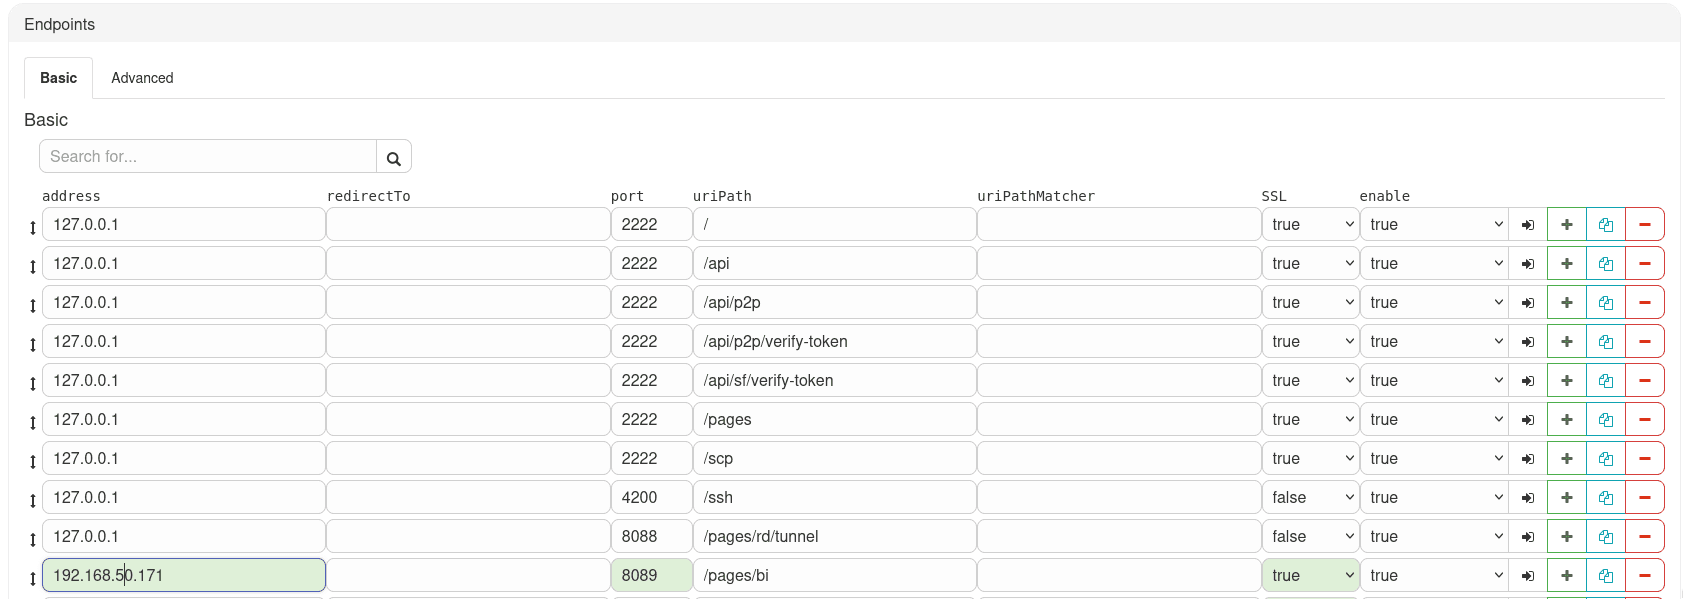
Adding the Browser Isolation Endpoint
Configure Browser Isolation Node(s)
Browser Isolation Container Configuration
To properly configure the Browser Isolation node, you need to reinstall the container by configuring it with the fixed IP address of the dedicated appliance.
The Browser Isolation container must be configured to listen on the appliance IP address (not on 127.0.0.1) to allow connections from the orchestrator node.
Run the following command, replacing <IP_APPLIANCE> with the actual IP of the Browser Isolation node:
cd /share
bash OPLON_INSTALL_CONTAINERS.sh -bi <IP_APPLIANCE>
# Example: bash OPLON_INSTALL_CONTAINERS.sh -bi 192.168.1.100
For more details on available parameters and other advanced container configurations, see the complete documentation.
Follow the installation procedure provided by the script and proceed with the next steps of the guide.
Import and Configure the Listener
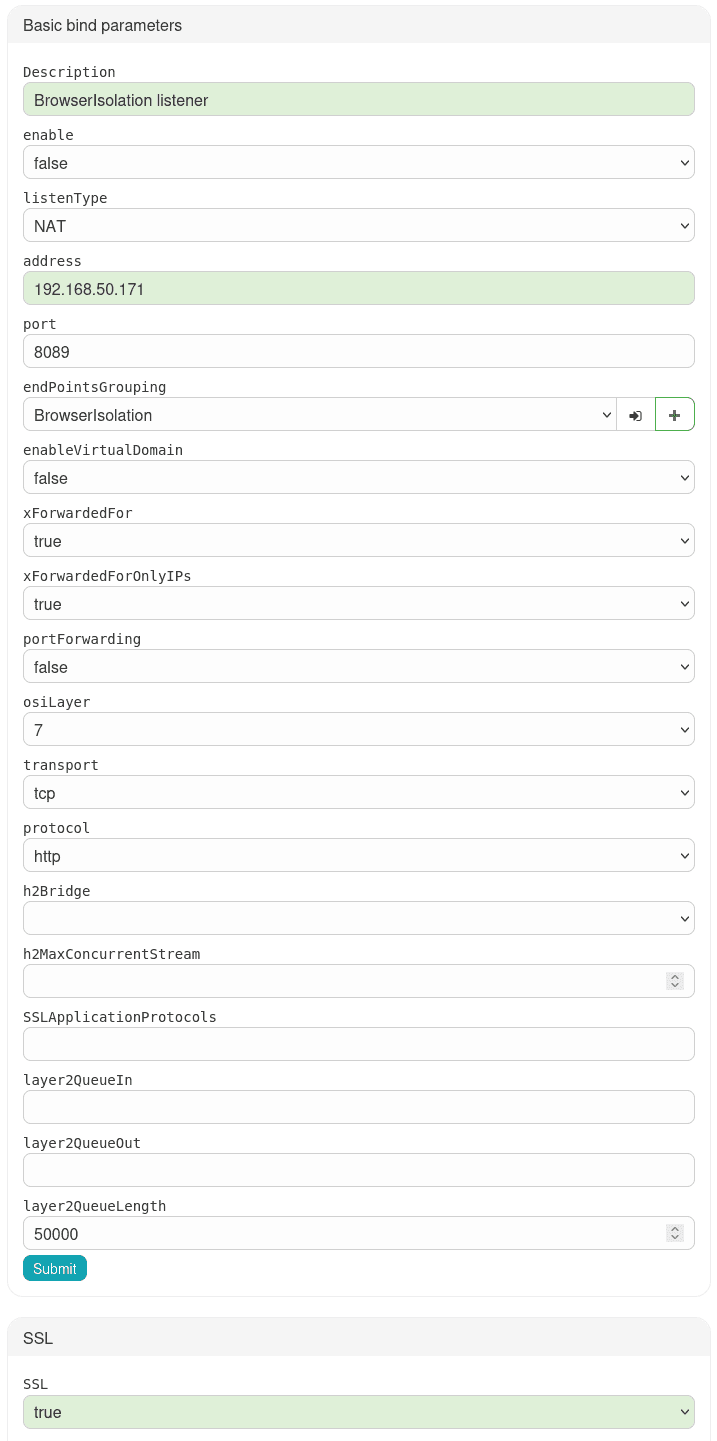
As a first step, import the listener (if not already present) and change the IP address it listens on.
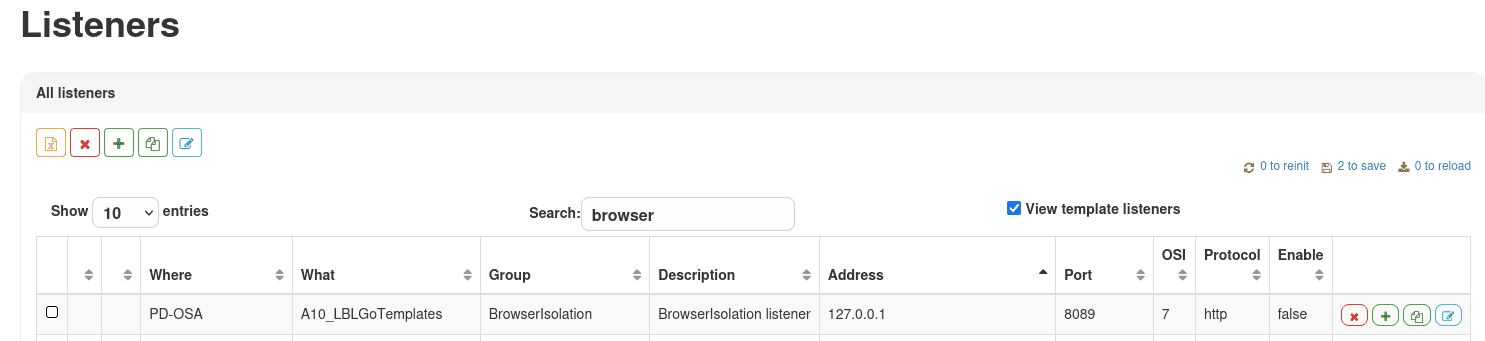
To do this, go to ADC Settings > Listeners, select View template listeners,
search for BrowserIsolation, click the copy button and copy the listener into the module in use (Platform, StandardHA, EnterpriseHA or cluster), as shown here:
Then clear View template listeners and edit the listener, setting the address field to the IP it must listen on and SSL to true:
Import Grouping
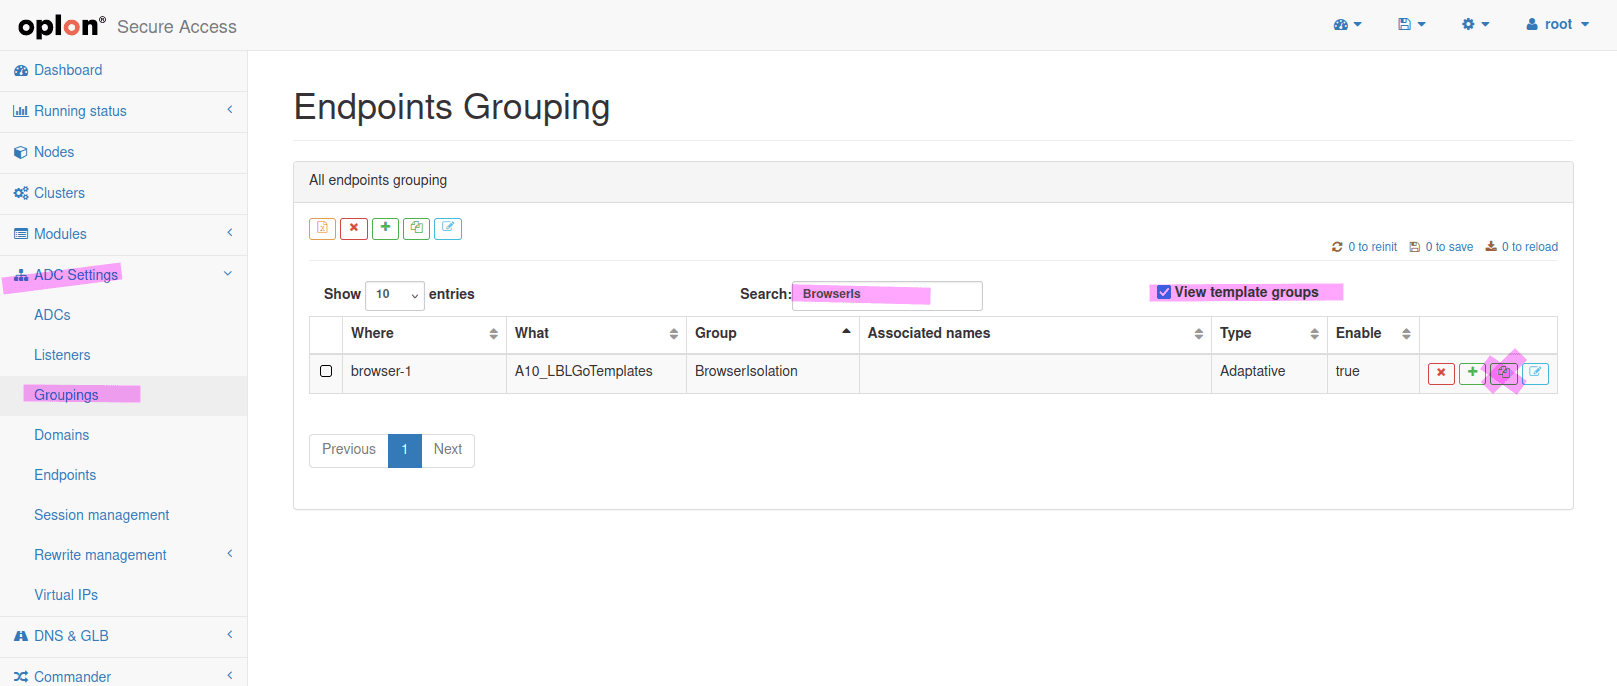
Next, import the grouping, which is essential to map the Browser Isolation backends.
To do this, go to ADC Settings > Groupings, select View template groups, search for BrowserIsolation and copy it with the corresponding button:
Import Rewrite Header rule “SecureAccessRWHeaderBIConnect”
To import the rewrite rule, go to ADC Settings > Rewrite management > Rewrite header rules, select View template rewrite rules as usual,
search for SecureAccessRWHeaderBIConnect and copy it with the corresponding button.
Starting the Modules for Browser Isolation
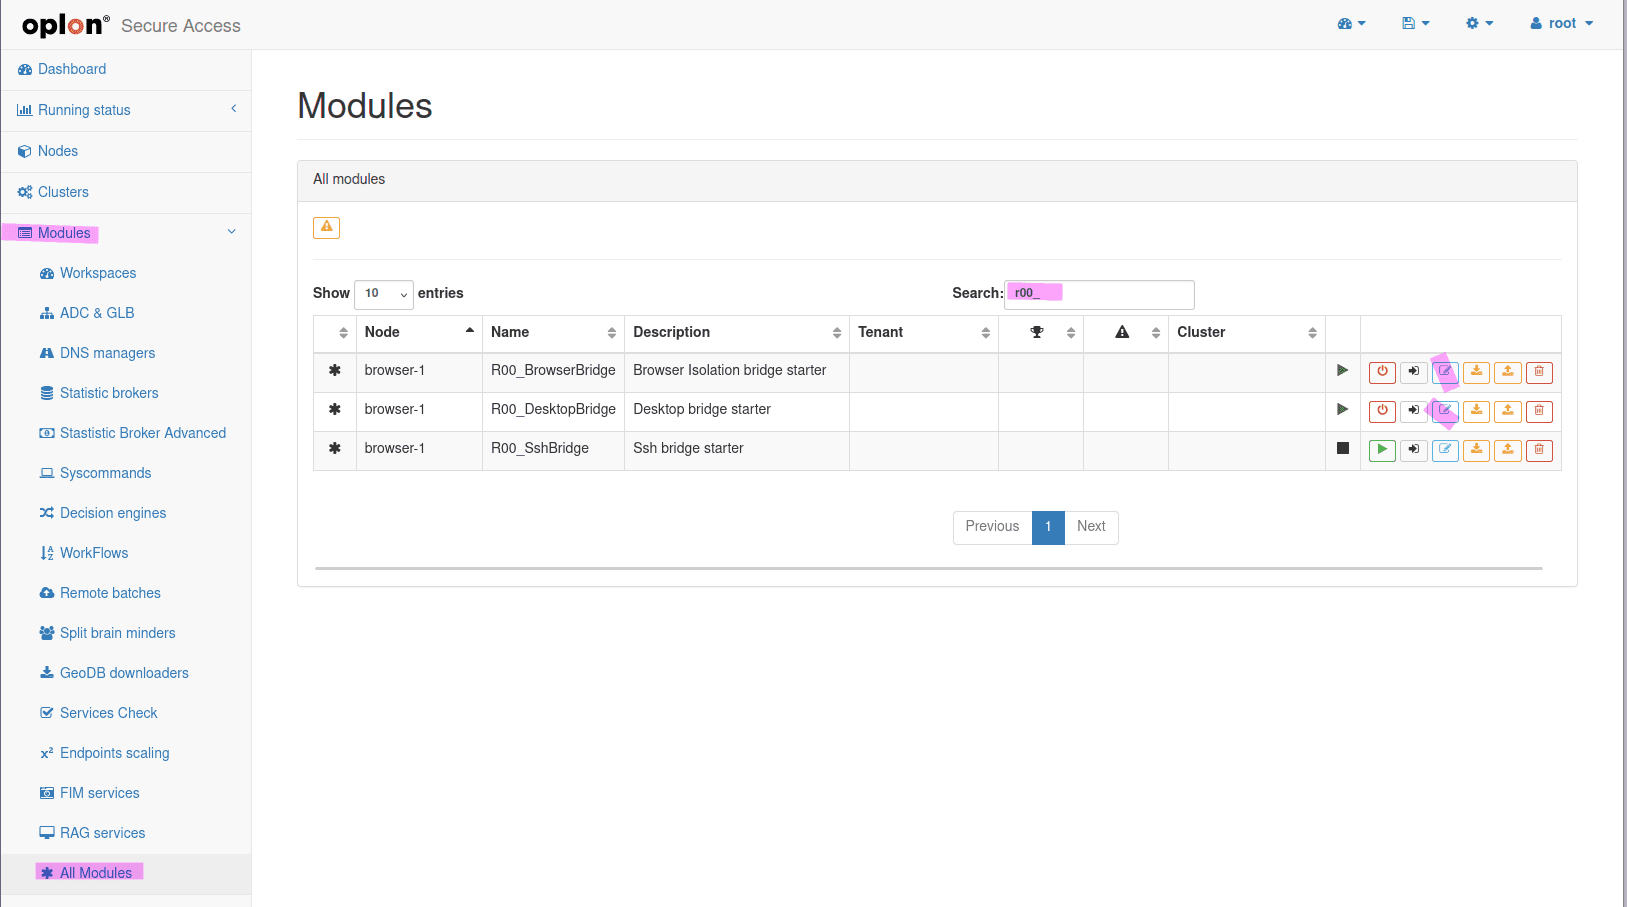
Next, set the following modules/services to start automatically:
- R00_BrowserBridge
- R00_DesktopBridge
To do this, go to Modules > All Modules, search for R00_ and set Module start to automatic for both modules, as follows:
Save and Re-Init
Finally, perform Save and Reinit for all the configurations you just made: