ADC cluster setup
Notes before use
Oplon Virtual Appliance (VAPP from now on) is a data traffic balancing and routing tool working at OSI layer 2-3/4 and OSI layer 7 HTTP/S DNS (ADC).
Oplon ADC is a product intended for mission-critical environments; therefore, only personnel who have attended the course and passed the exam are authorized to certify the cluster installation and to manage the products in production. All certified persons hold a certificate of course attendance and exam completion, issued by OPLON NETWORKS SRL and digitally signed.
Preparation for use
This manual describes how to create a cluster of the Oplon ADC module. The cluster lets you use all the features in high availability through Virtual IPs (VIP). This example covers a setup of two nodes in failover with each other.
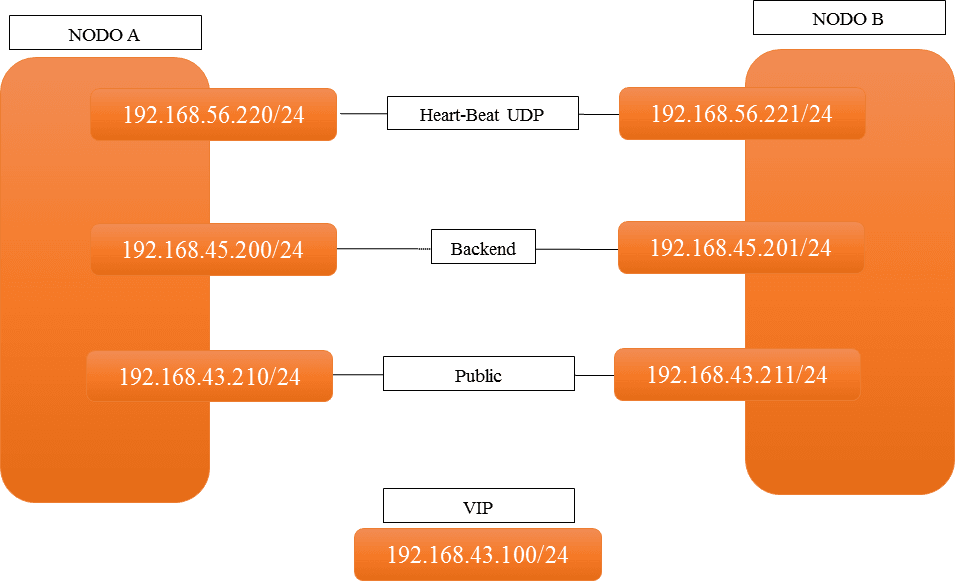
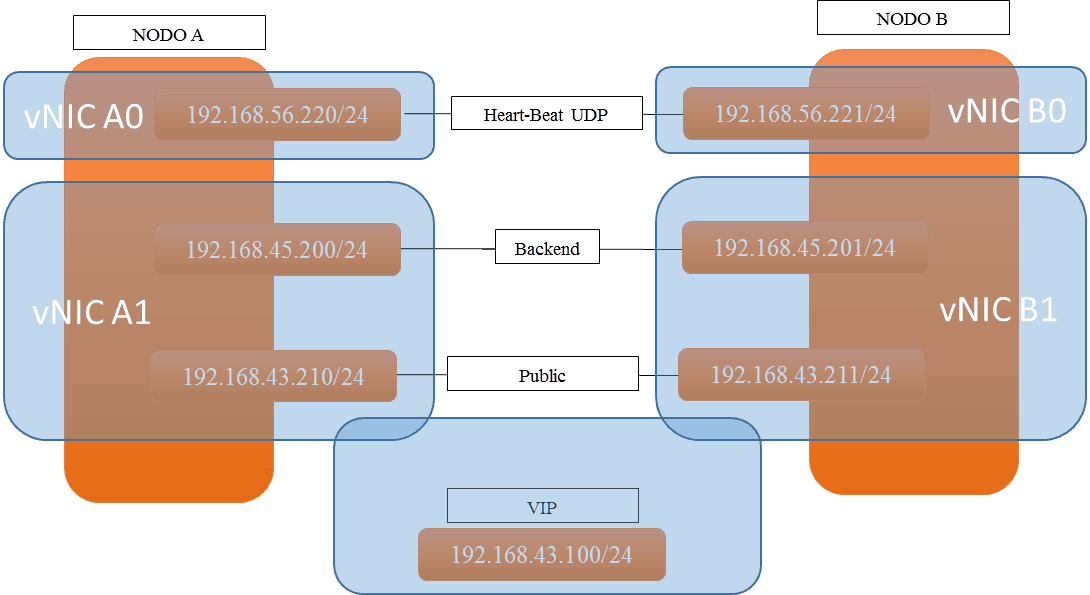
The example uses the following IP addresses and networks to simulate a real-world scenario:
-
Heart-Beat: the network used to check the activity status of the nodes
-
Backend: the network where the services reside; it is usually reachable through the gateway. In some environments it may reside in a separate network/VLAN
-
Public: the network from which service requests come
-
VIP: the address shared between the two nodes
Oplon VAPPs Static Address Settings
After importing the VAPPs into the virtual environment, you must assign the virtual NICs to the two nodes. In this case, 2 vNICs will be assigned to each node:
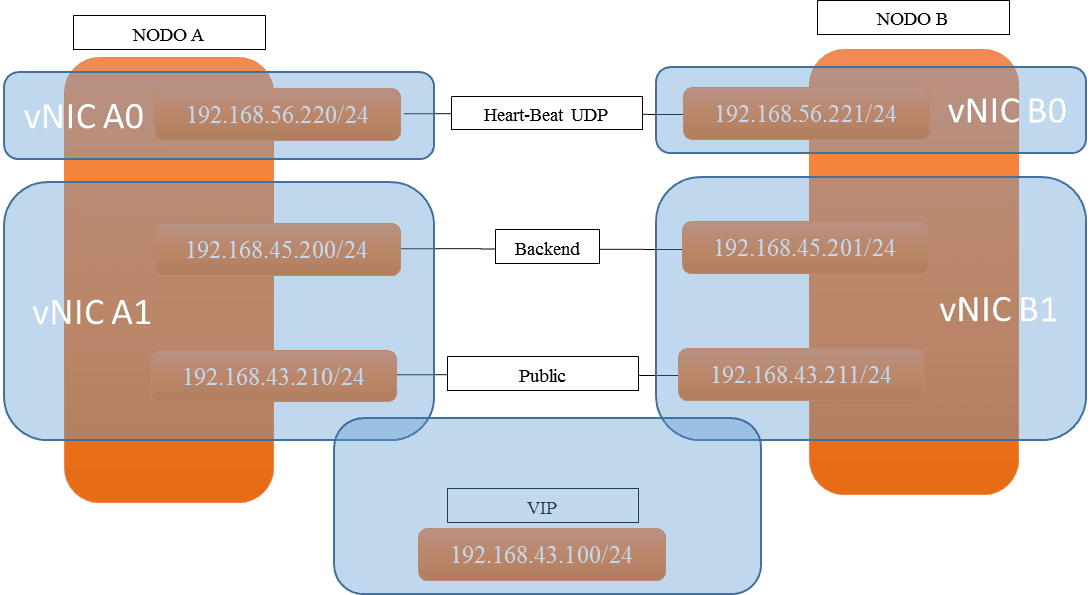
The VIP will be assigned alternately to vNIC A1 and vNIC B1. The node that holds the VIP is called MASTER.
Next, assign static addresses to the NetworkManager-based VAPPs (where NetworkManager is not present, use the standard tools of the distribution). To map the vNICs of the virtual environment to the internal interfaces of the VAPP, it is a good idea to note down the MAC addresses of the individual interfaces: this will make it easier to assign the static addresses.
On NetworkManager-based systems, the static addresses are assigned through
the nmtui interface, while the dynamic address (VIP) is assigned
directly by Oplon ADC.
Below are the steps to set up the static addresses of one VAPP; when you are done, repeat the same steps on the other VAPP:
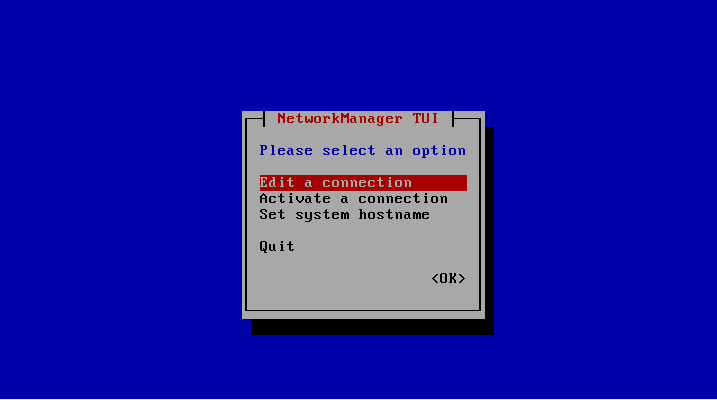
Use the arrow keys to move to the first item.
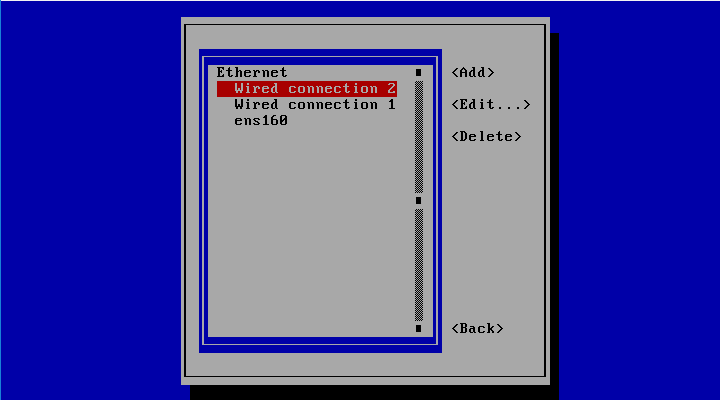
Check the MAC address and match it to its function (Public, Heart-Beat, etc.). We recommend changing the interface description so that you can quickly identify it later. Move the cursor to Automatic and change it to Manual:
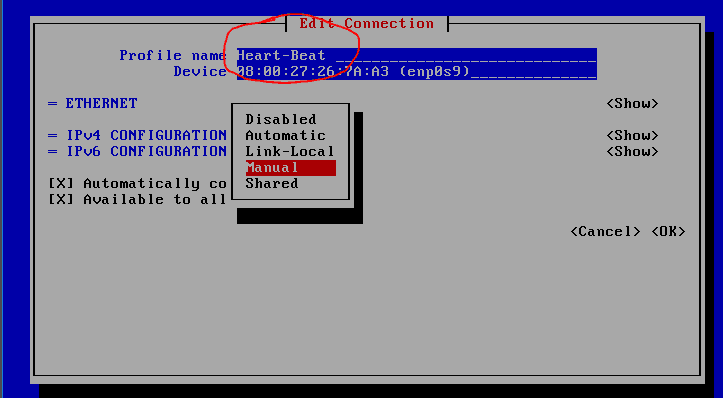
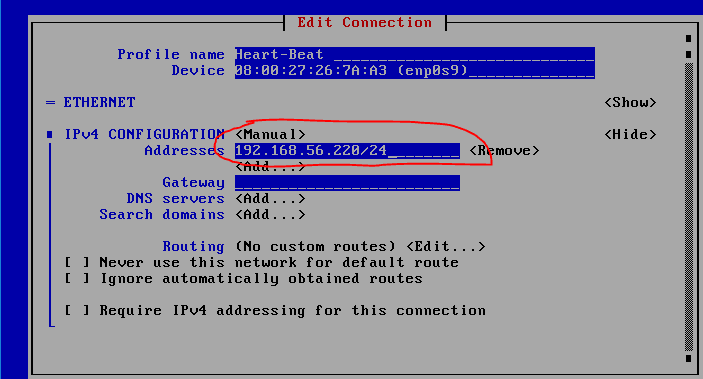
Move the cursor to Show: the fields for setting the interface addresses manually are displayed. Use Add to enter the address of the interface, in this case the address designated for the Heart-Beat (NB: remember to also specify the netmask as /XX at the end of the address):
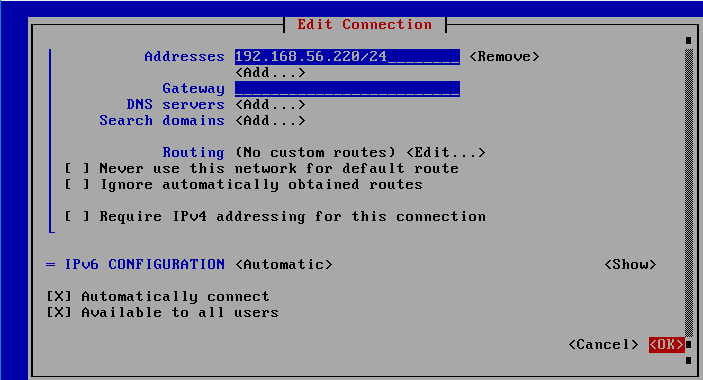
When you finish typing the address, use the arrow keys to move to OK and then confirm with the ENTER key.
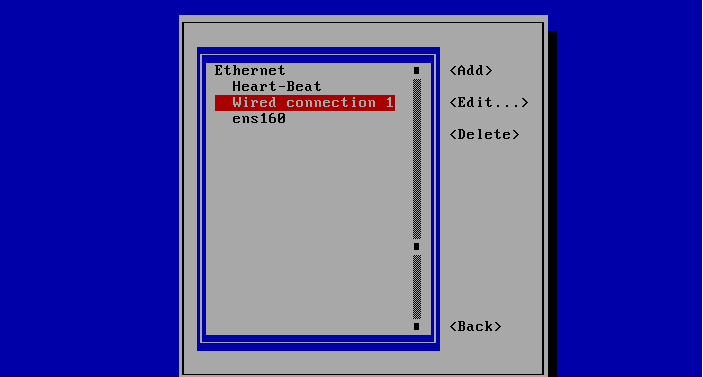
You are taken back to the list of interfaces to configure: use the arrow keys to move to the second interface…
In this case too, change the description of the interface according to its function, identifying it through the MAC address. Then go to the address type selection, Automatic, and change it to Manual, as shown below:
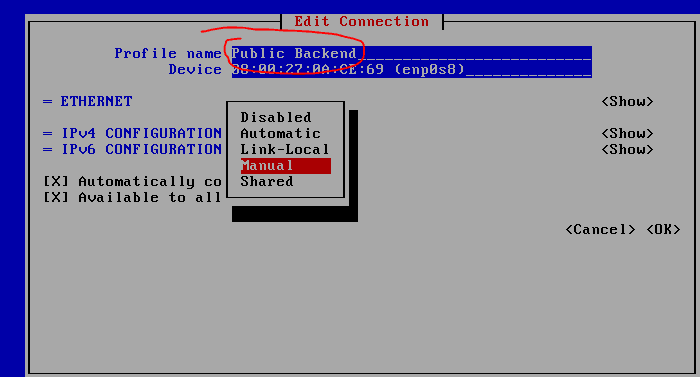
Add the address or addresses related to the function of the interface, which in this case are the public one and the backend one (NB: usually the backend is not addressed directly on the interface, but is reached through a gateway: in this case, adapt the setup to your specific operating environment by adding the Gateway).
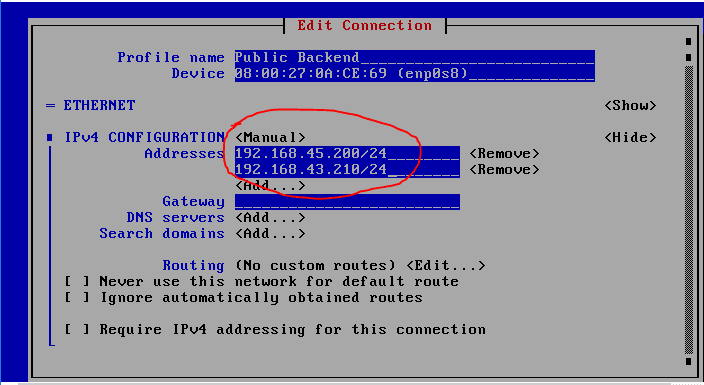
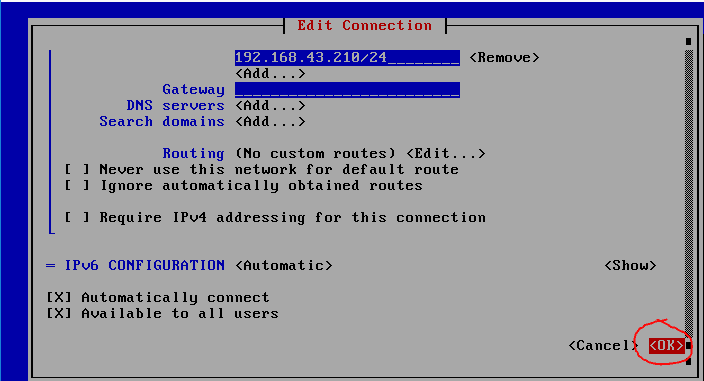
Use the arrow keys to move to OK to confirm the setup and then press ENTER.
After confirmation, the result will be similar to this:
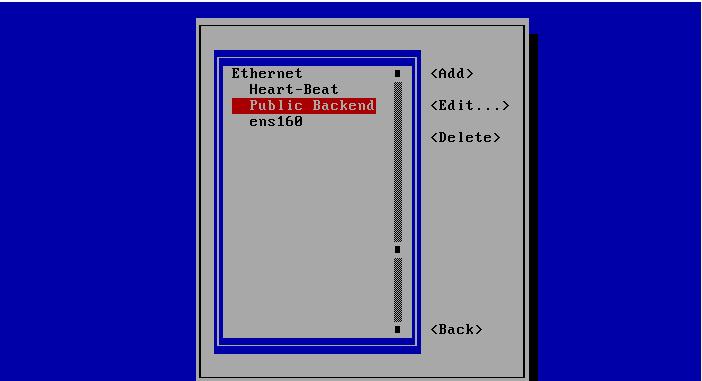
Use the arrow keys to move to Back and confirm with the ENTER key.
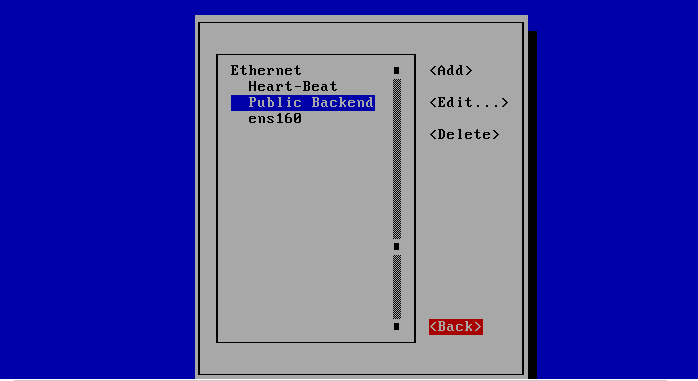
At this point, activate the interfaces with the new addresses (NB: if you are performing this operation over SSH, using the initial DHCP dynamic addresses on the same interfaces to which the new addresses will be assigned, you will be disconnected during the assignment).
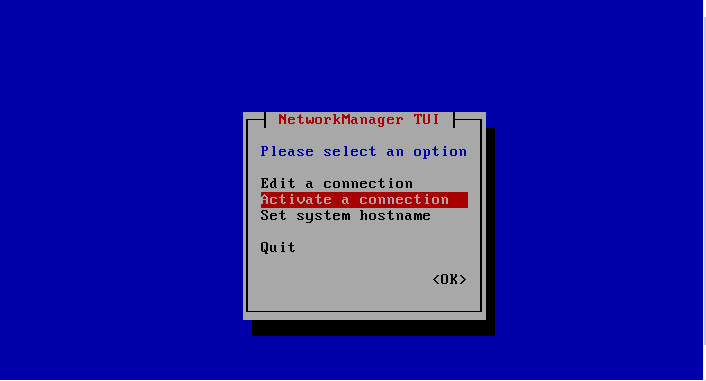
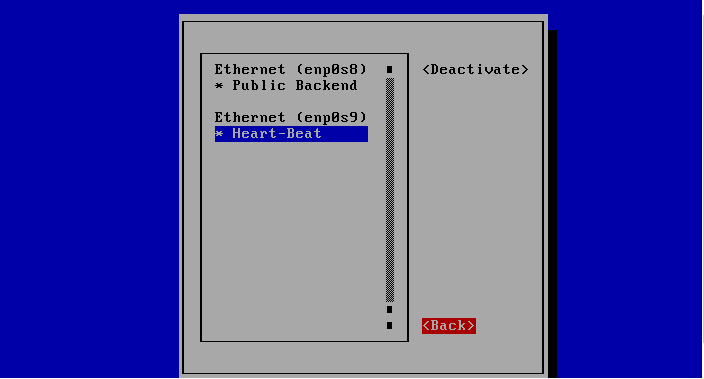
To activate the new addresses, you must first deactivate the previous
assignments and then activate the new ones. The * symbol indicates that
the interface is active. Press ENTER to deactivate the selected interface
and press ENTER again to reactivate it.
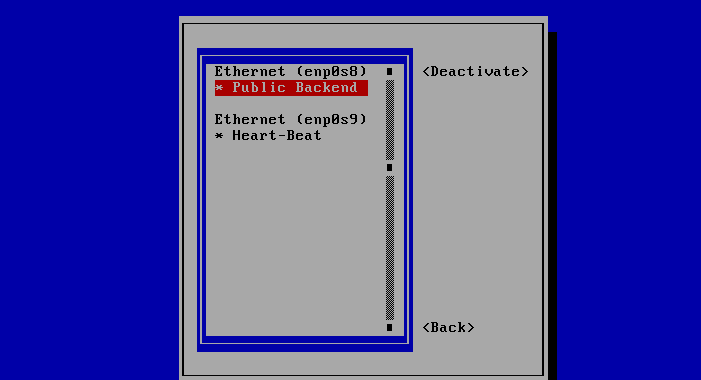
In this case, both interfaces were first deactivated and then reactivated with the ENTER key and the arrow keys…
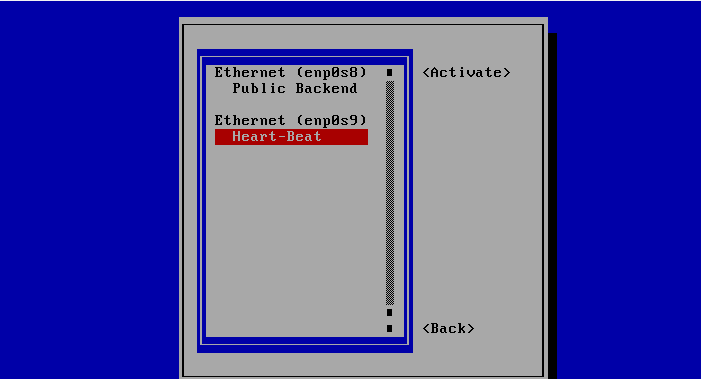
Once the interfaces are reactivated, the * symbol appears again on the
left.
Use the arrow keys to move to Back and then confirm with ENTER.
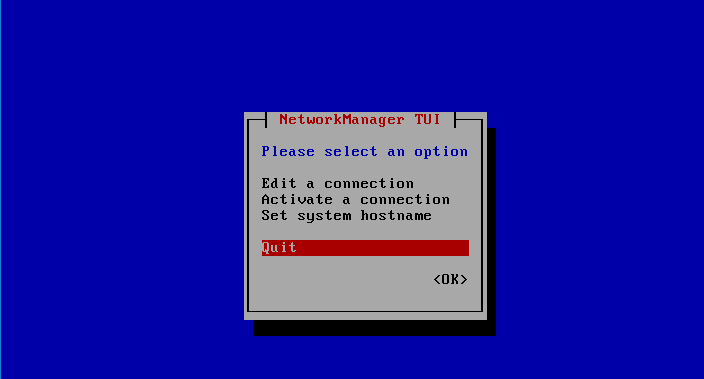
Use the arrow keys to move to Quit and then confirm with ENTER.
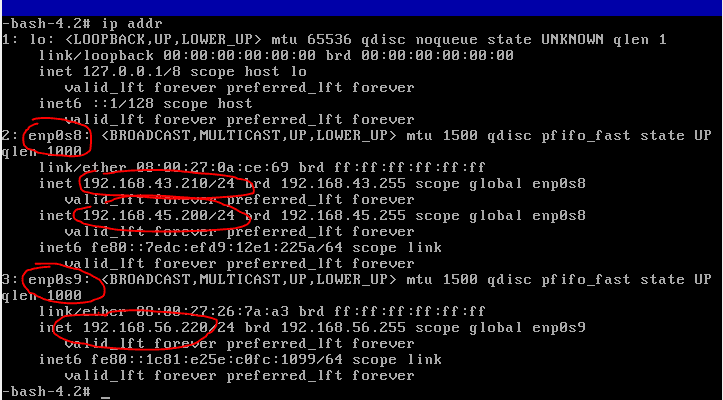
To verify that the addresses were set correctly, run the # ip addr
command.

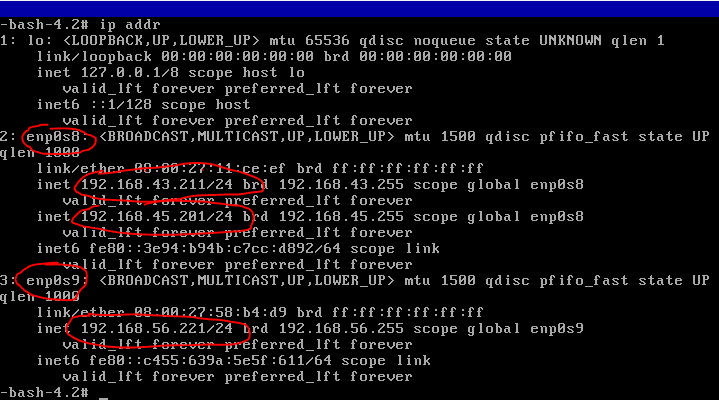
If the setup was successful, the interfaces must show the static addresses that match the initial network schema. For convenience, note down the interface names.
NODE A:
Repeat the same steps on the other VAPP: the end result should be similar to the following and, in any case, in line with your network addressing scheme.
NODE B:
Oplon VAPP Management Addresses Setting
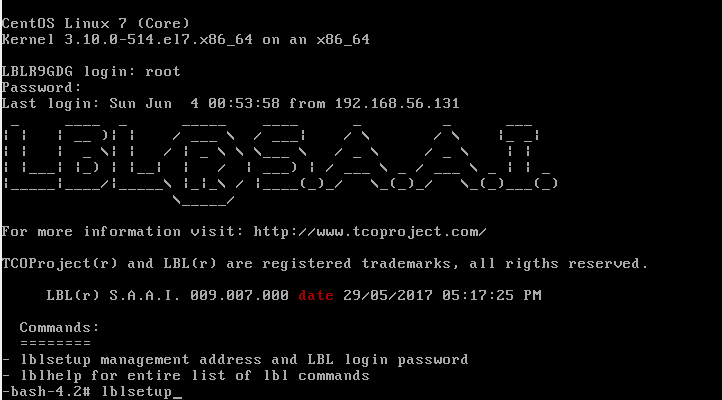
From the command line of the NODE A VAPP, run # oplonsetup.
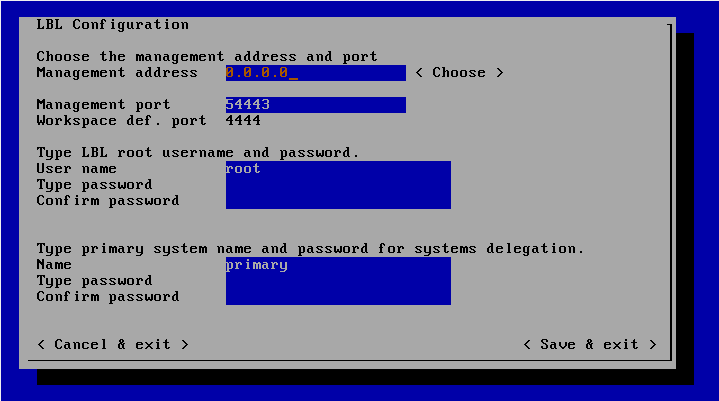
Move to Choose and press ENTER to choose the management address; in this case, the 192.168.45.xx network is set as the management network…
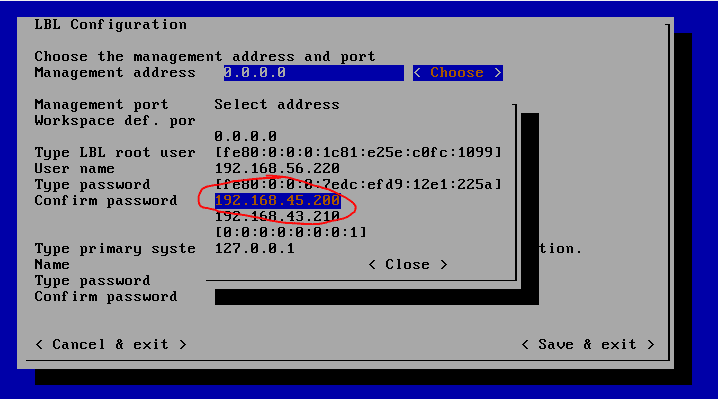
Then move to the password of the root user to set the password. This
example uses the password AdminAdmin1!. NB: for security reasons, do
not set AdminAdmin1! in production.
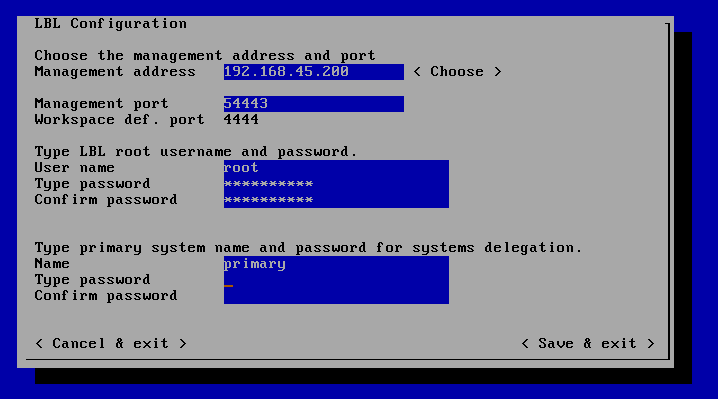
Setting the delegation passwords lets you use the VAPPs in hybrid environments, allowing administrative hierarchies. This feature lets you assign groups of VAPPs in complete self-management while maintaining overall control of the infrastructure. For details, see the “Autonomous Delegated Authentication” manual.
After you set the administrative and delegation usernames and passwords, go to Save & exit to save the settings.
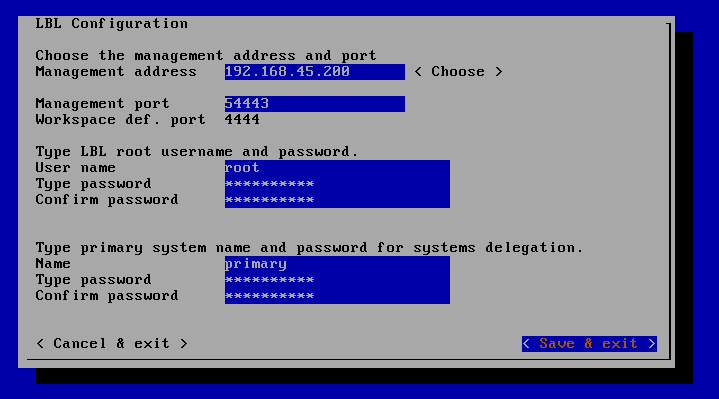
To apply the settings, you must restart the services with the
# oplonrestart command.
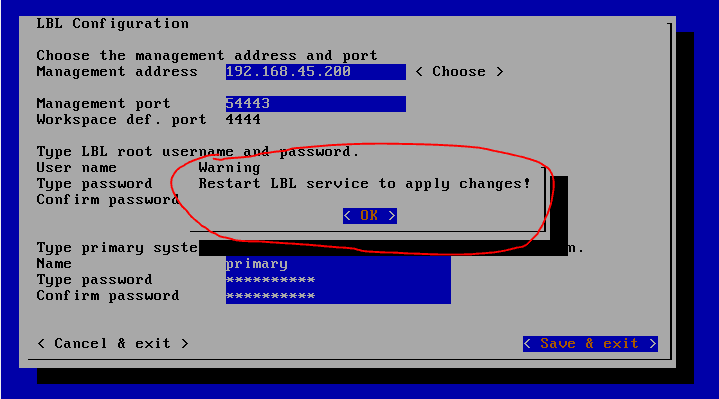
Running the # oplonrestart command:

The command takes about 1 minute, after which the VAPP will be configured with the management addresses on which the web services and the Management Console will respond.
You can verify that the management listeners actually match with the commands:
# ss -ln|grep 4444
and
# ss -ln|grep 54443

N.B.: do the same on the NODE B VAPP; the result should be similar to that of the previous command.

Set hostname on Oplon VAPP powered by CentOS
Run as root:
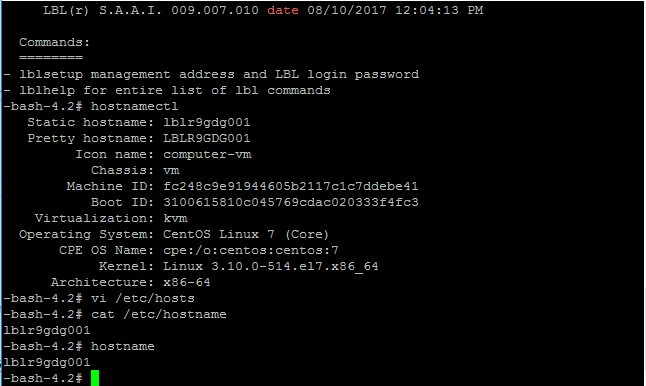
# hostnamectl set-hostname OPLON10GDG001
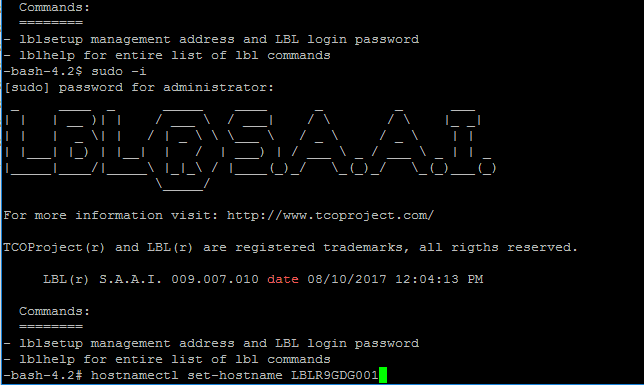
# hostnamectl
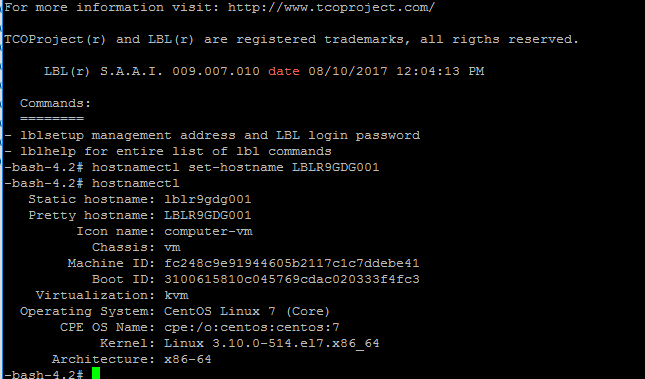
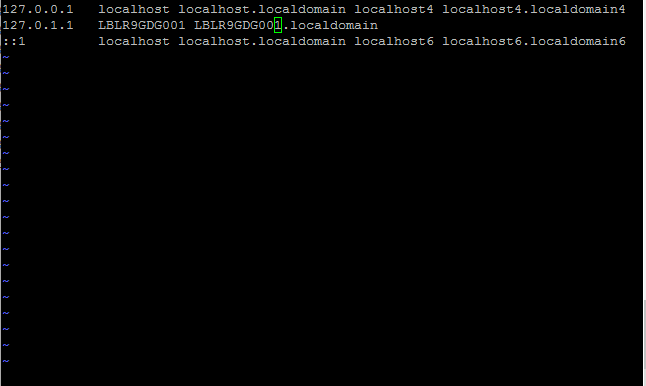
# vi /etc/hosts
Change the name associated with the address 127.0.1.1 to the new VAPP name.
# hostname
# reboot
You must reboot so that applications and services also run with the new name.
Set hostname on Oplon GDG powered by Ubuntu
Run as root:
# hostnamectl set-hostname OPLON10GDG001
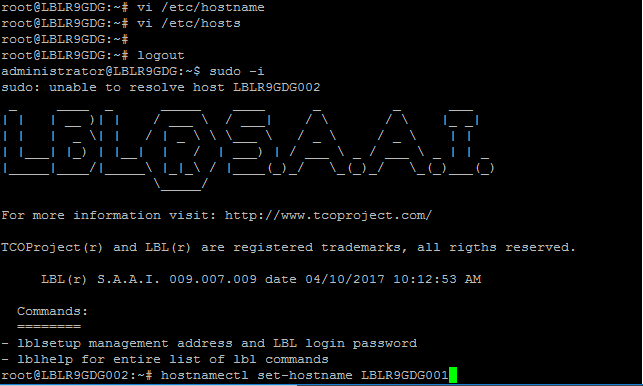
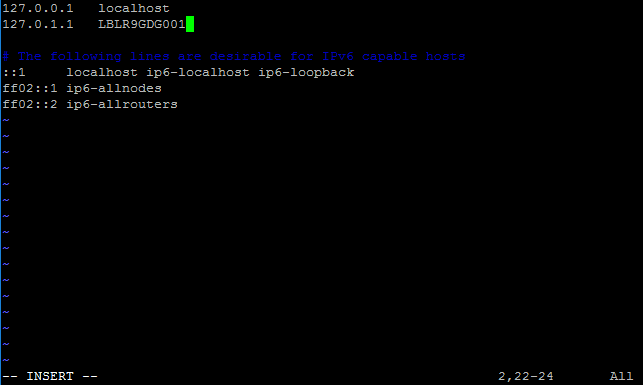
# vi /etc/hosts
Change the name associated with the address 127.0.1.1 to the new VAPP name.
# hostname
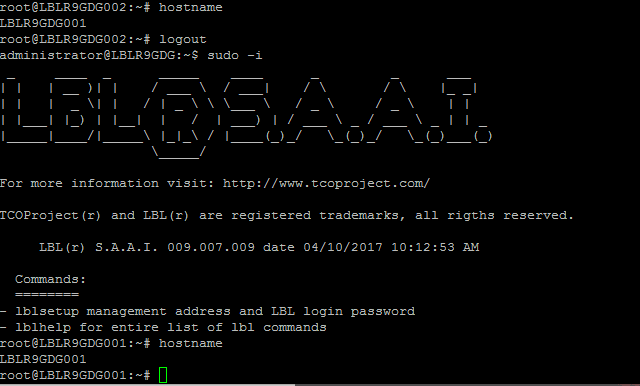
# reboot
You must reboot so that applications and services also run with the new name.
Disabling Oplon Platform Demo/Test Services
Before proceeding with the cluster setup, you must set the licenses on both nodes and disable the unnecessary modules that start automatically to provide a ready-to-use platform for demo/test/prototype purposes. To do this, turn off the Oplon Platform modules on both nodes and then enter the licenses required for the cluster to operate.
To disable the Oplon Platform module, simply type in a browser:
https://192.168.45.200:4444/
(NB: the service has a self-signed digital certificate, so you will need to tell the browser to proceed. You can still install a new digital certificate that identifies the service.)
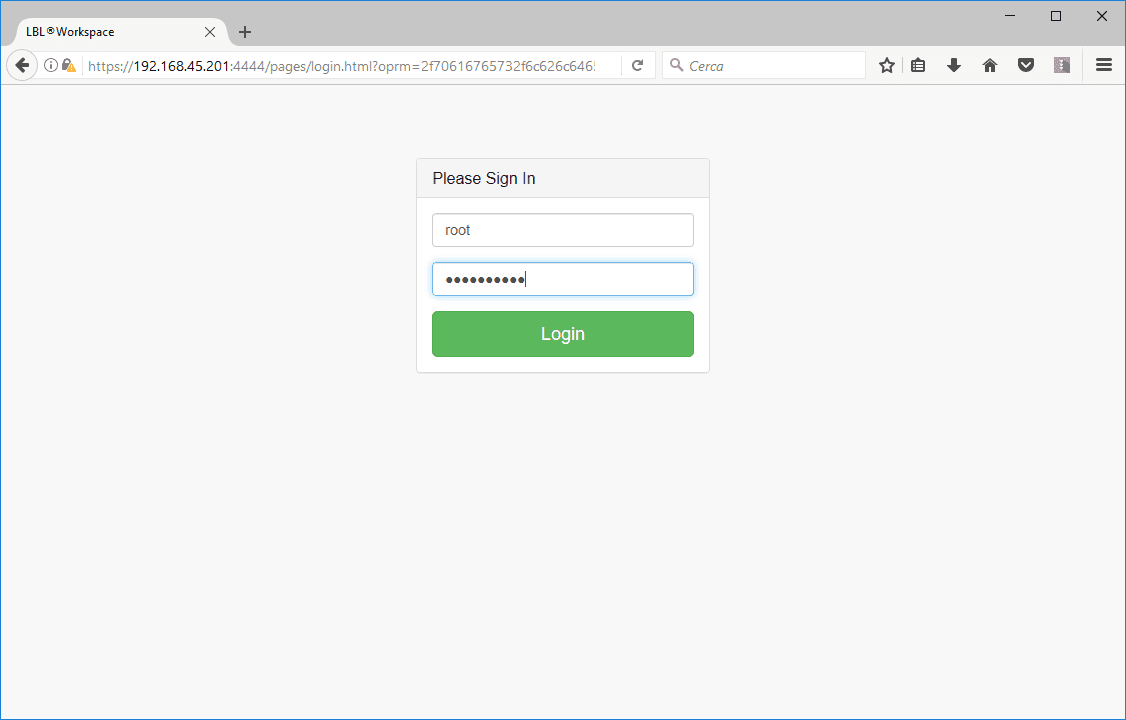
When prompted for username and password, enter the ones set initially in
the console, in this case: username root, password AdminAdmin1!.
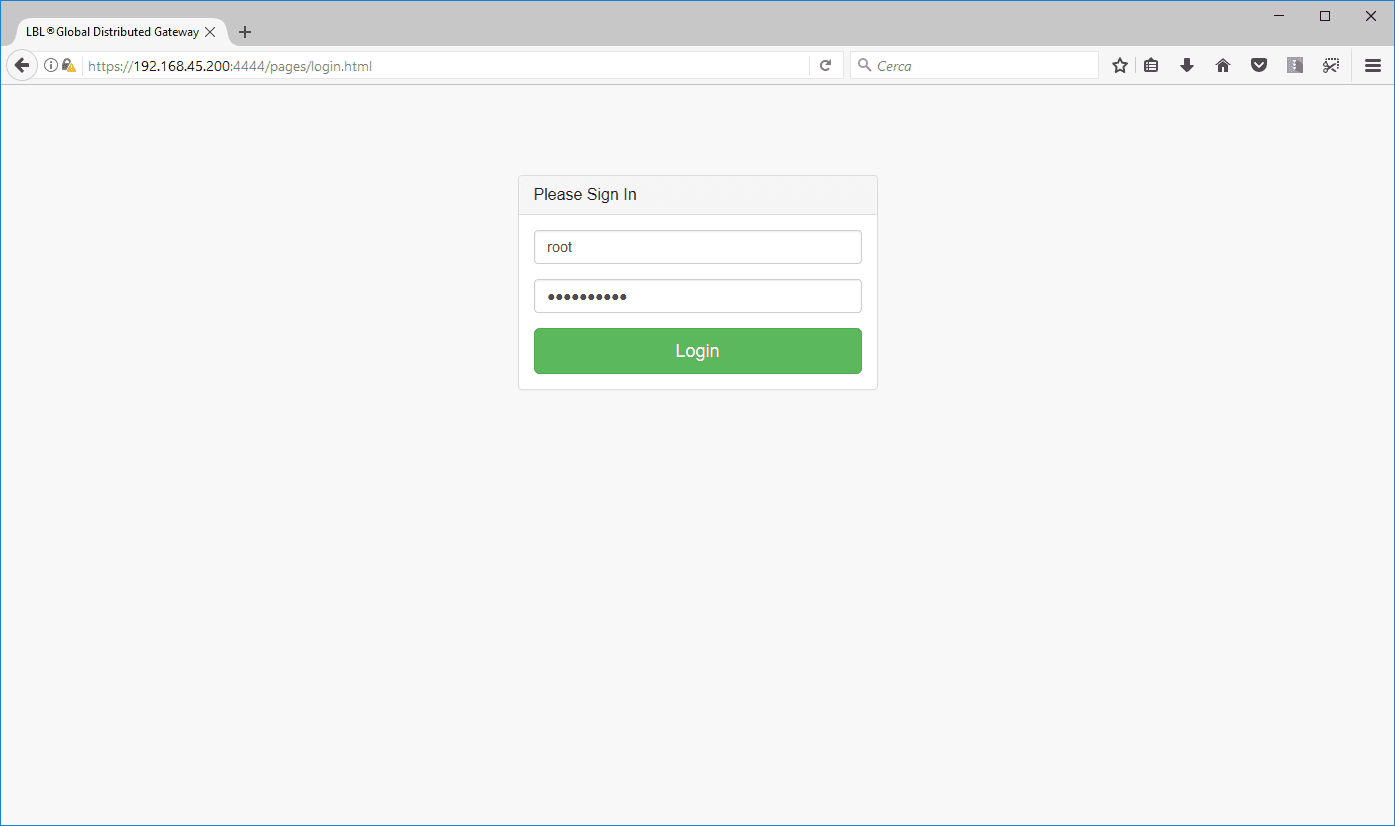
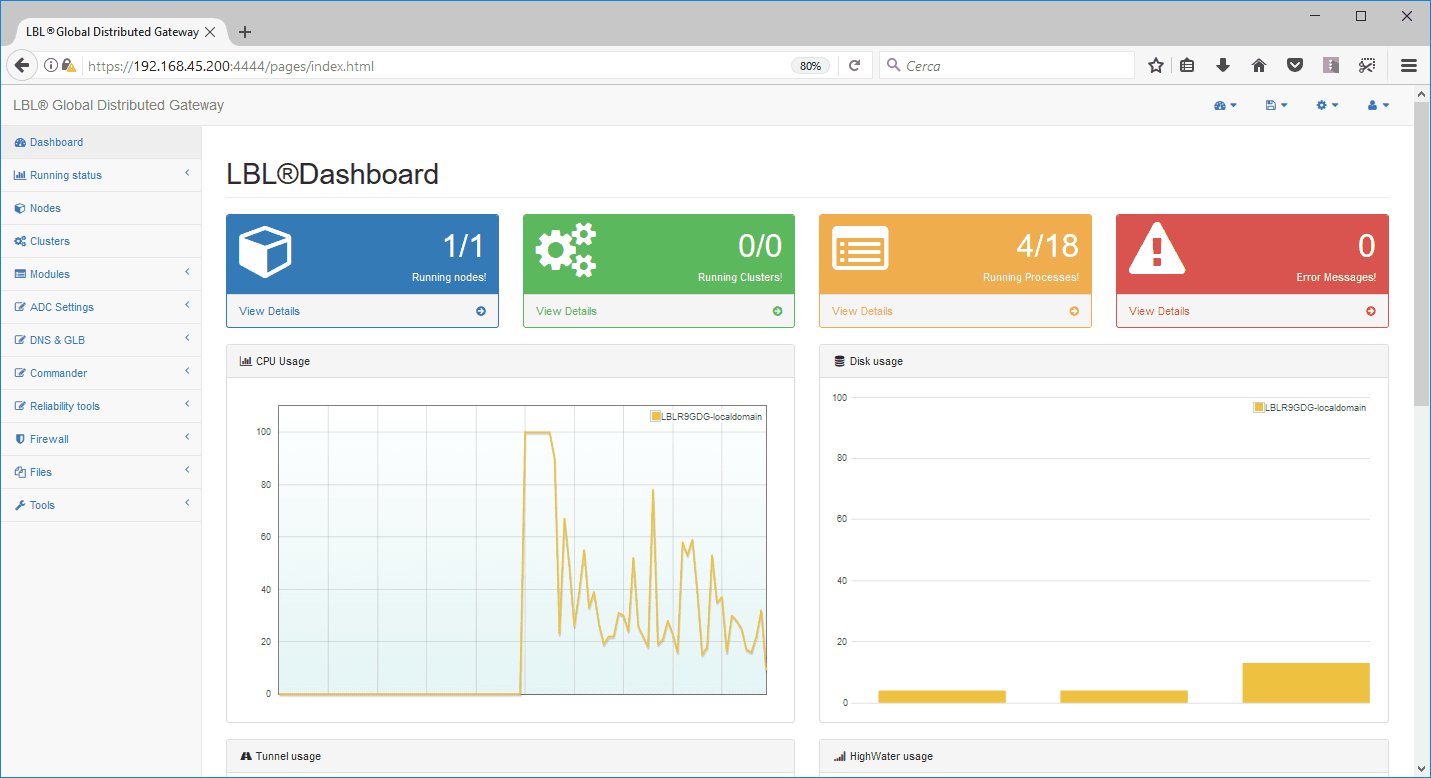
Once you have logged in, the Global Distributed Gateway global control console appears: from here you will disable the demo/test modules and then set up the licenses, before setting up the cluster.
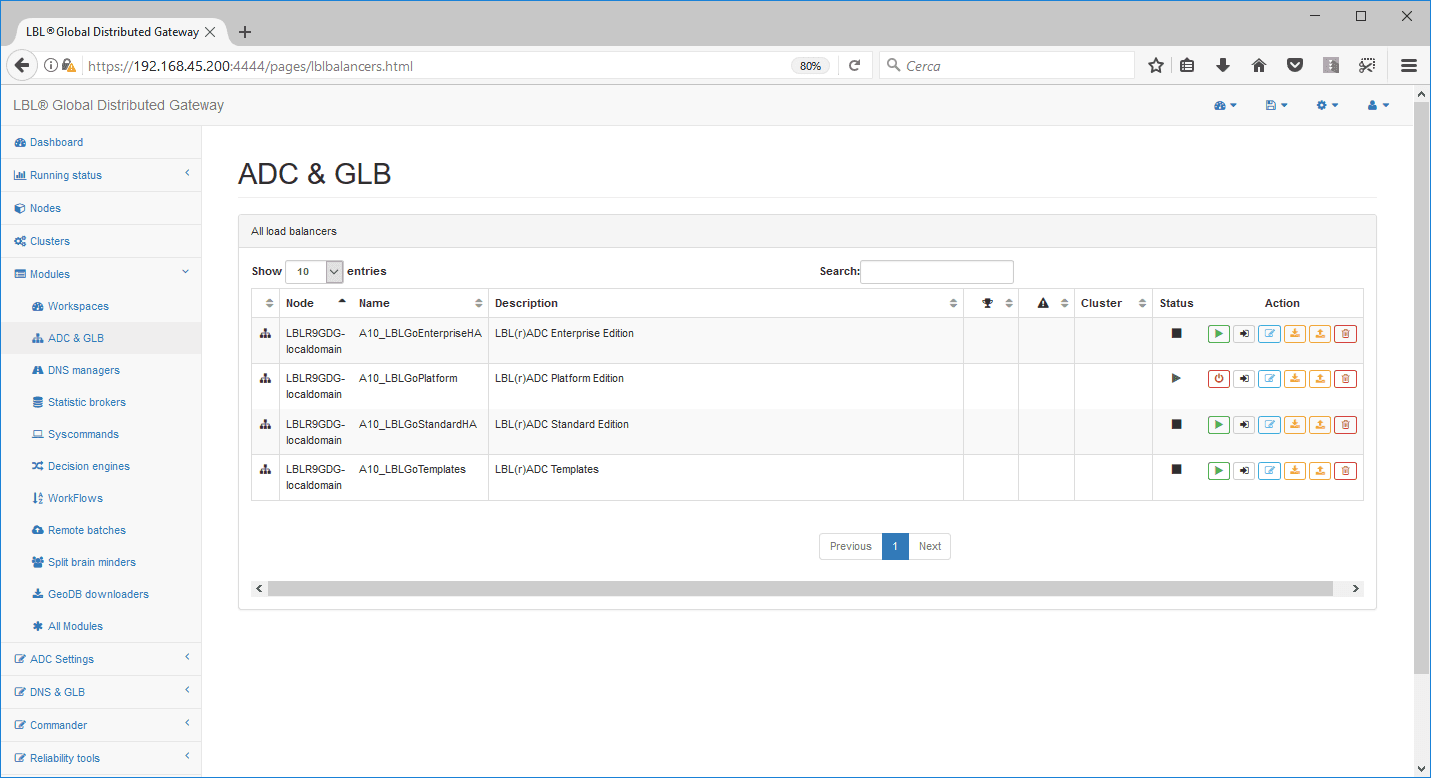
To disable the Oplon Platform module, expand the Modules menu, select ADC & GLB and then click Edit:
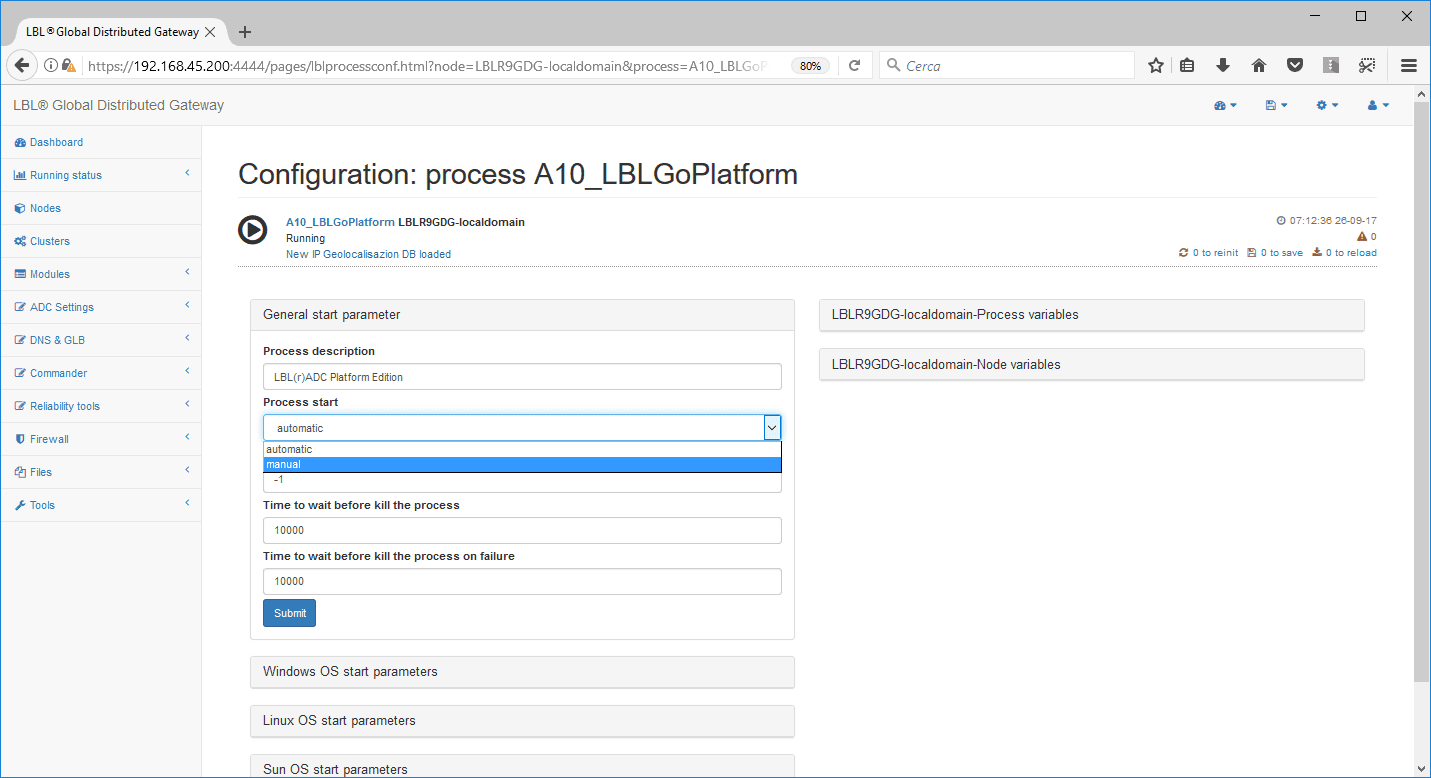
Expand the General start parameters panel and change the Process start parameter from automatic to manual.
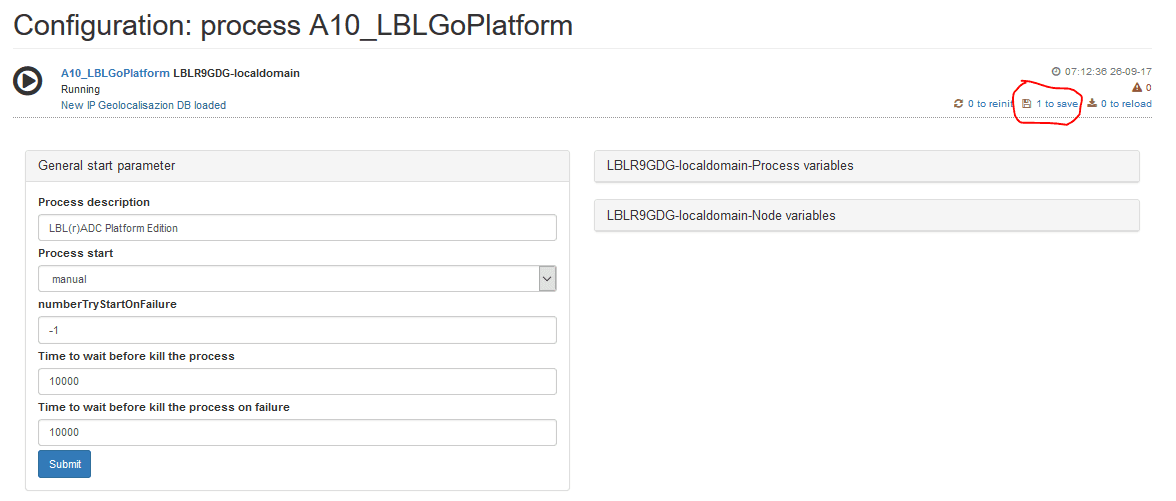
Once the parameter is changed, the 1 to save indicator appears at the top right to save the configuration.
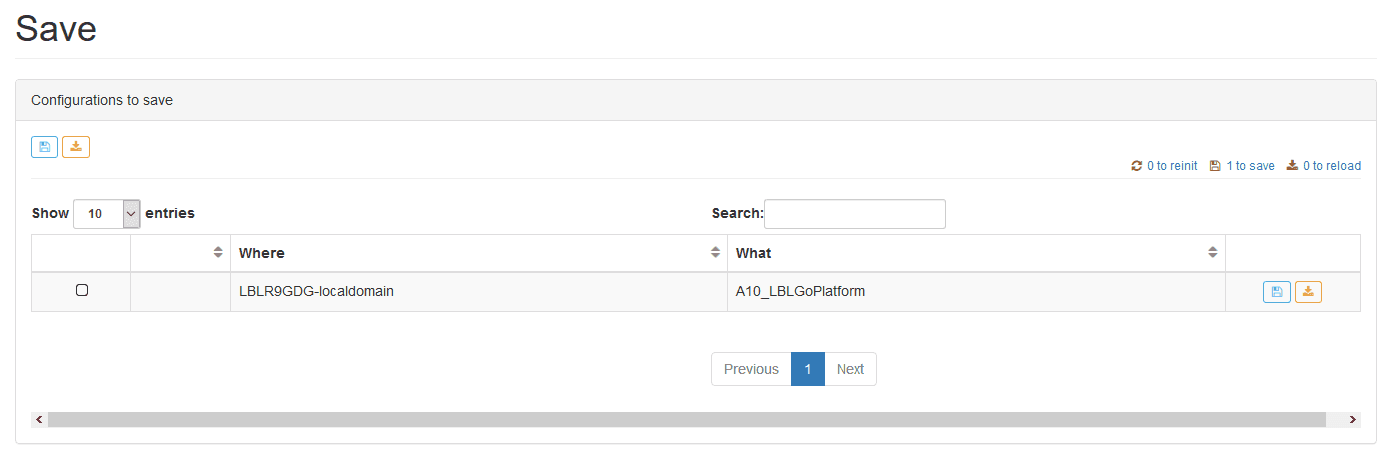
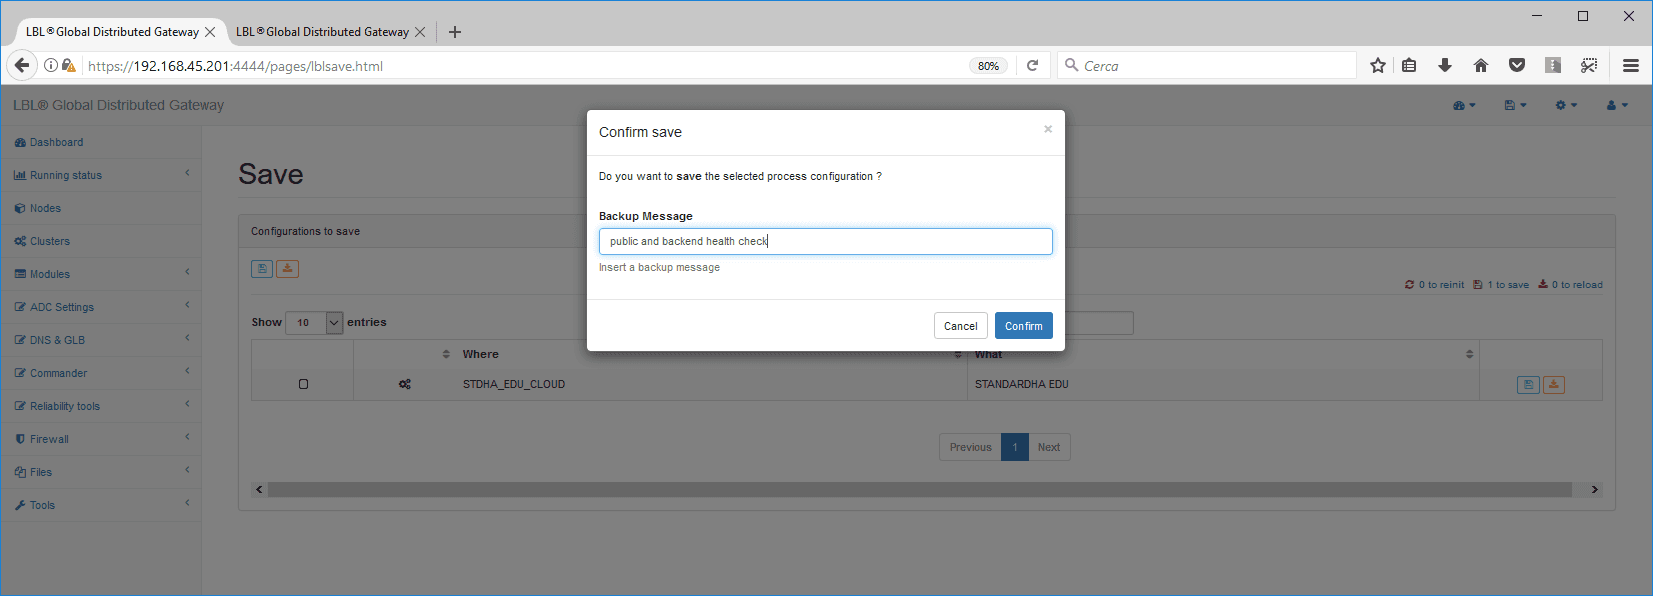
Follow the 1 to save link to apply the changes. To do this, click the Save button. (NB: in this case, the change is applied immediately and shuts down the Oplon Platform module)
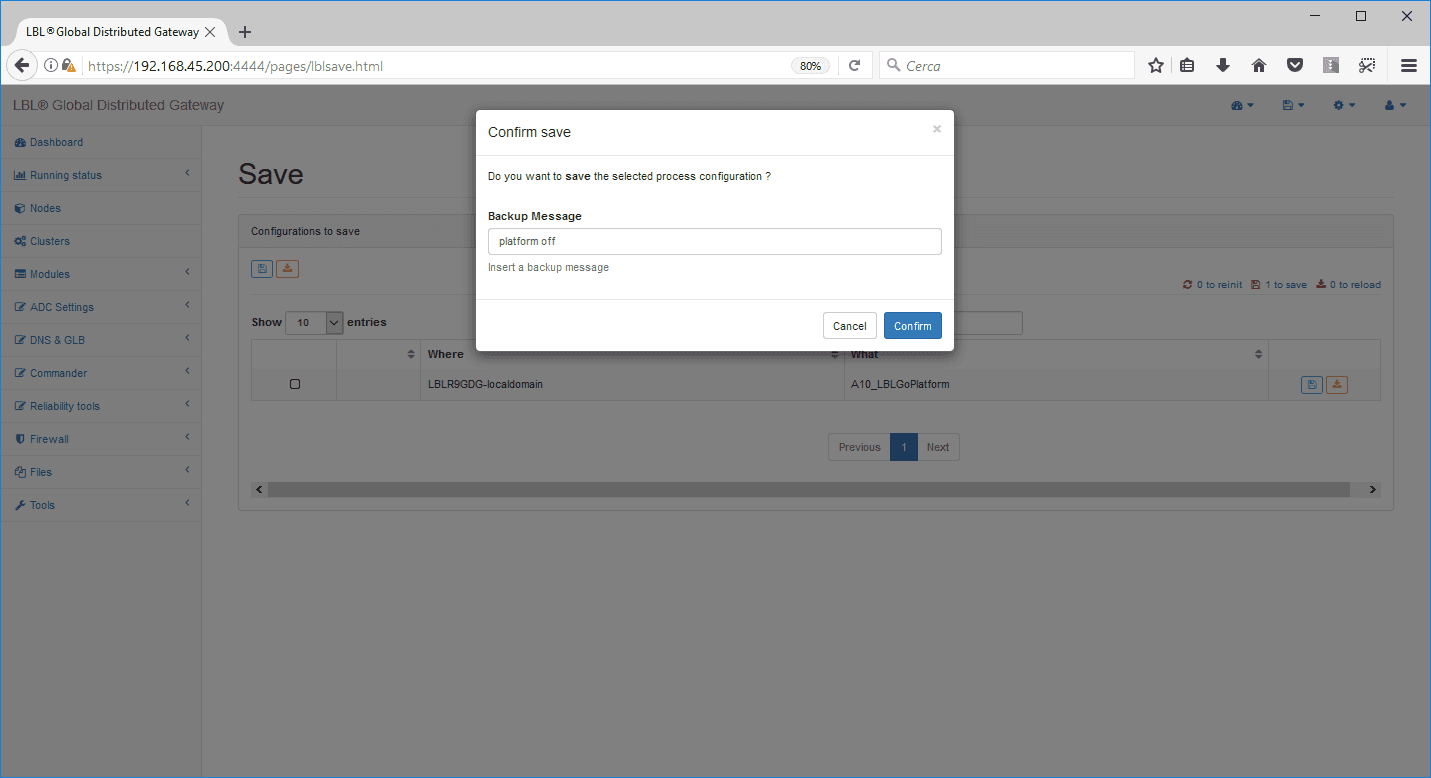
As soon as you click the Save button, you can describe the operation, because all changes are “recorded” both to perform rollbacks and for “audit” procedures.
If you go back to Modules > ADC & GLB, you will notice a rotating gear symbol…
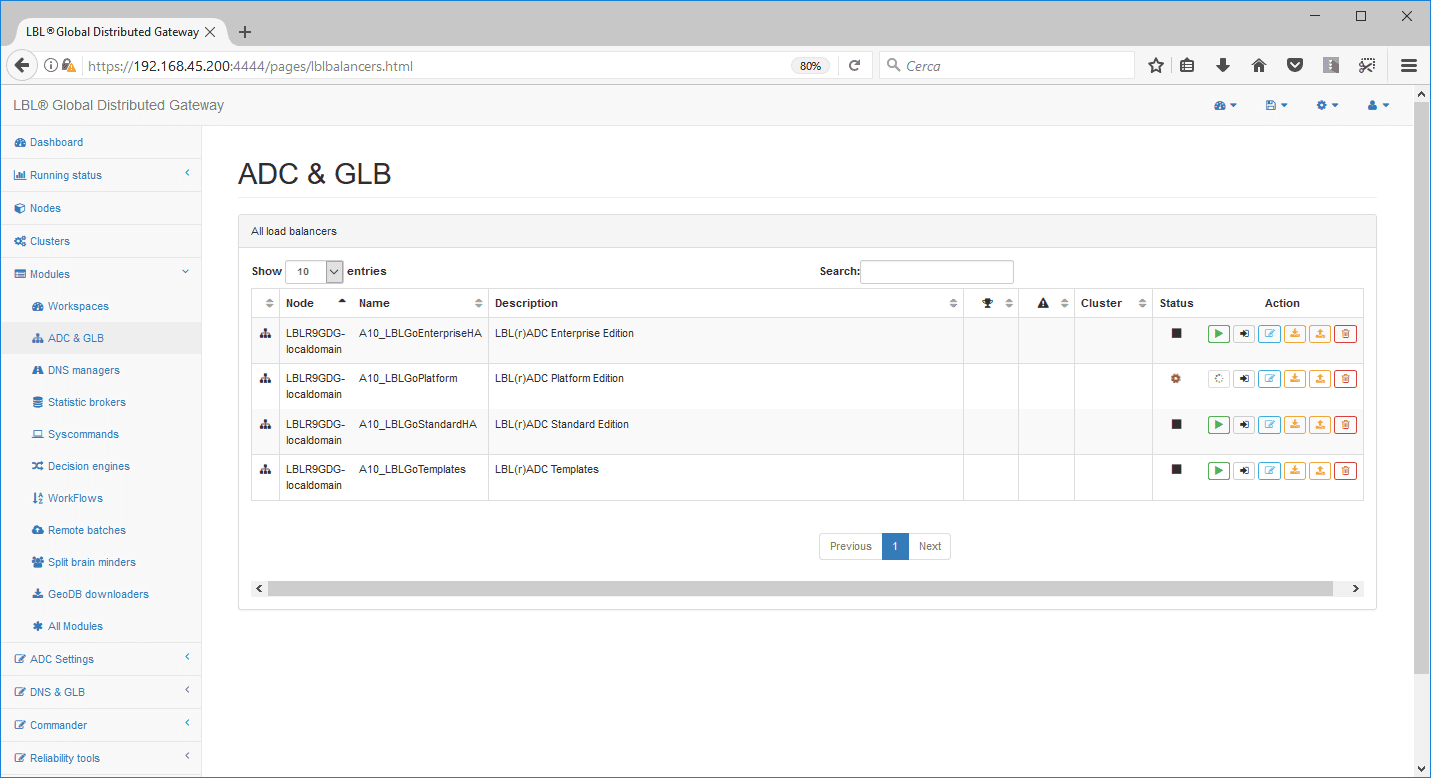
…until the module is completely shut down.
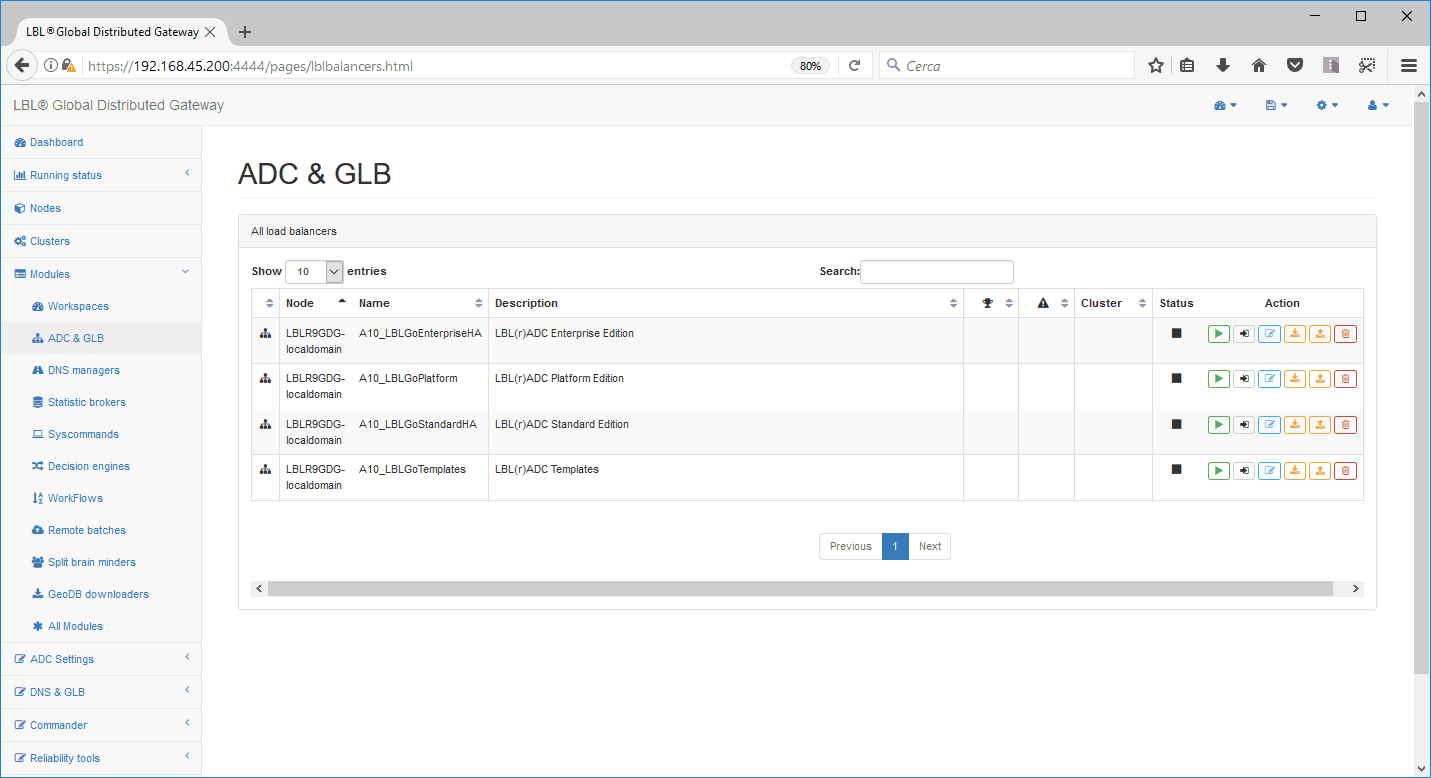
NB: do the same on NODE B.
Setting up licenses
To install the licenses that activate the modules, proceed as follows:
-
Get the licenses
-
Install the licenses
Once you have obtained the licenses, you can install them according to their function. First, install the “Catalog” license, which is used to populate the local and/or global inventory, depending on the license. In this case you need the Catalog licenses, for global control, and the Standard HA licenses, which can also include the DoS/DDoS Attack Prevention & Mitigation extension, as shown below. The licenses must be stored in a directory on your system.
Example:
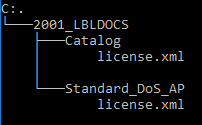
In the web interface, select Nodes and then click Actions, from which you can access the Install license menu item:
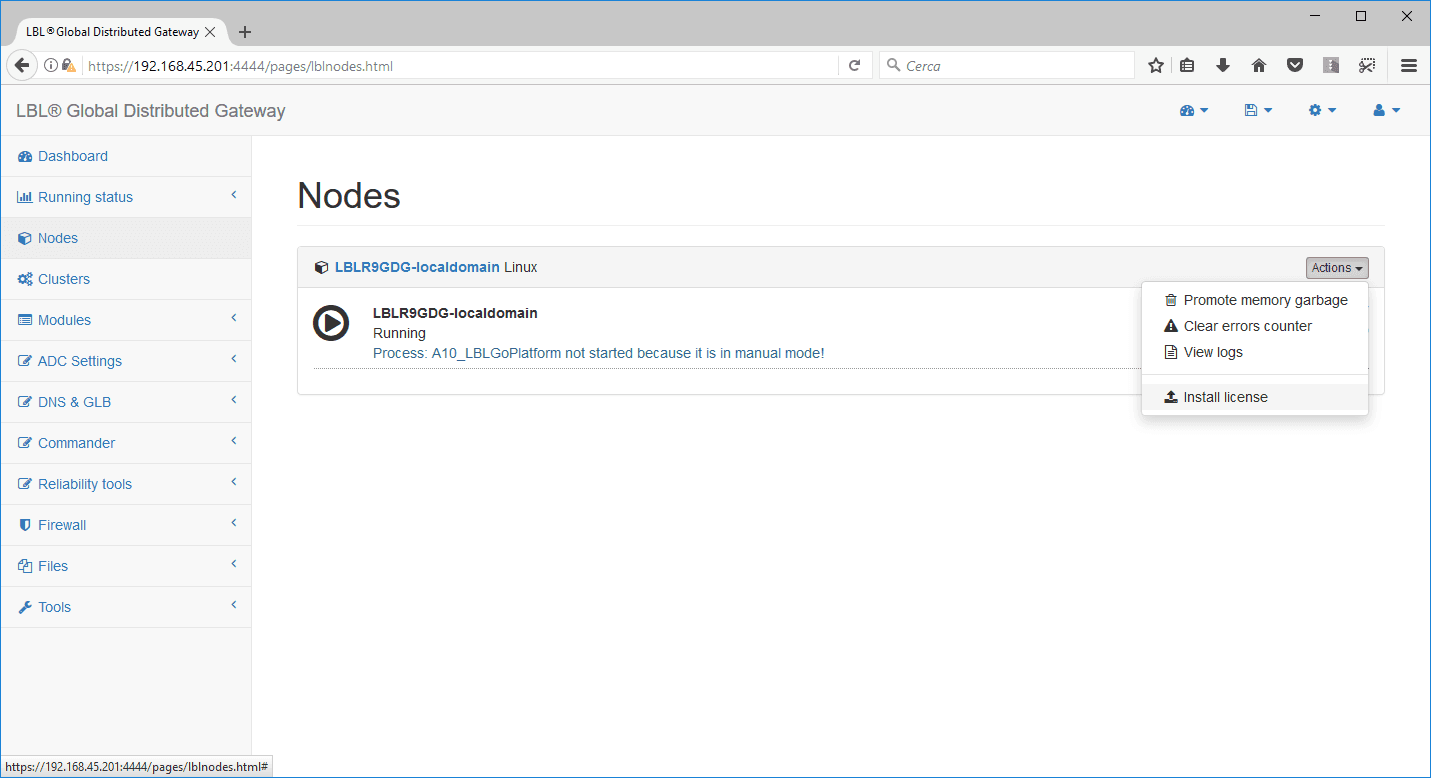
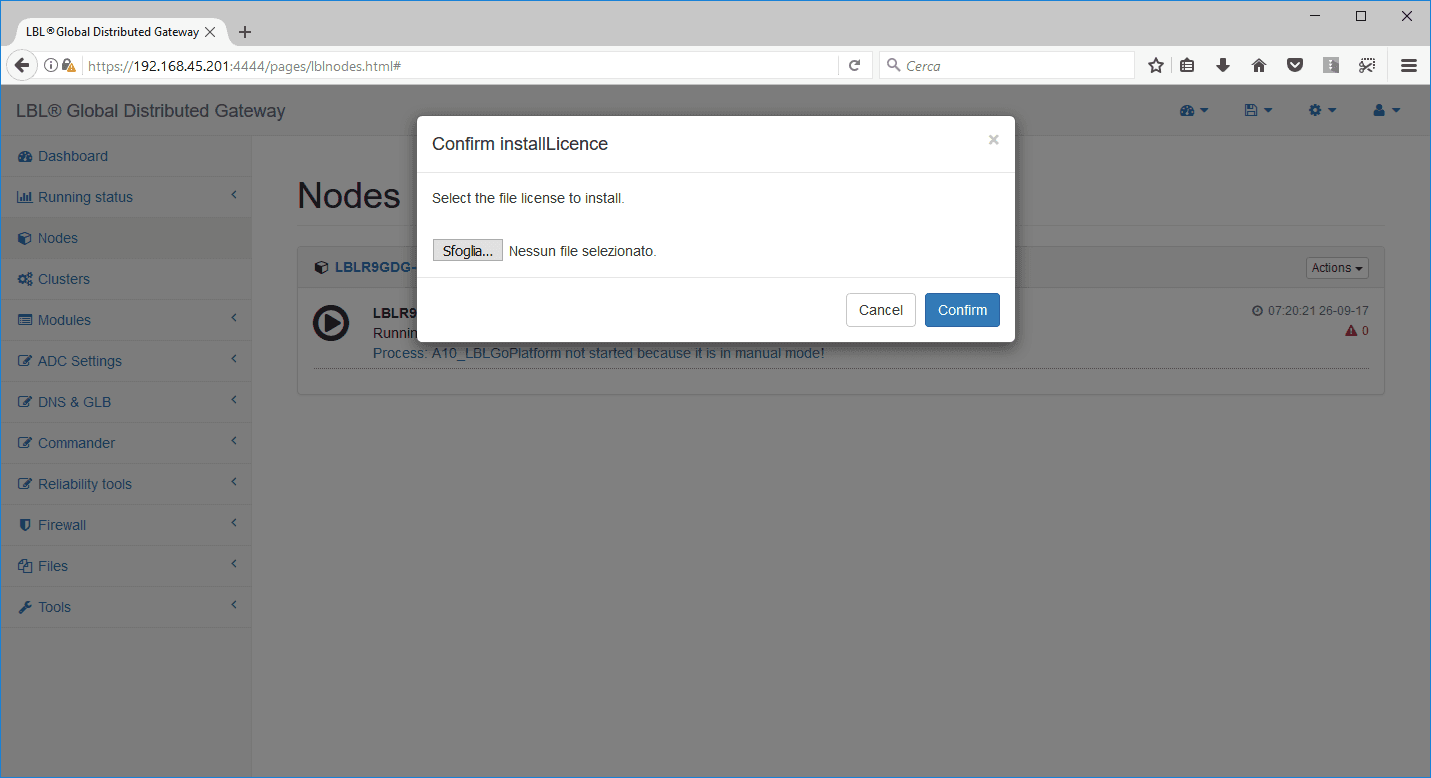
After you select the “Catalog” license, click Confirm.
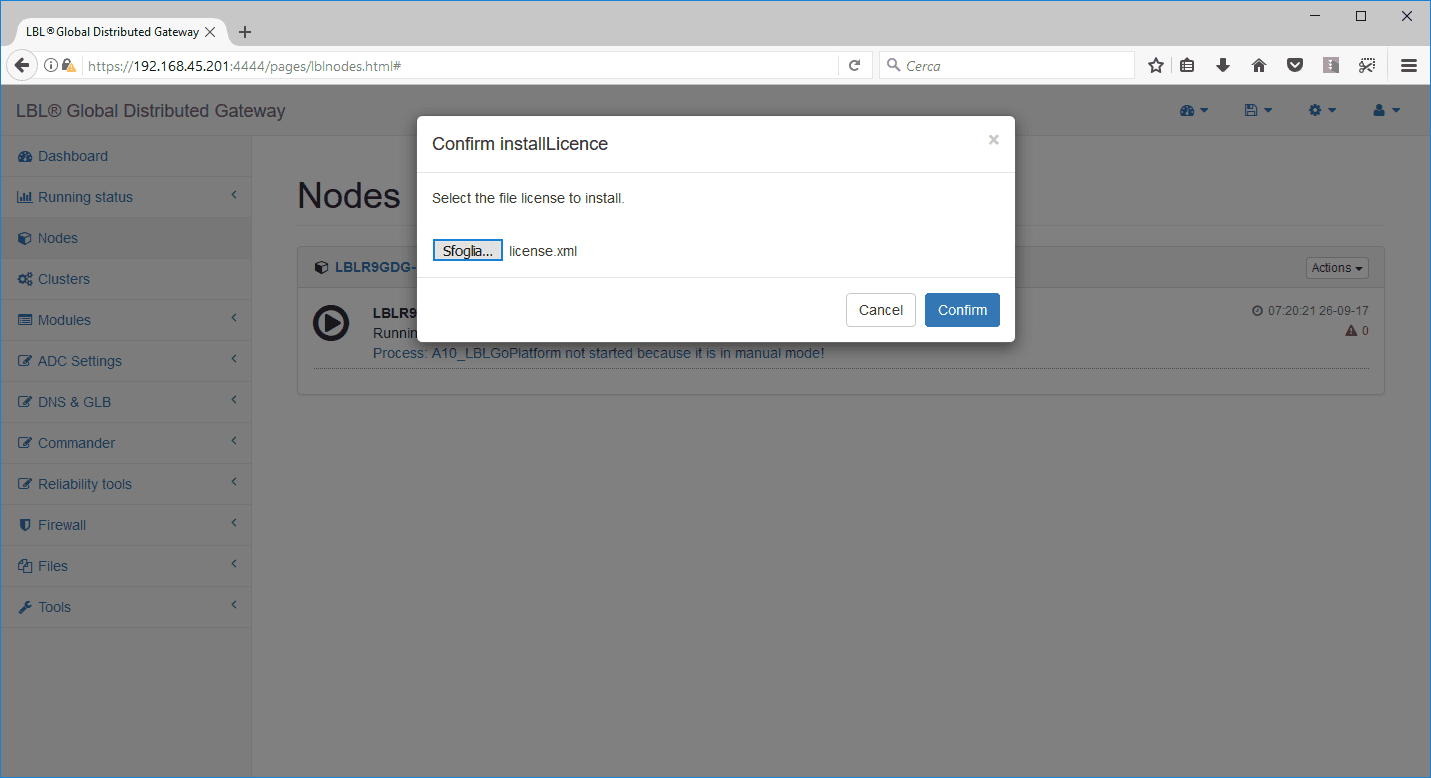
The operation confirmation message appears:

At this point, you need to set the license of the “Oplon ADC Standard HA” module, which in this example also includes the DoS/DDoS Attack Prevention & Mitigation, DNS Global Load Balancing and Web Application Firewall (WAF) extensions. To set the license of the “Oplon ADC Standard HA” module, select Modules > ADC & GLB and then go to See details of the module.
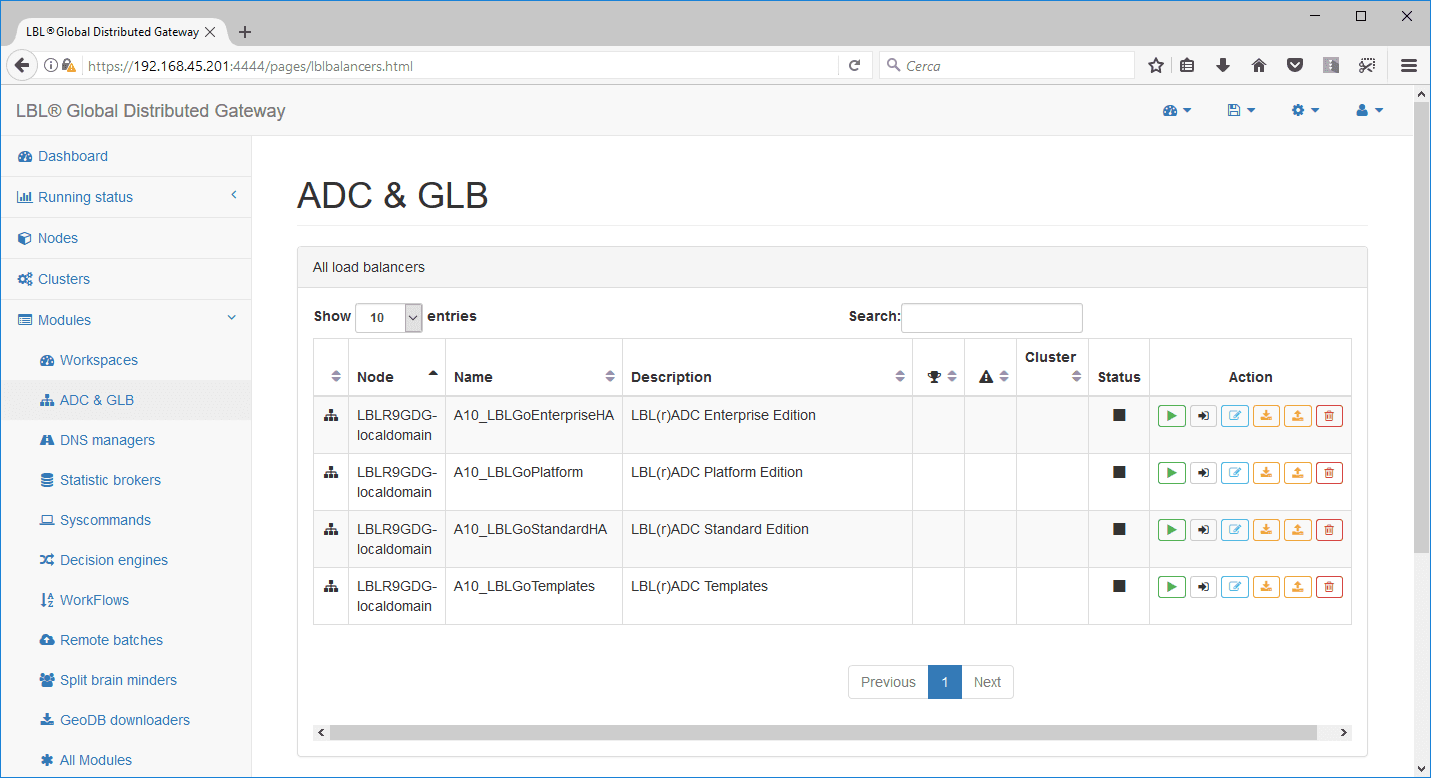
Again, select Actions and Install license as before.
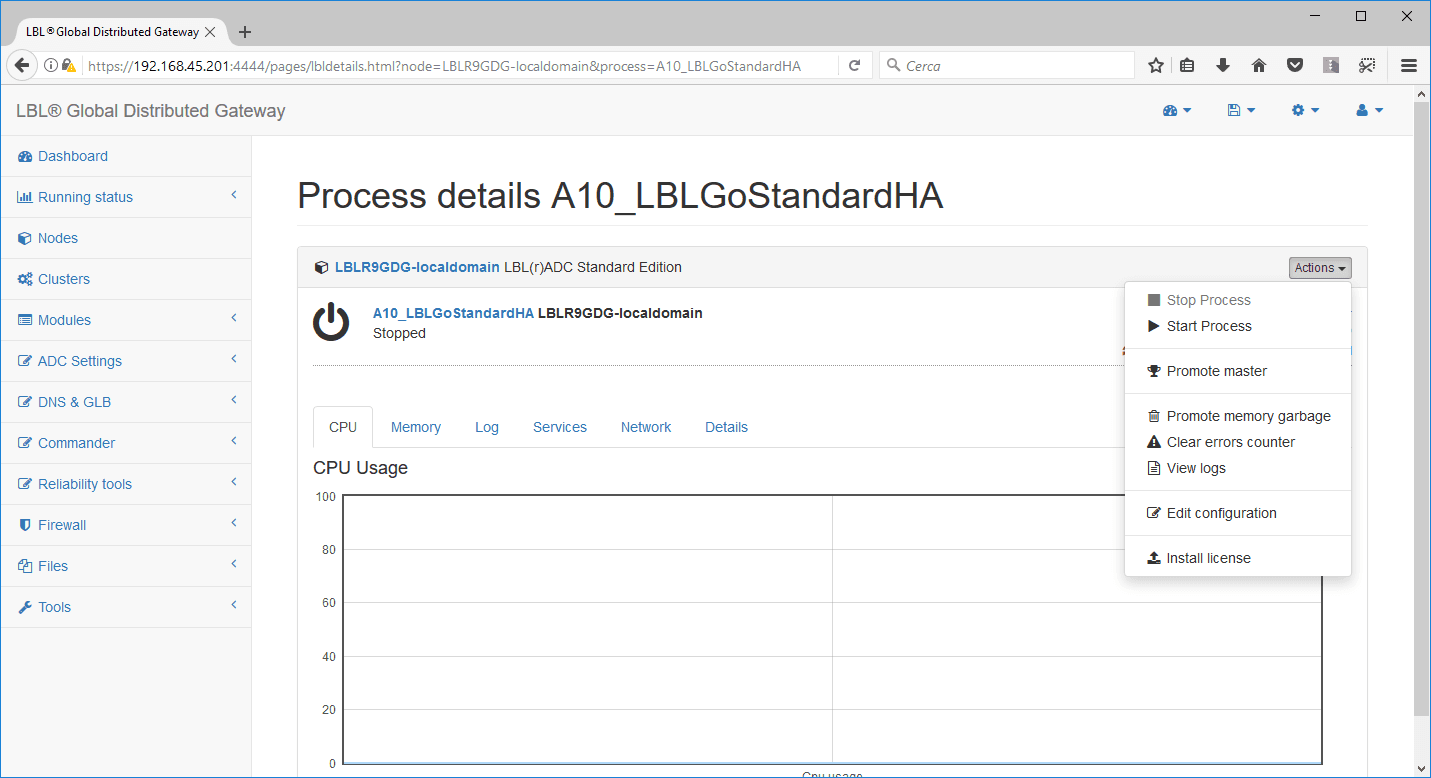
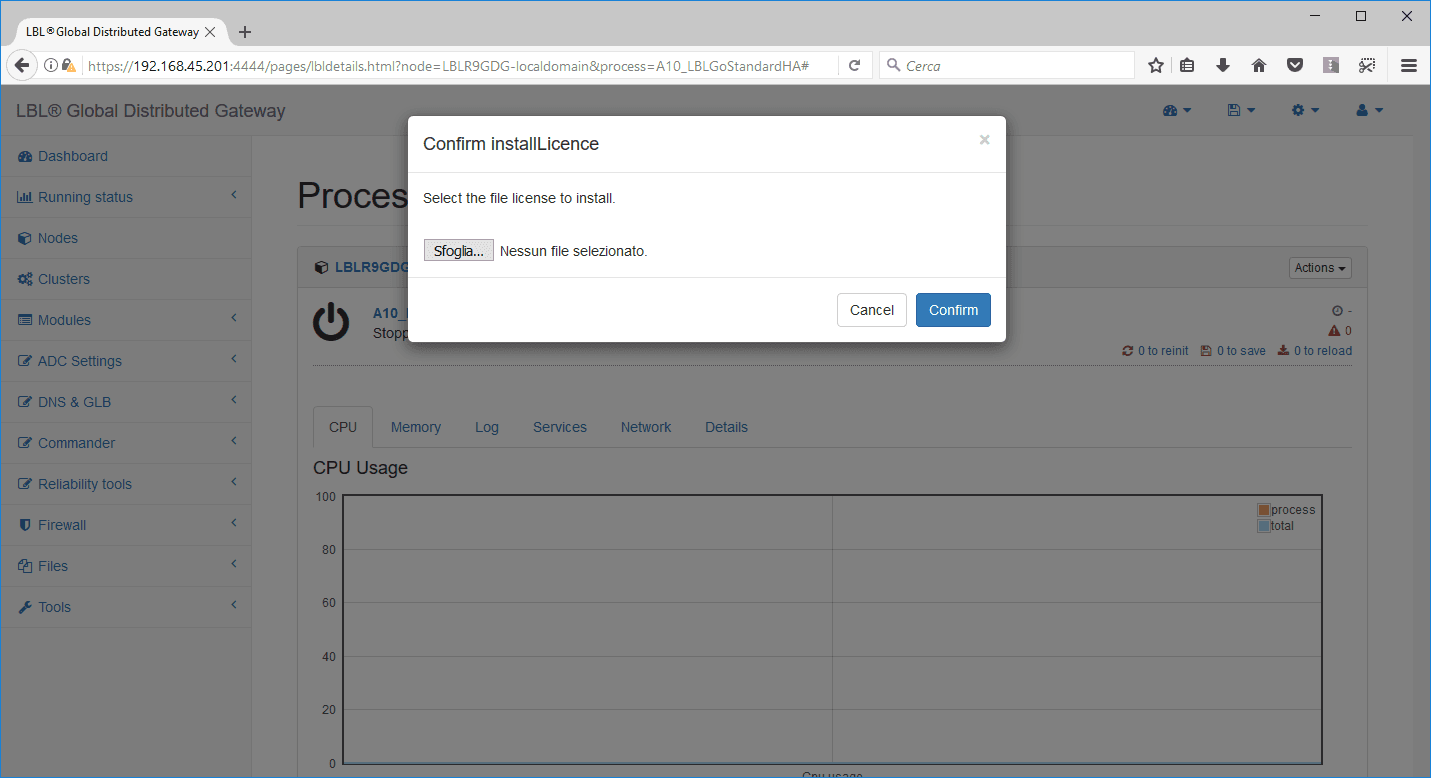
Select the STANDARDHA_DOSDDOS_WAF_DNSGLB license and then confirm.
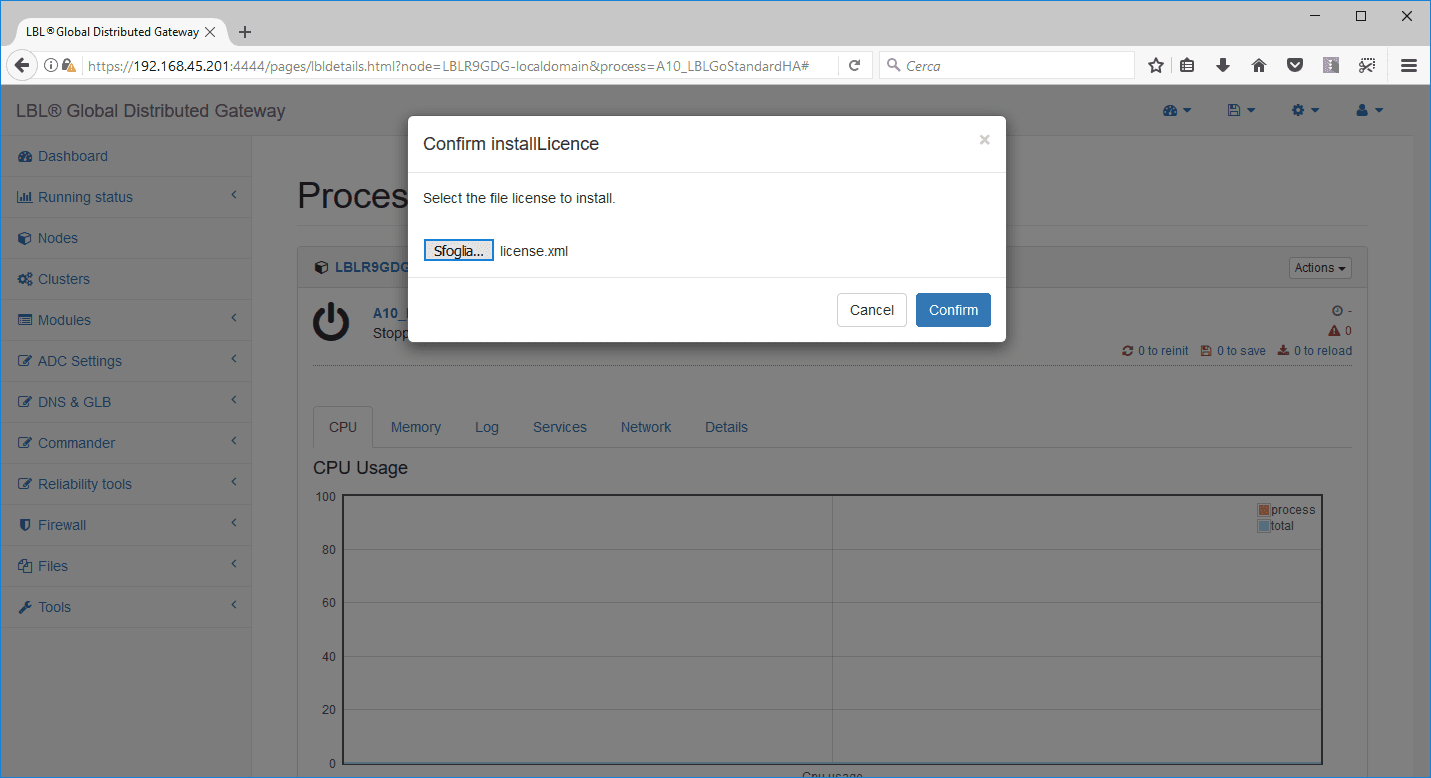
The operation confirmation message appears:
NB: repeat the license setup steps on NODE B as well.
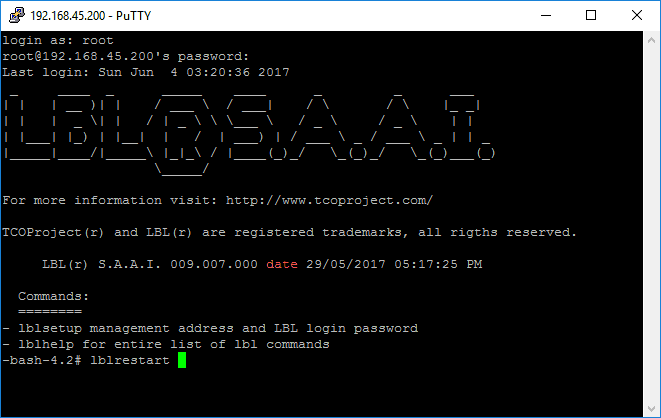
To apply the “Catalog” licenses, you must restart the main module through the console or SSH.
NODE A:
NODE B:
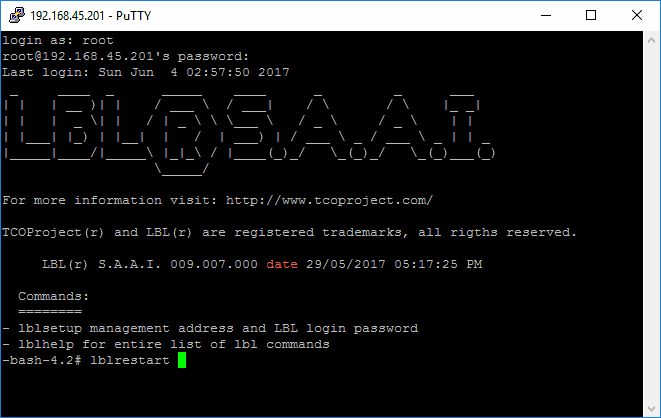
During these restart operations, the web console may report errors similar to this one, due to the restart of the services:

As soon as the service is restored, the browser shows the login page again.
Populating the node inventory catalog (Inventory)
To add nodes, you must have the “Catalog” licenses and “root” rights. Before creating a cluster, you must tell Oplon Workspace which nodes to manage. To do this, use the settings menu > Nodes in the System bar.
To add or remove nodes you must have “root” rights. Other users, even if declared administrators, will not be able to add or delete nodes to manage.
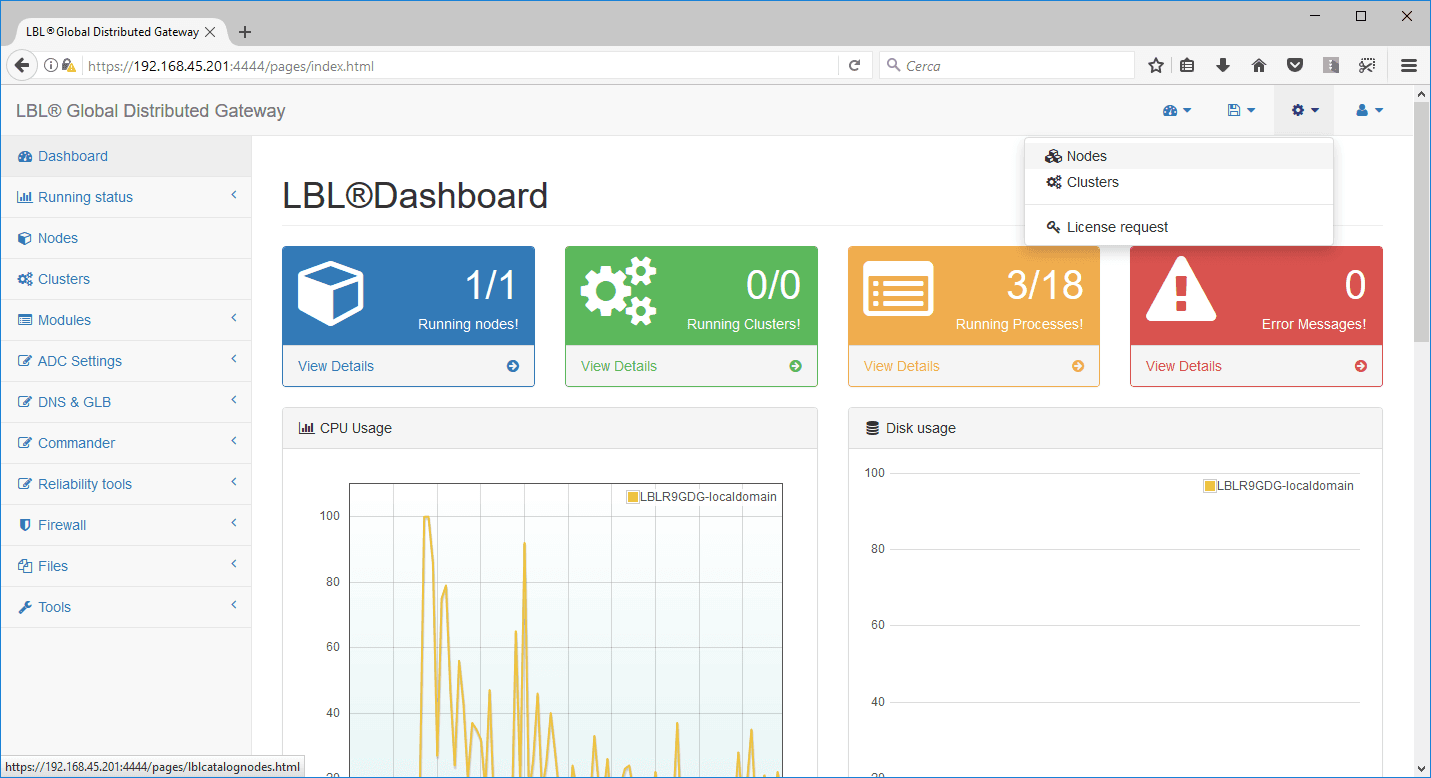
 From the Nodes menu you
can delete, add and configure nodes.
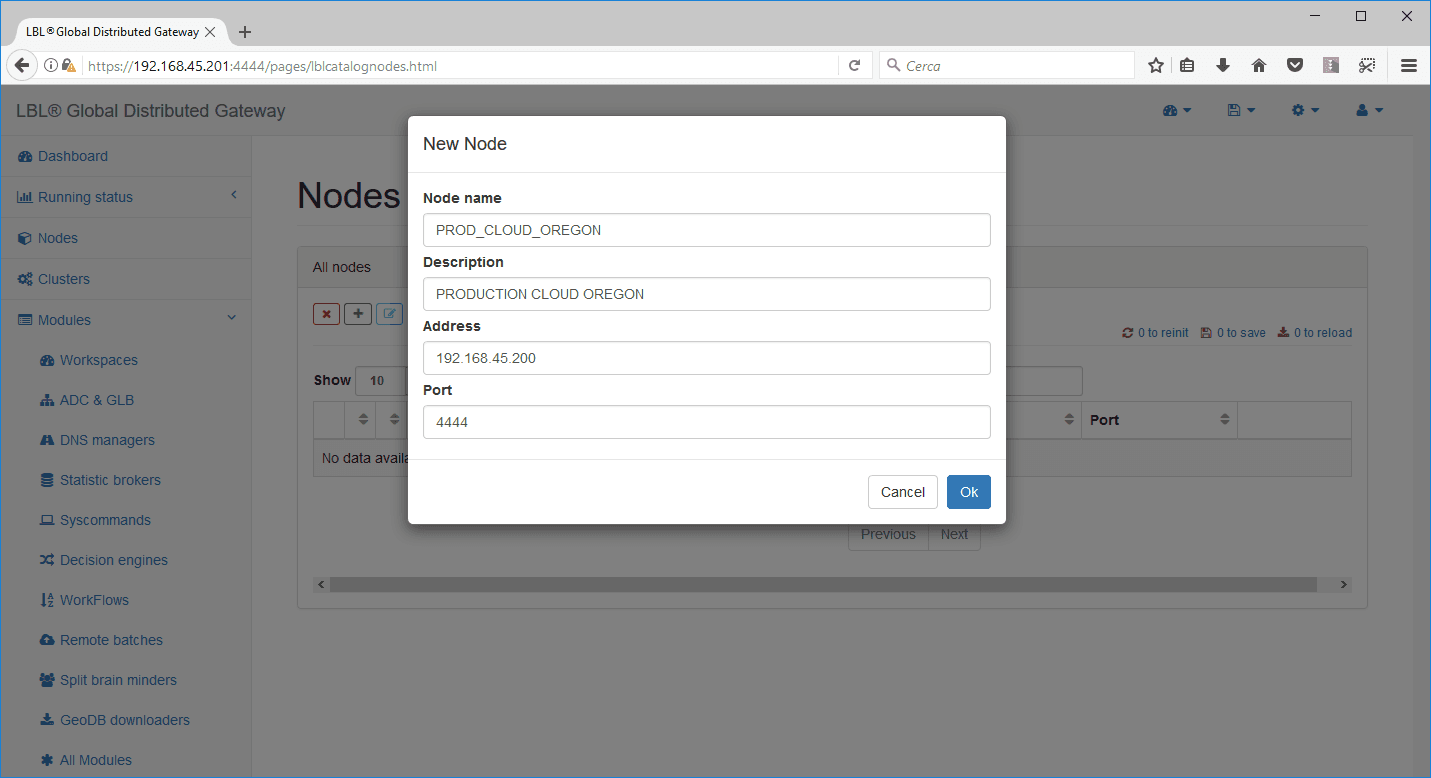
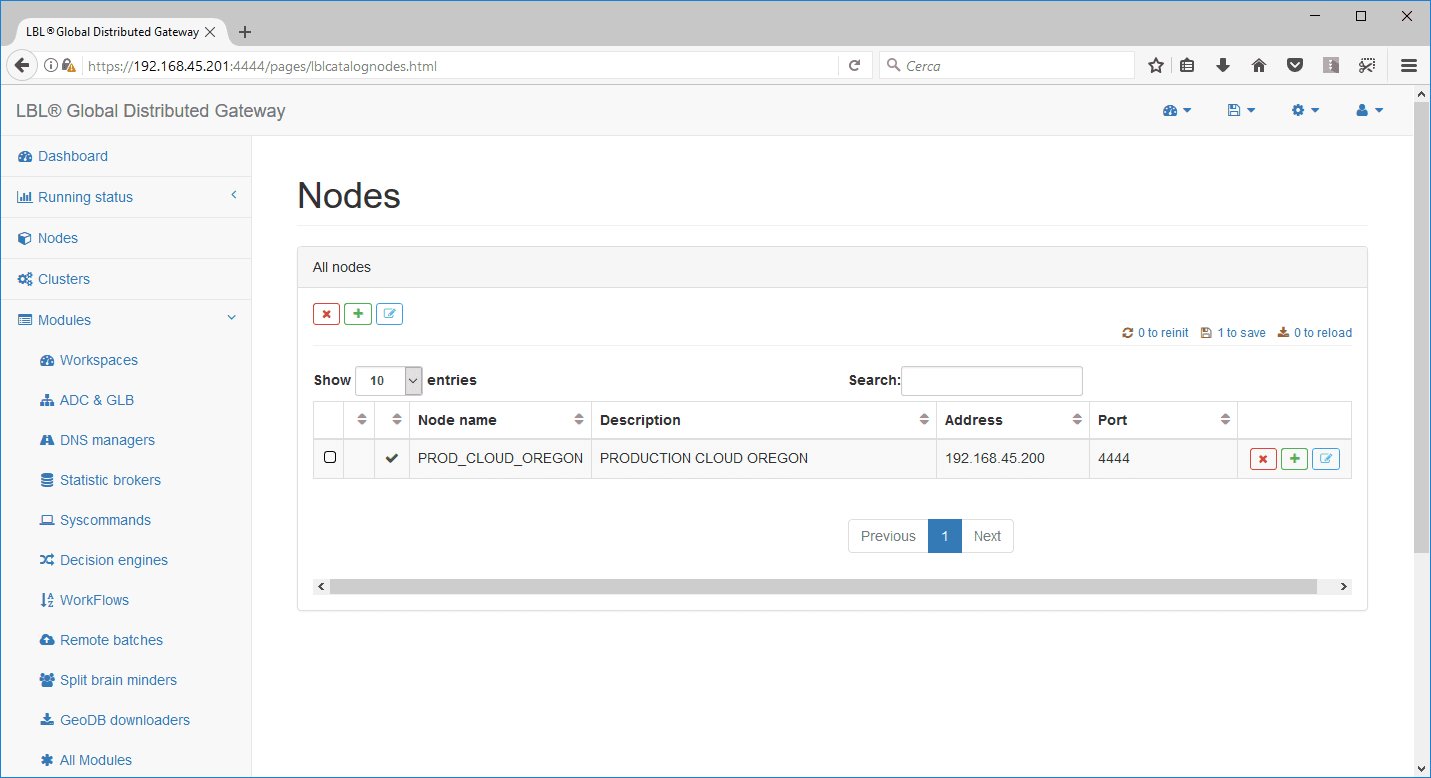
Then proceed with adding the second node as well:
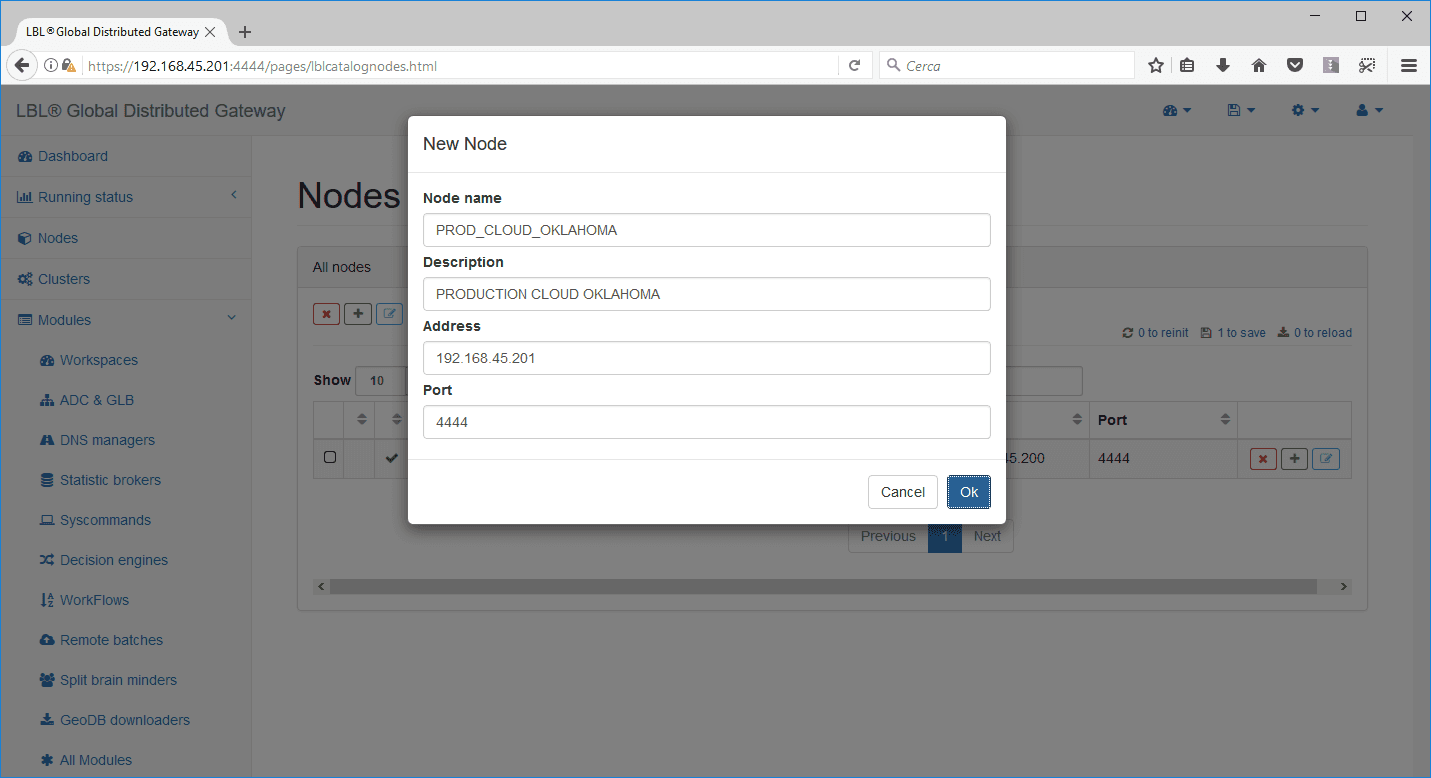
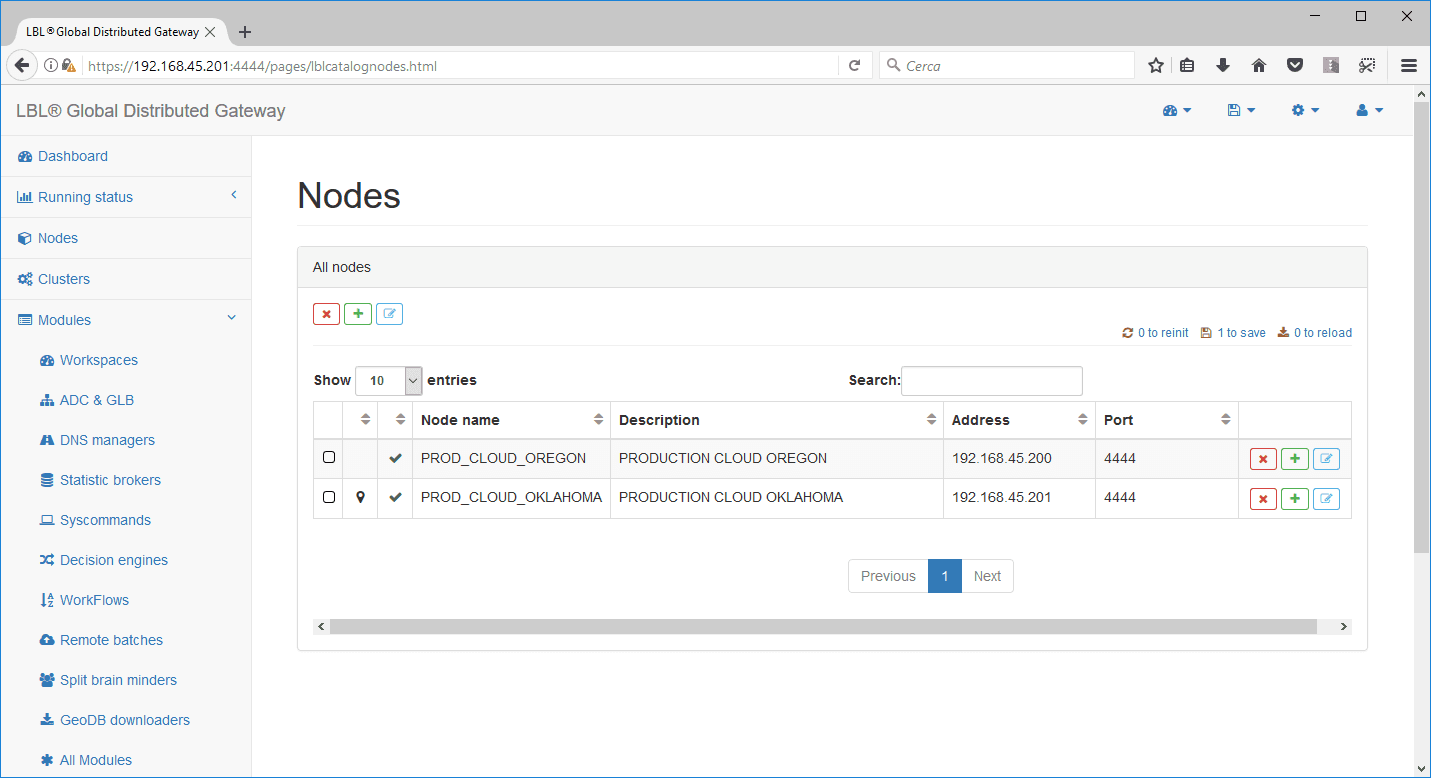
Once the two nodes are added, save the configuration.
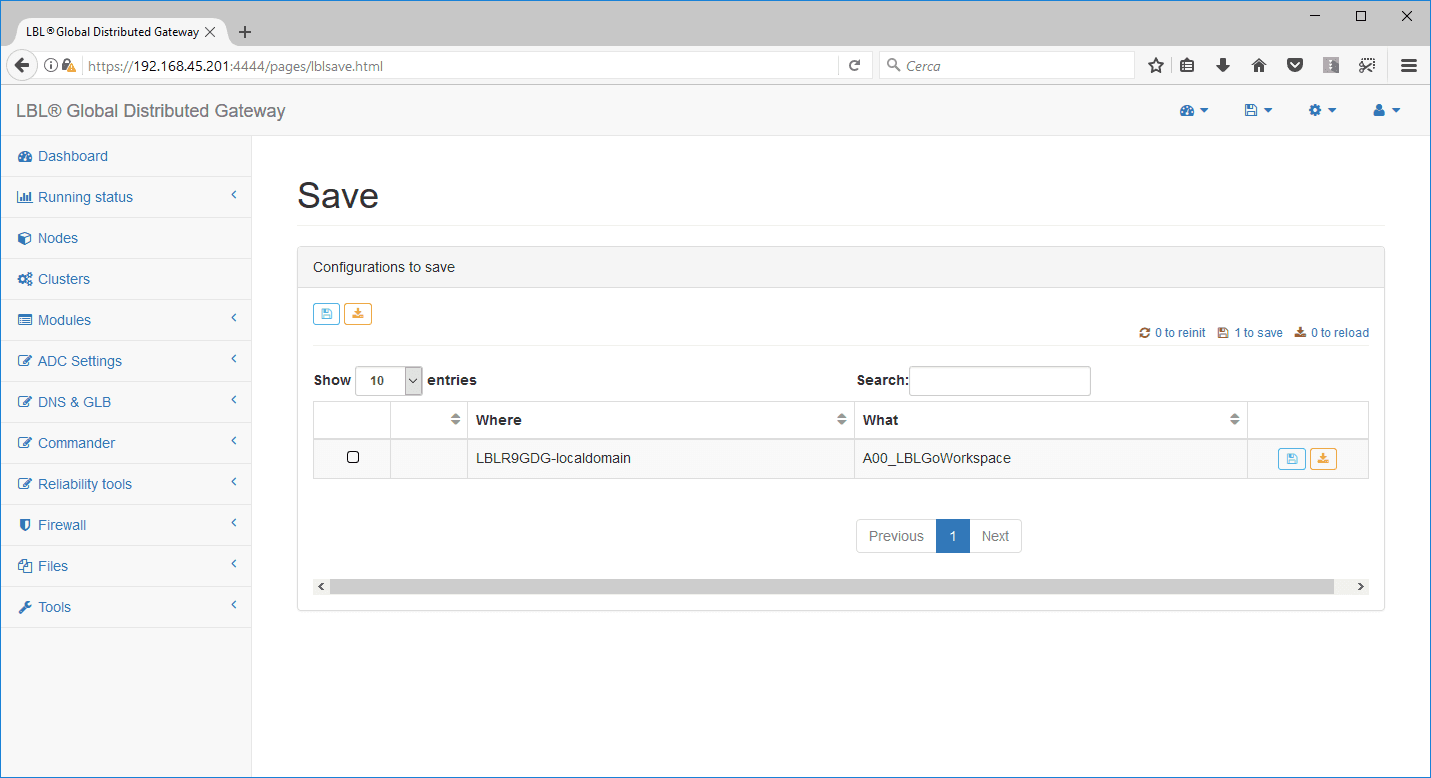
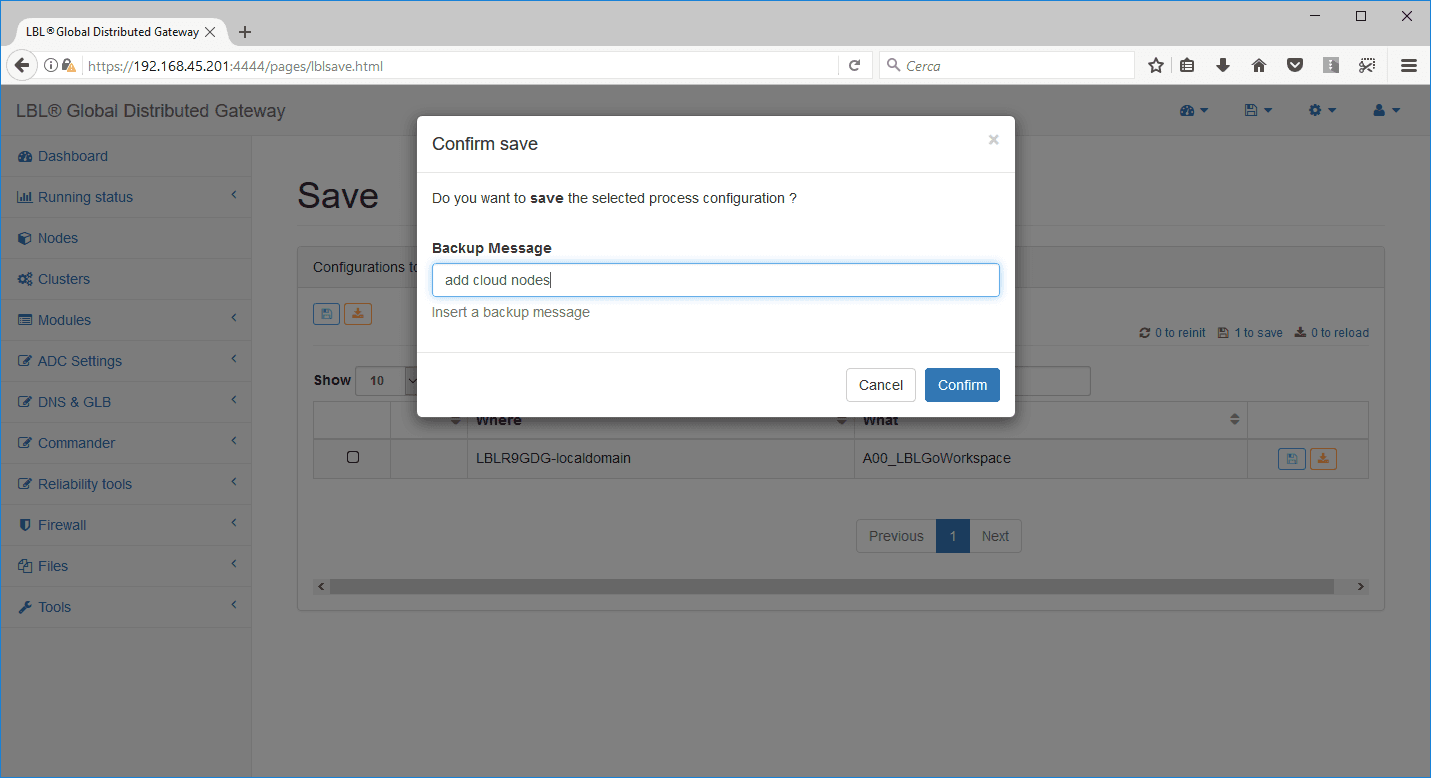
Enter the reason for the configuration change.
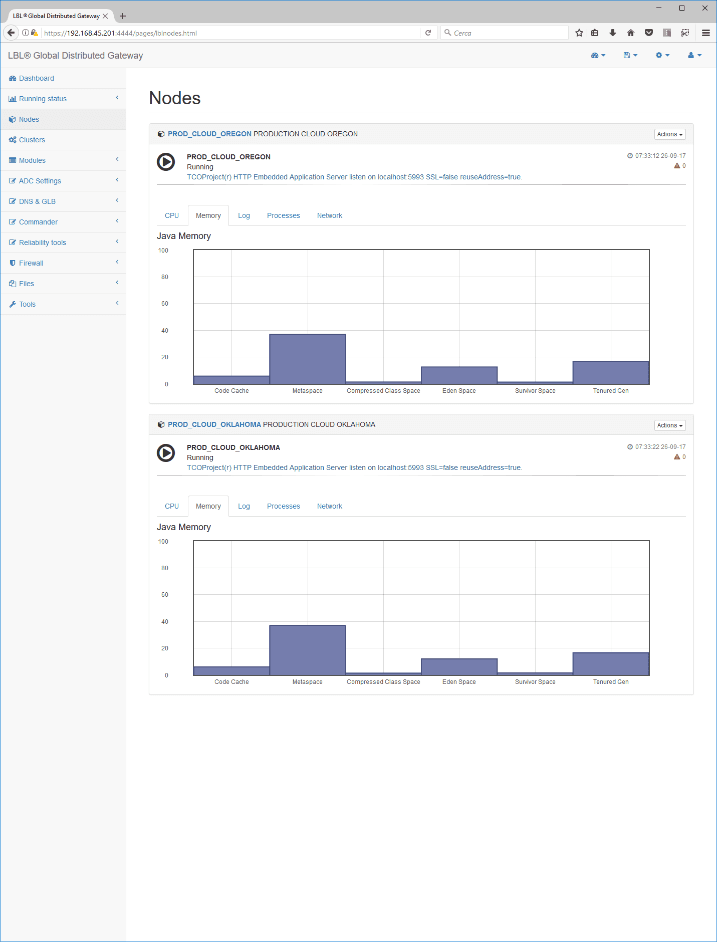
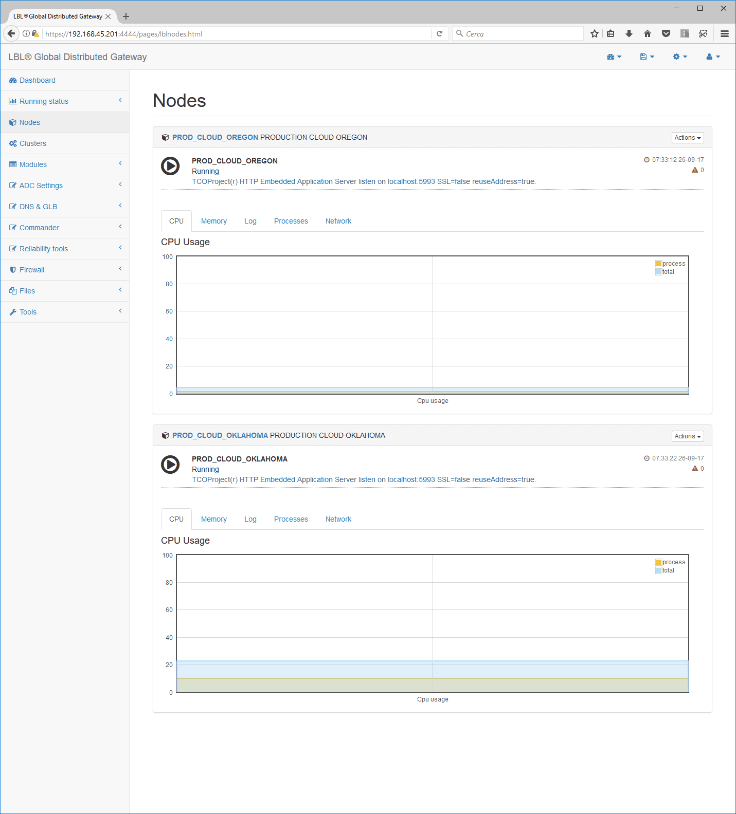
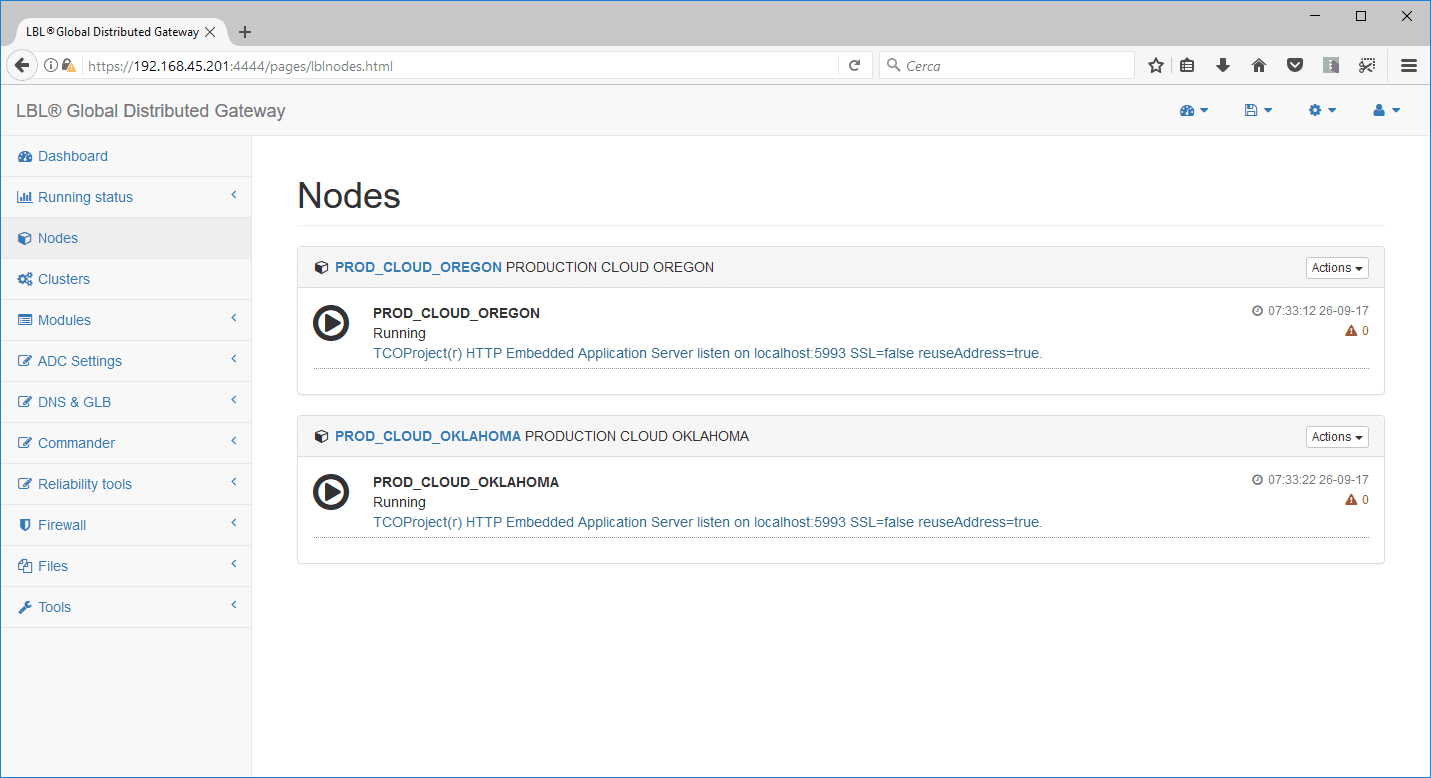
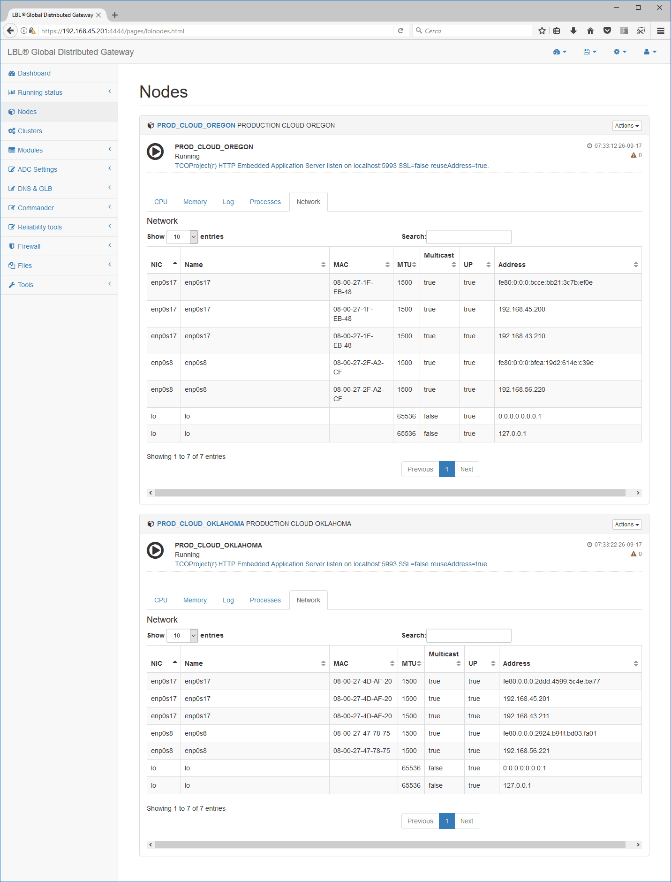
You can now select the Nodes menu to view the status of the nodes.
Creating the Oplon Workspace Cluster
To create the cluster, you must have the “Catalog” licenses and “root” rights. Other users, even if declared administrators, will not be able to create or destroy clusters.
To make all the general settings redundant, the first cluster to create is the Oplon Workspace cluster. This propagates the general parameters to at least one other node so that, if needed, you will find the same configuration on the second node, replicated automatically by the cluster.
You can create/destroy a cluster through the menus in the System bar, which appear at the top right of the browser.
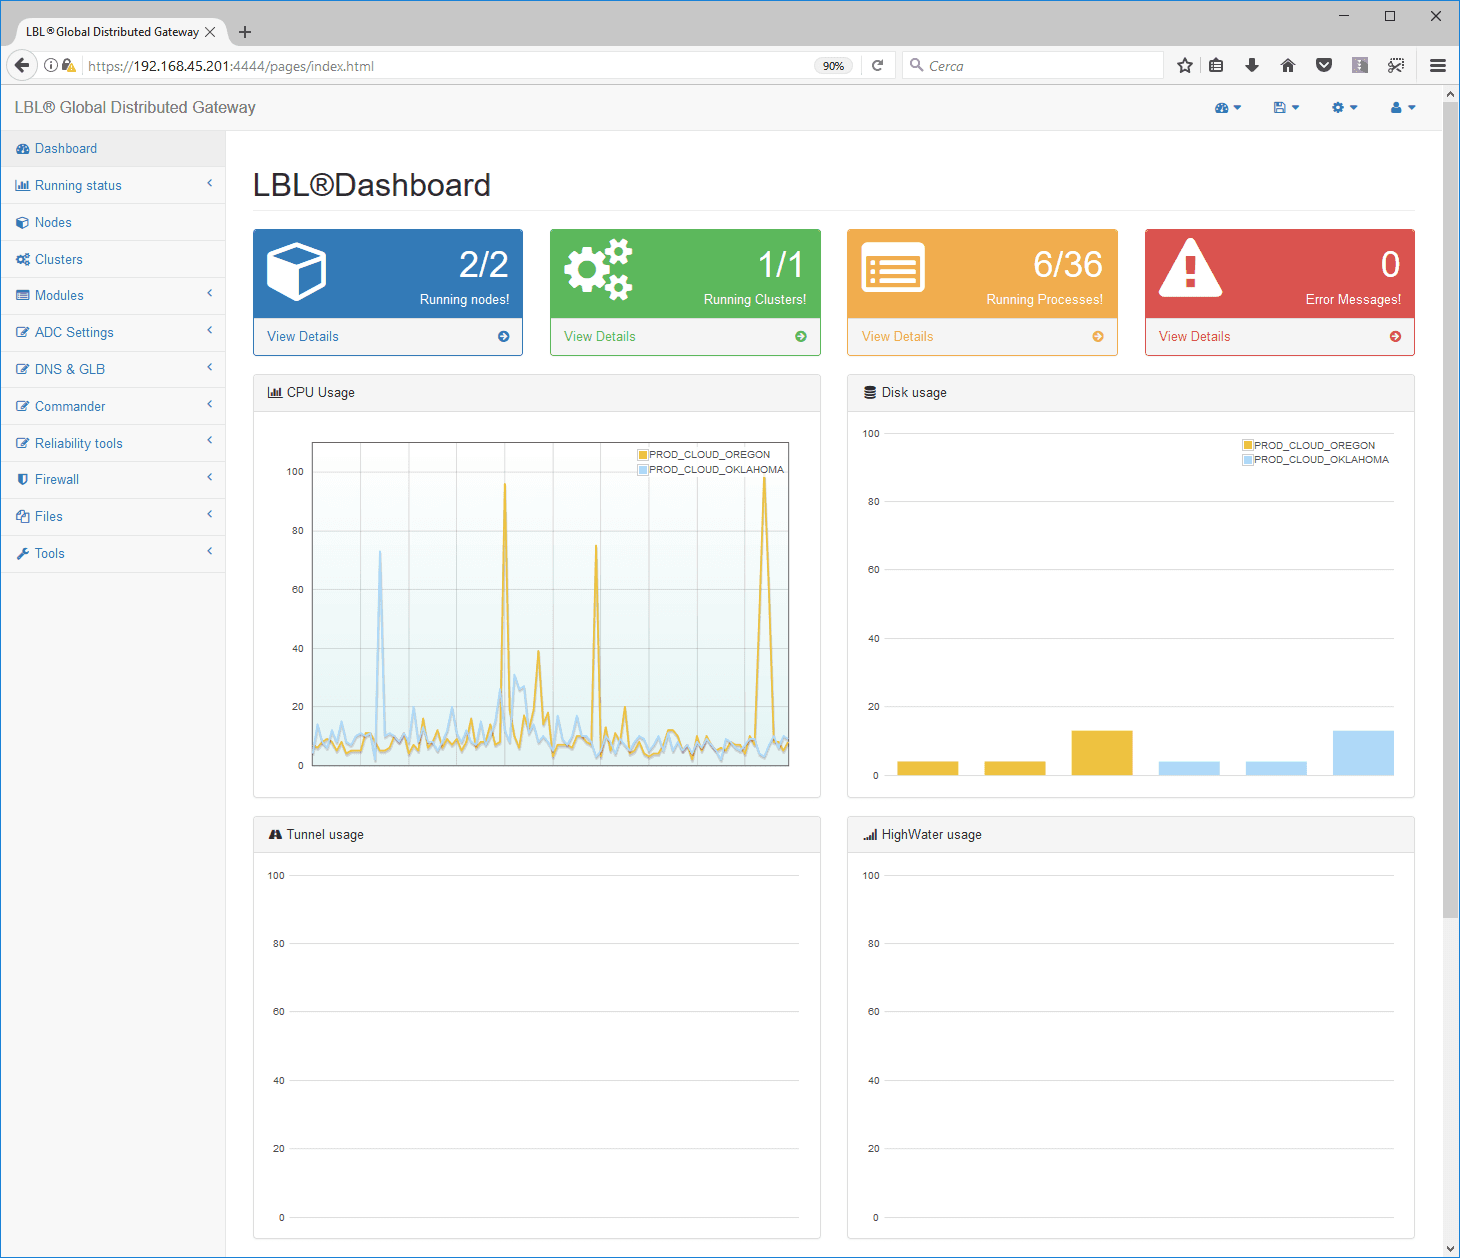
You can already see that the summary view of the Dashboard shows the status of the two nodes for the key values: CPU, disk space, ADC tunnels and HighWater, Memory usage, Swap area.
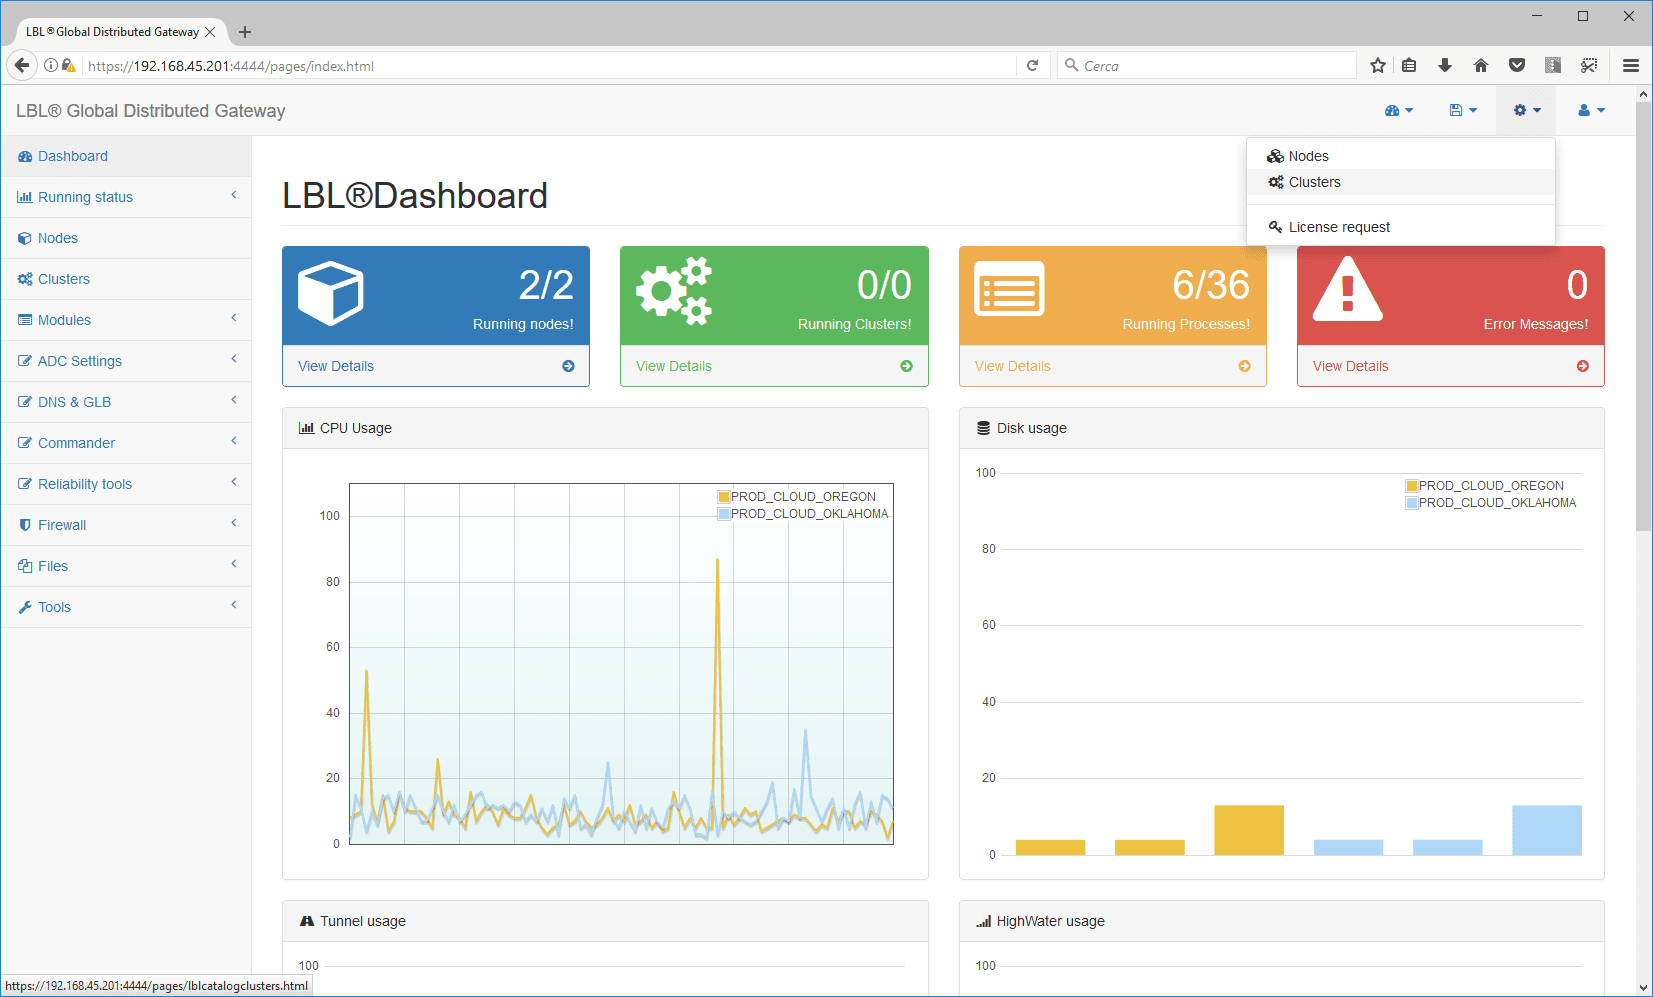
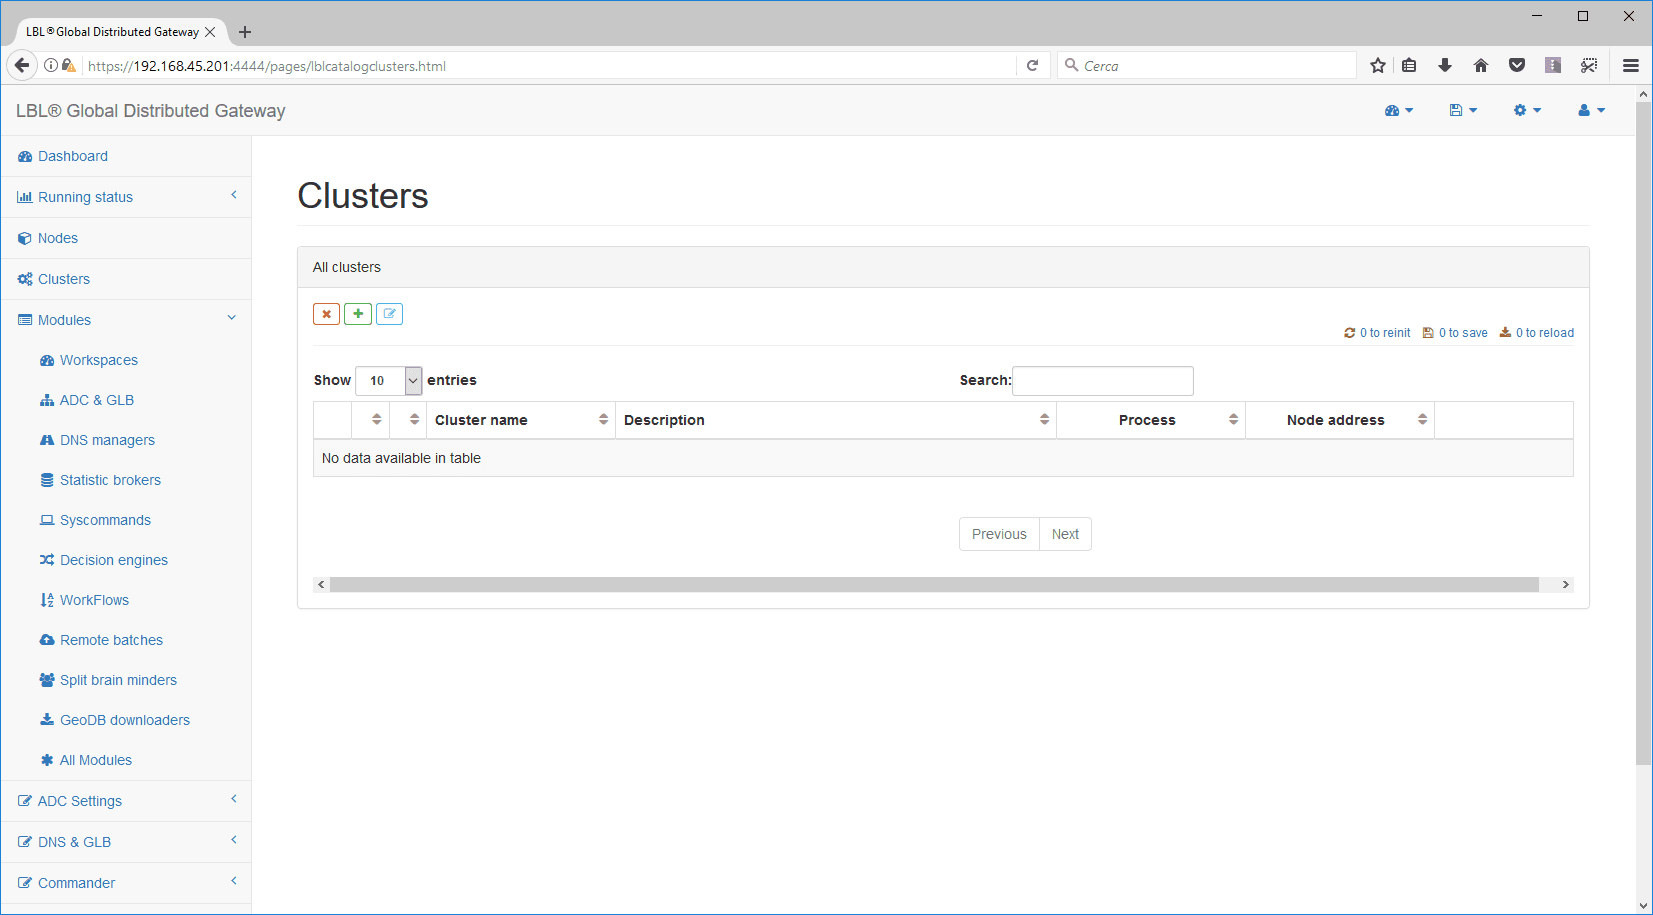
From the Clusters menu
you can delete, create and configure clusters…

When you click the + button to add a cluster, you are prompted to enter the name and description of the cluster you want to create.
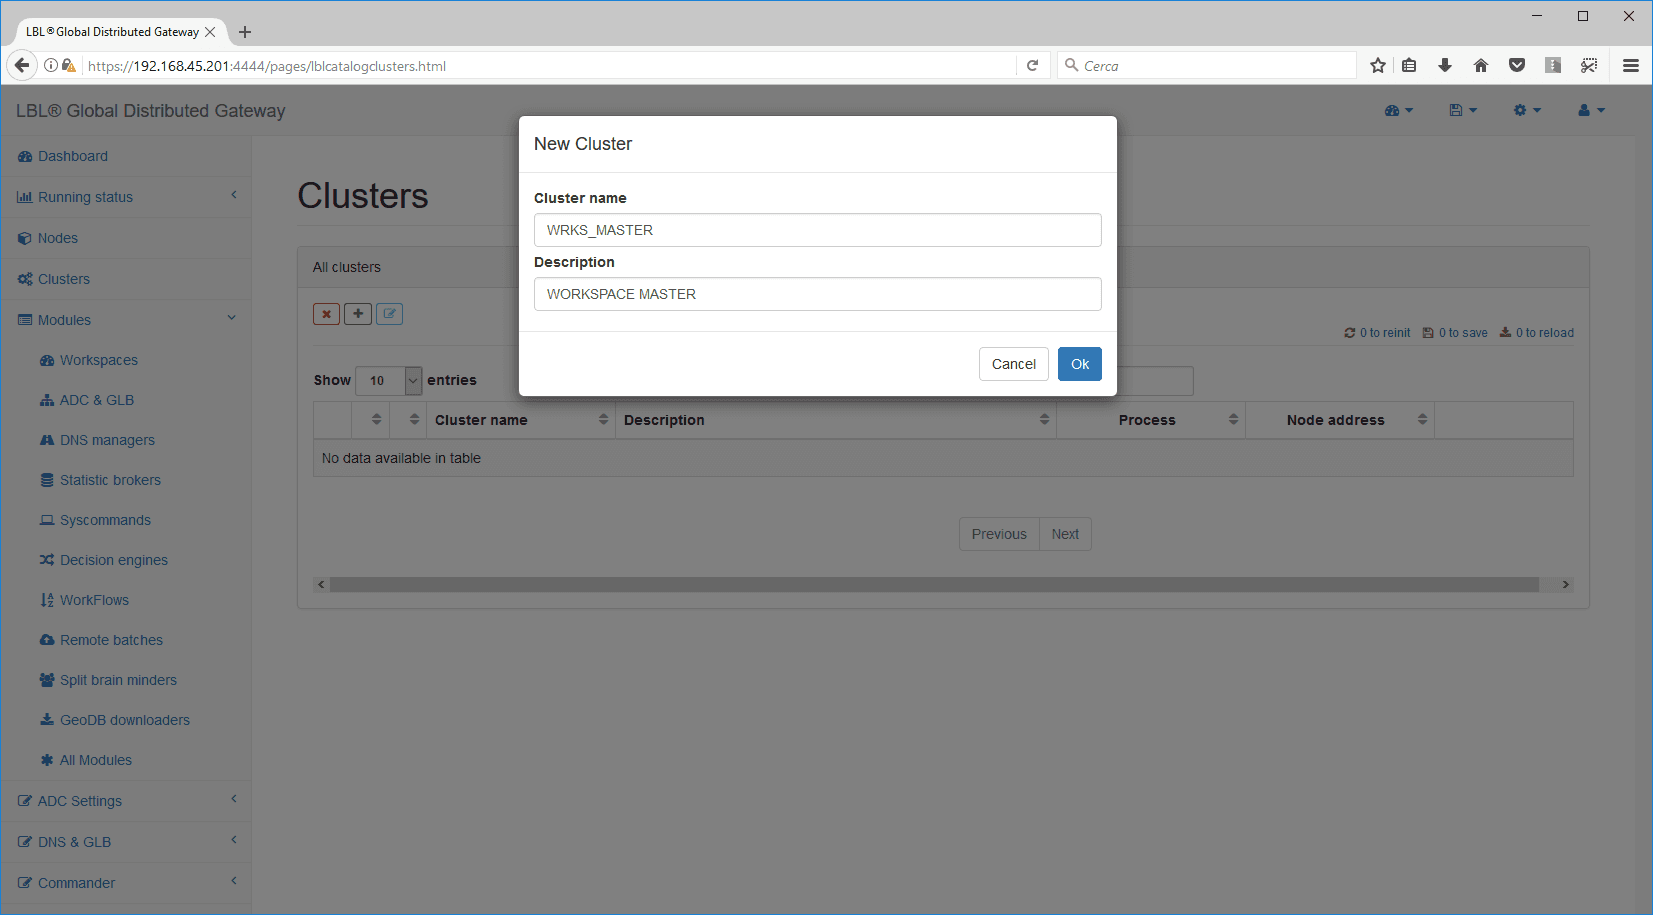
After you confirm with Ok, you can configure the cluster through the Edit button…
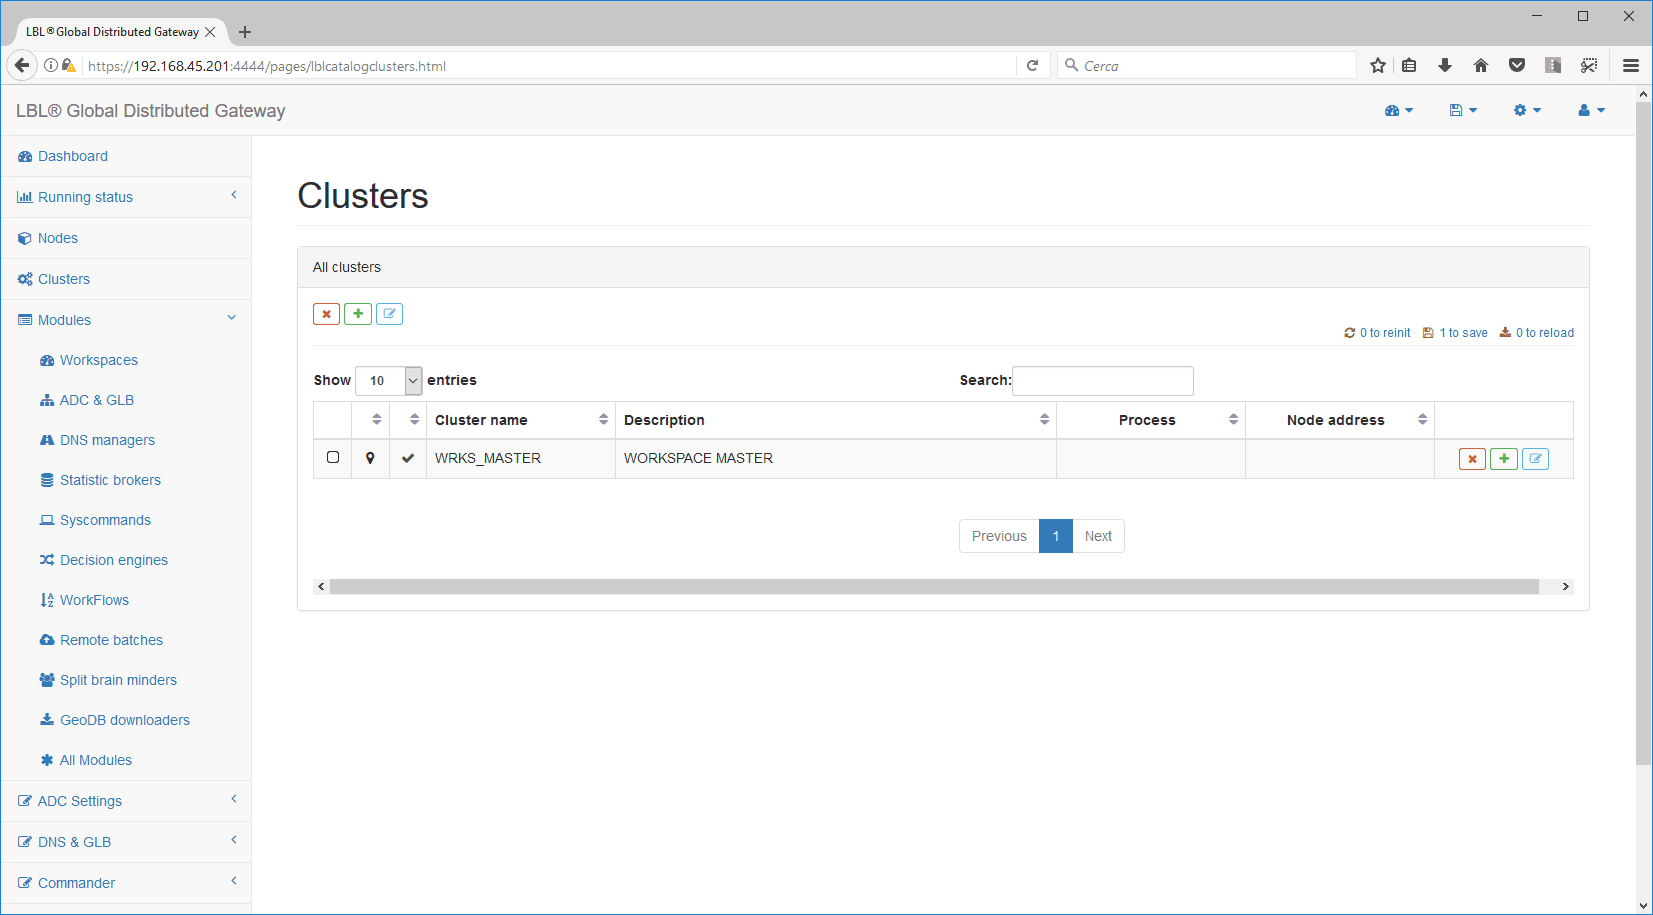
After you select Edit and expand the Processes parameters, you can associate the processes with this cluster.
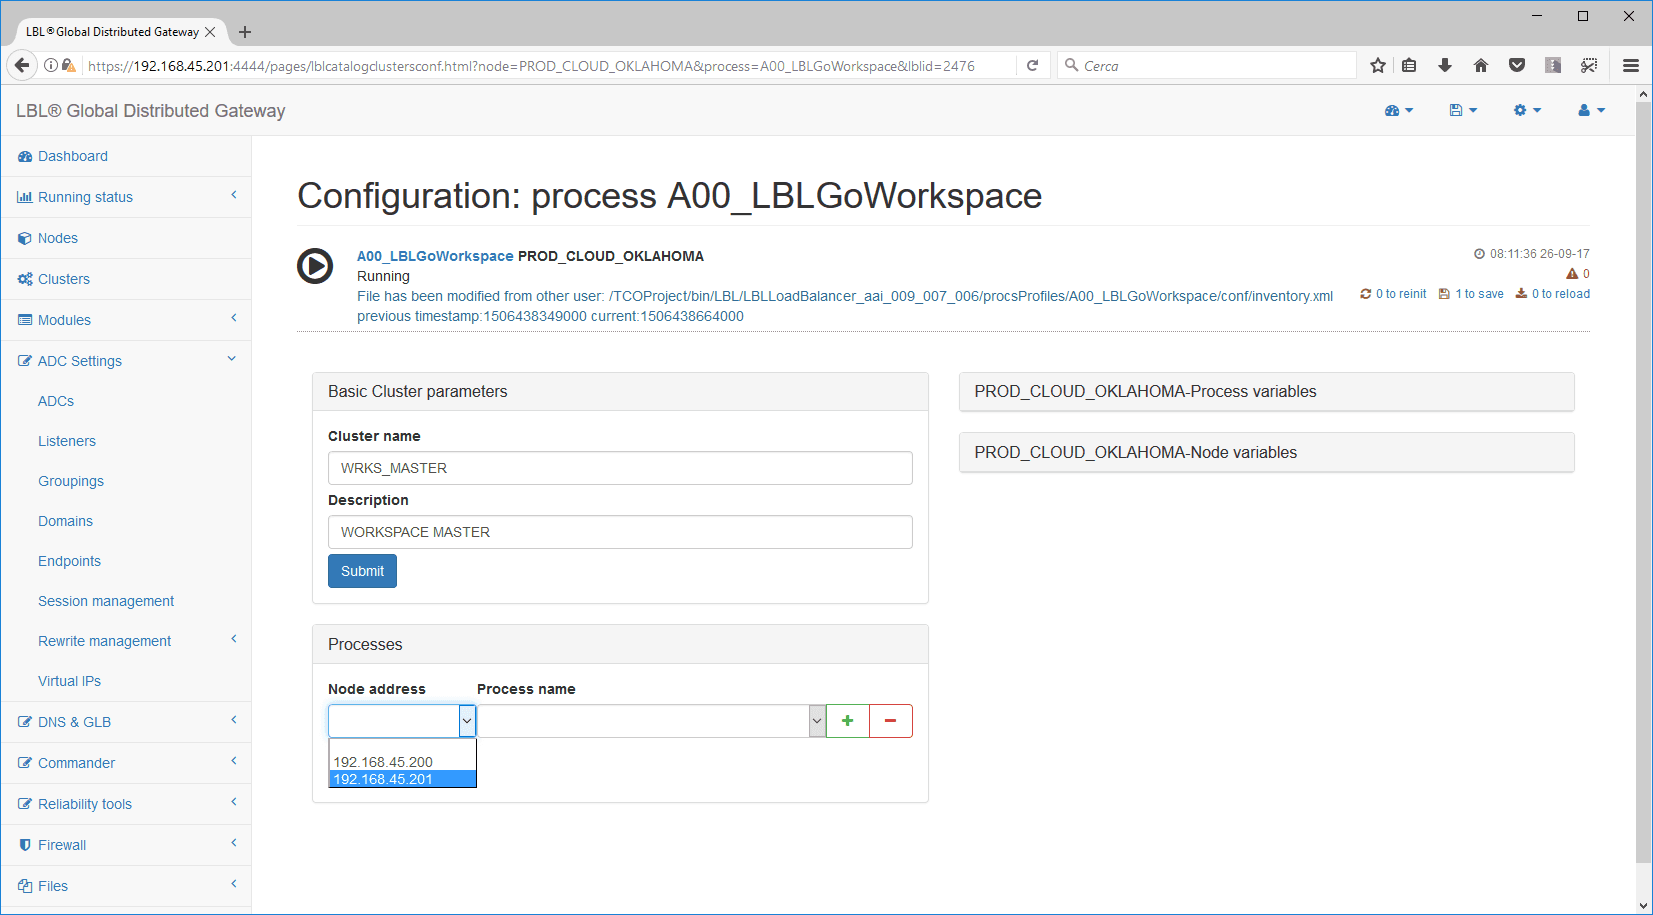
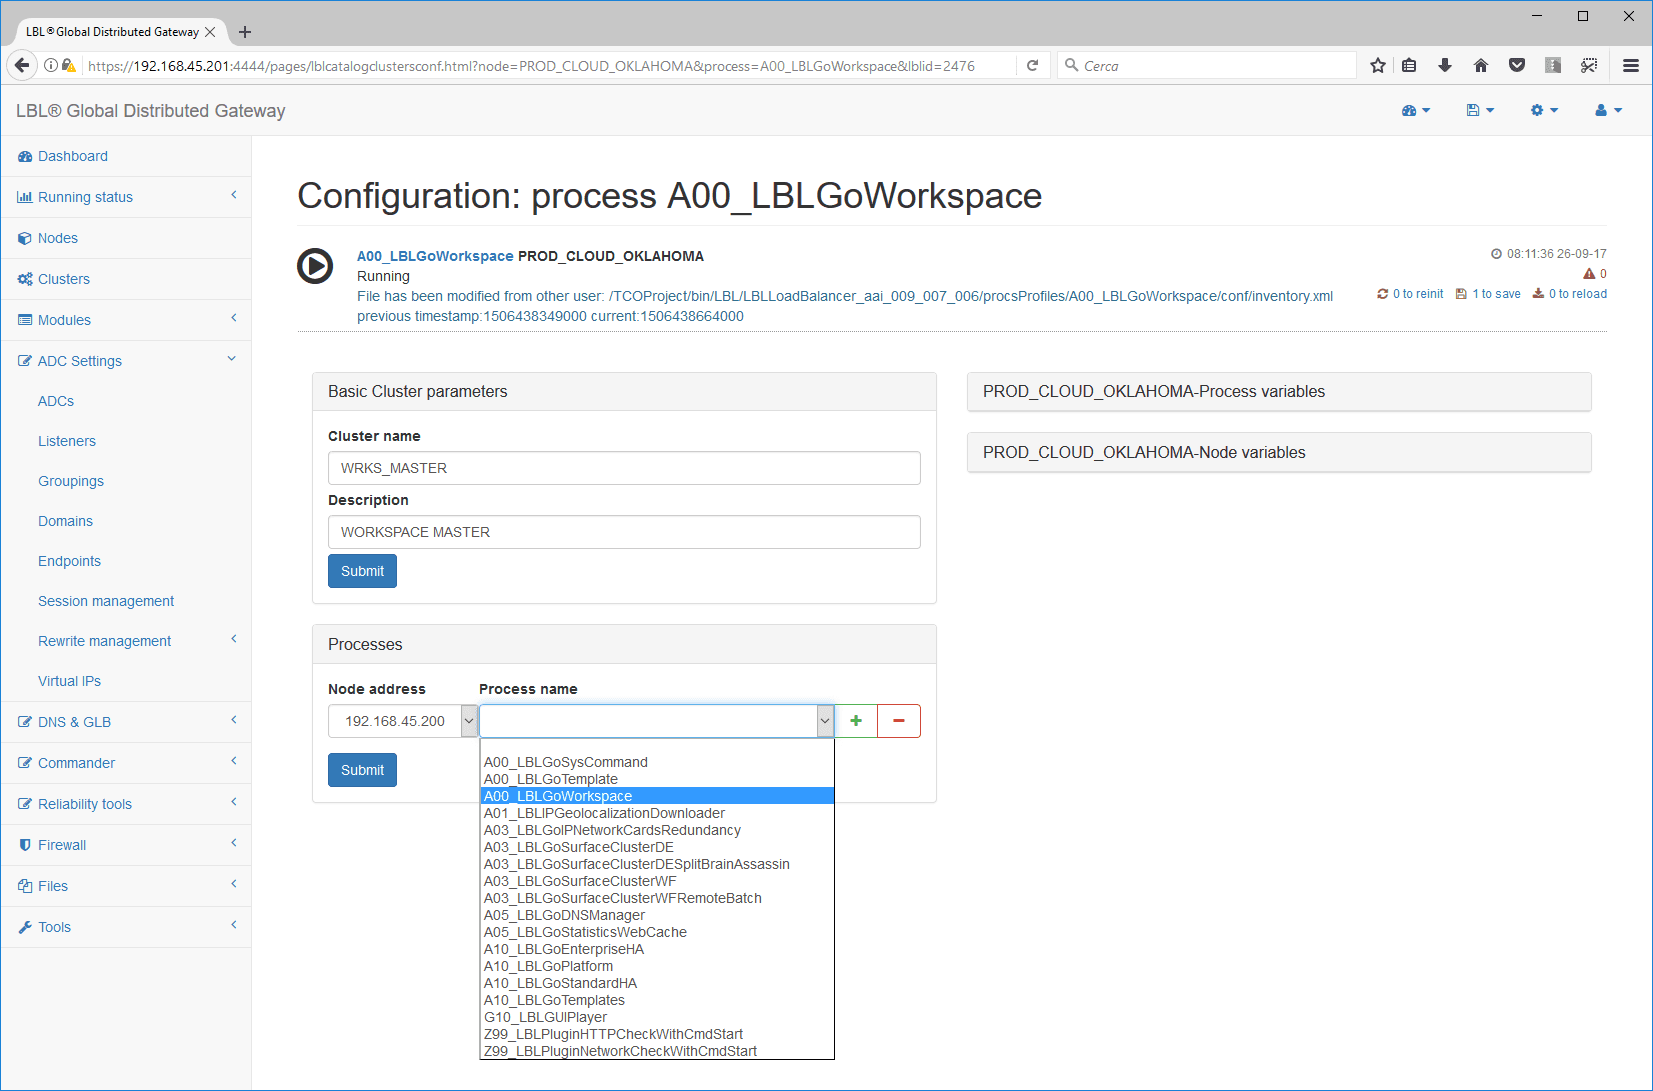
Use the + button to associate the second process that makes up the cluster.
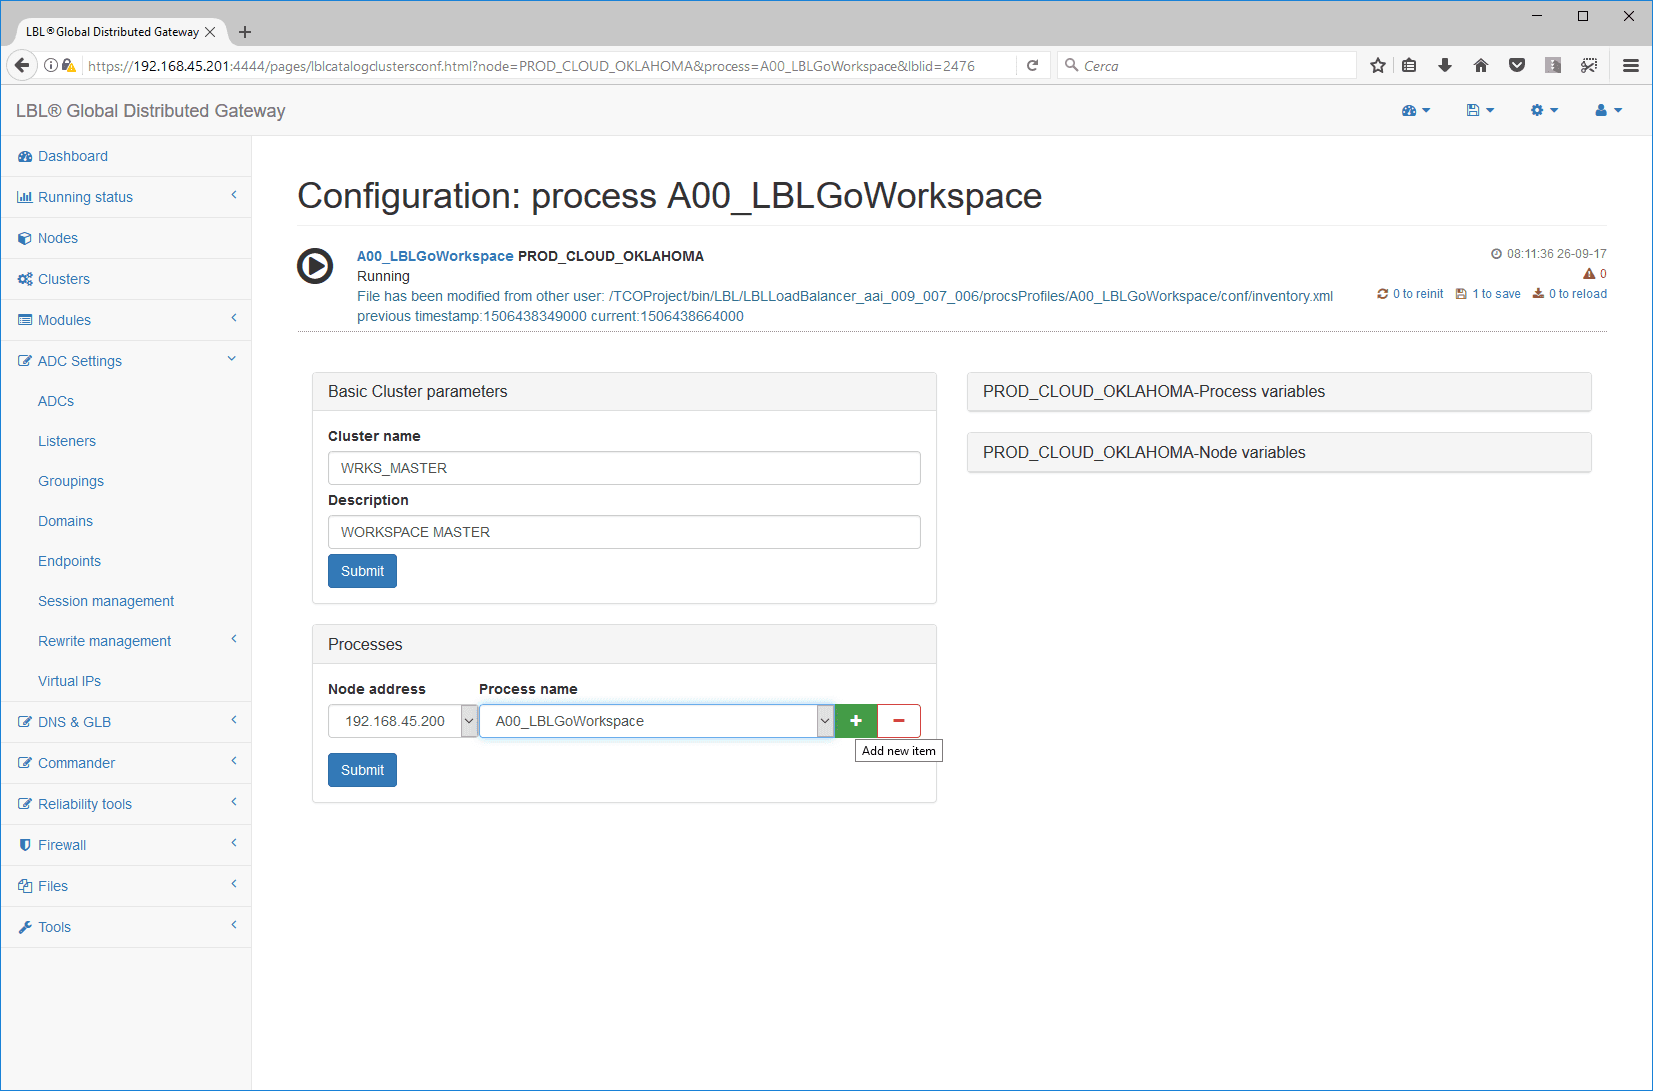
For convenience, the + button copies the characteristics of the row where it is clicked. Therefore, you only need to change the necessary values, in this case only the Node address.
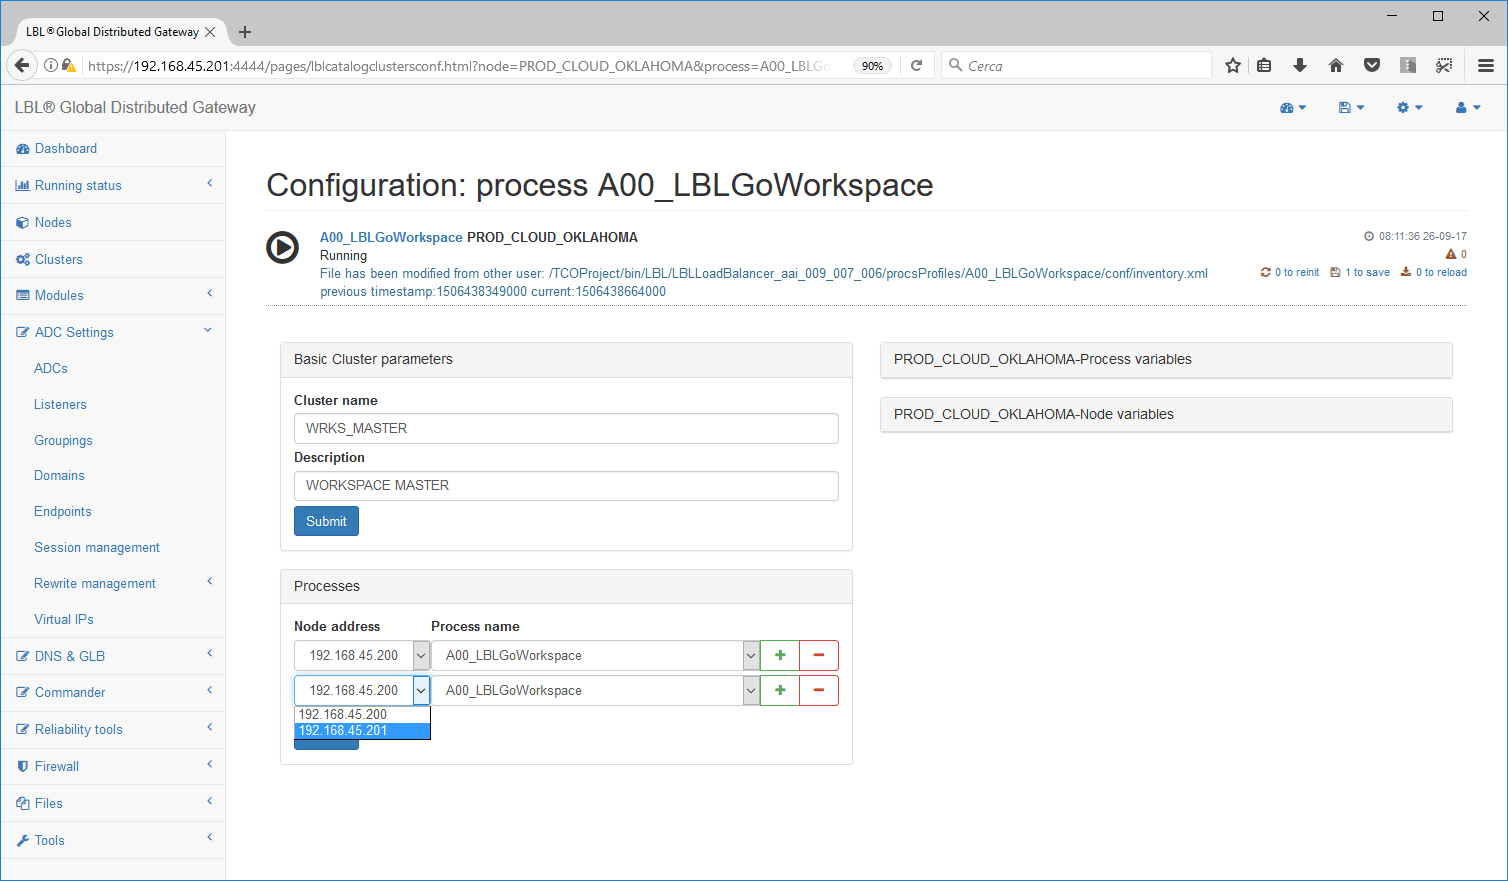
Simply save the configuration to activate the cluster…
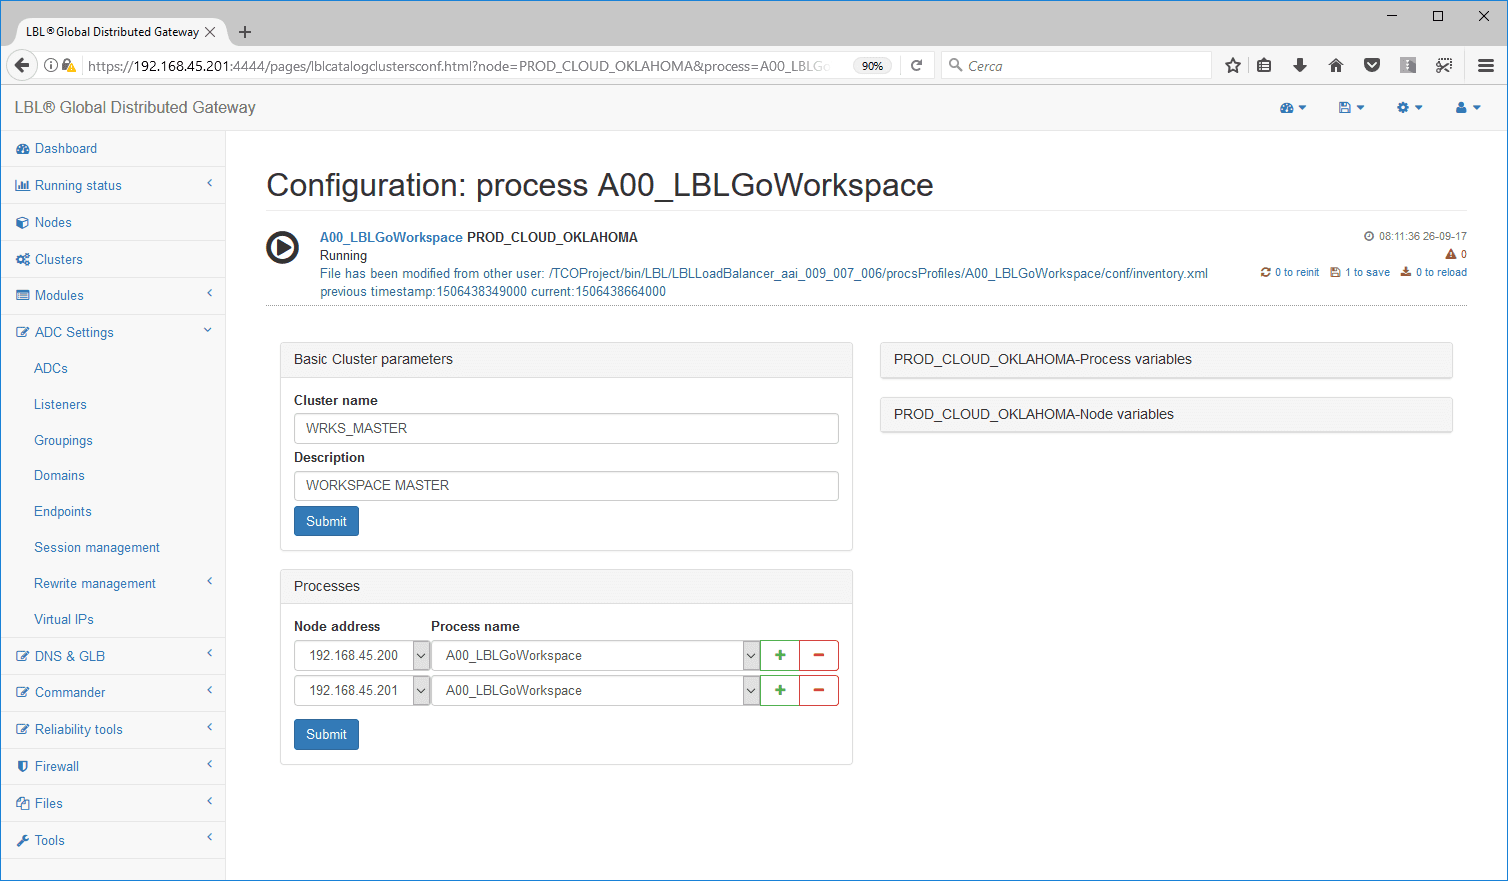
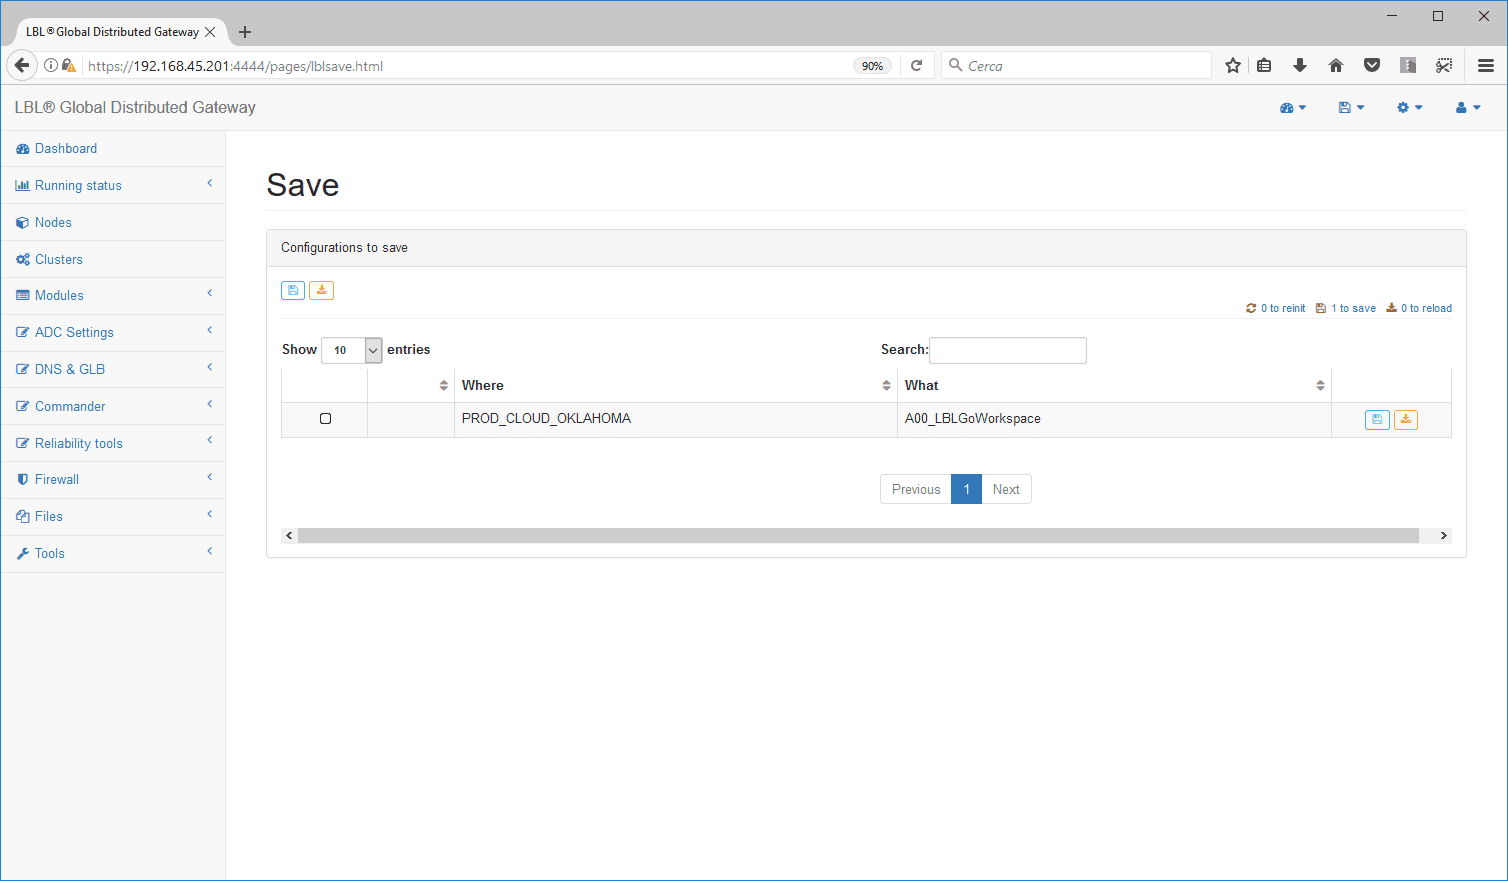
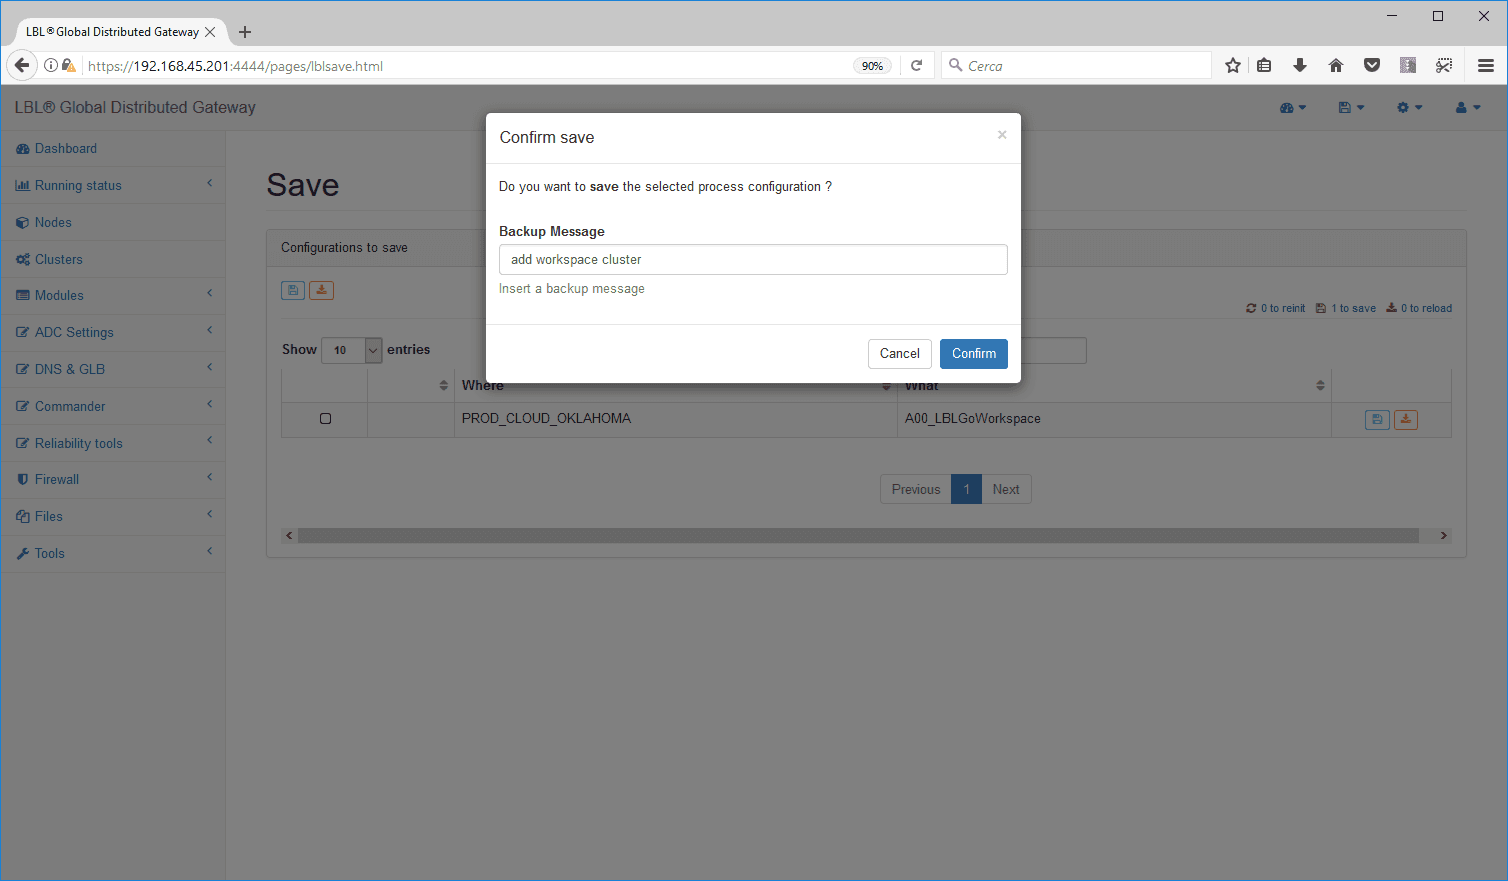
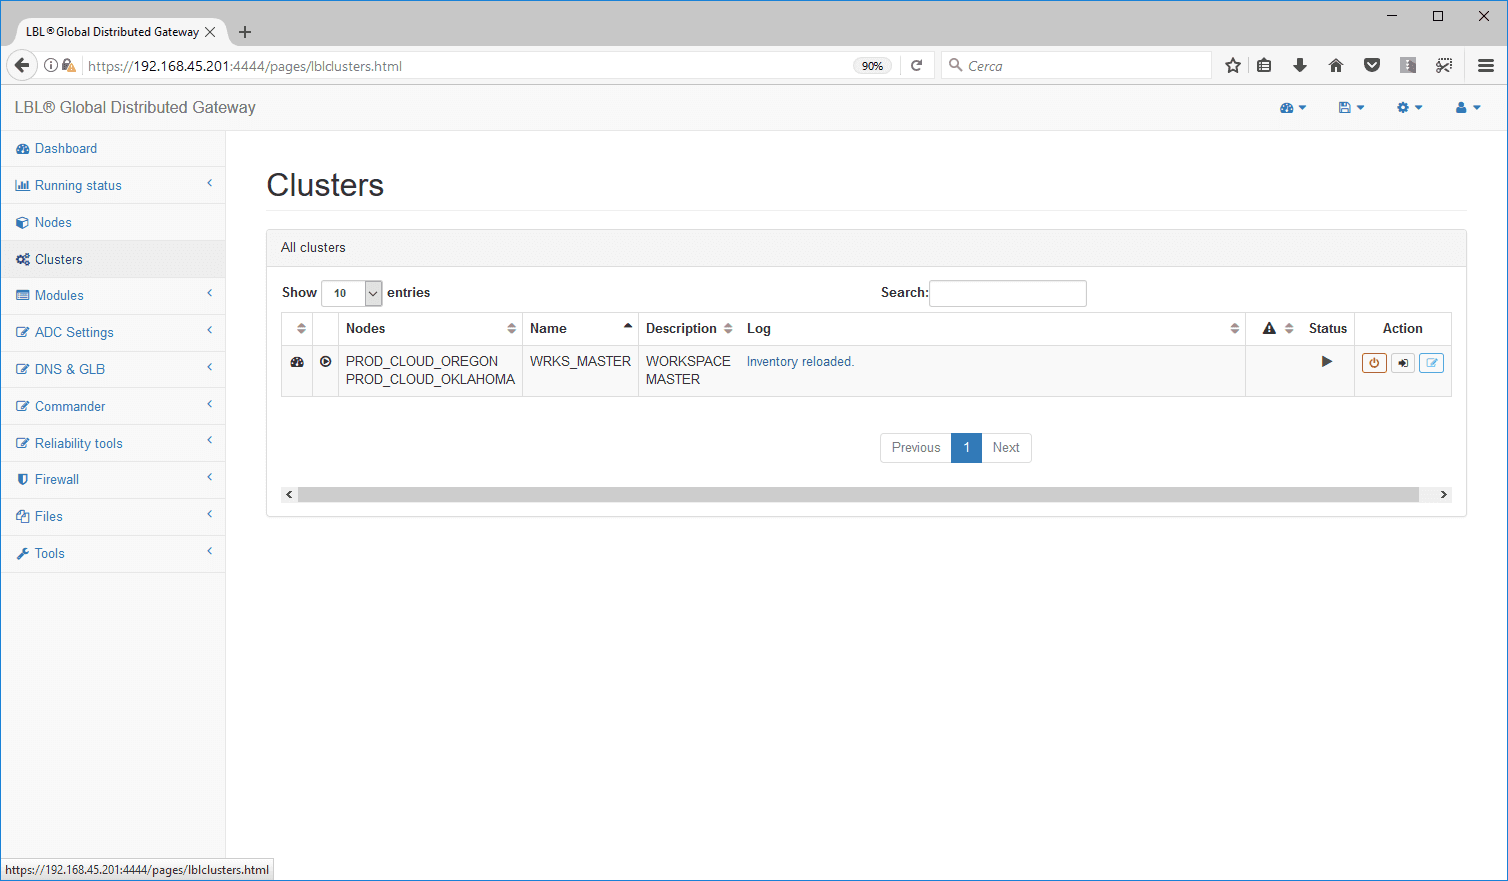
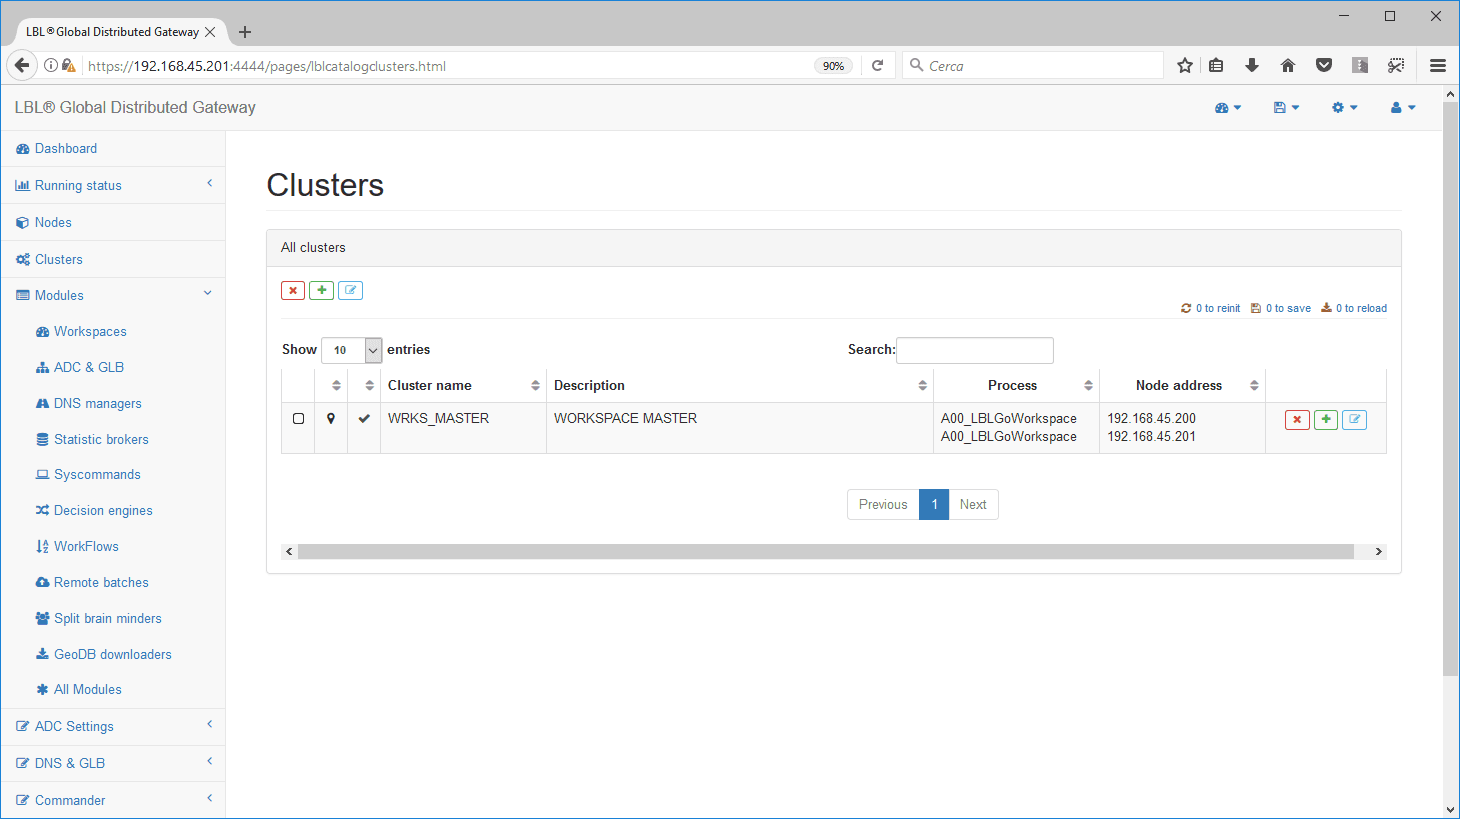
Select Clusters to see the composition of the newly created cluster…
Back on the Dashboard, you will notice that the system detects a configuration misalignment.
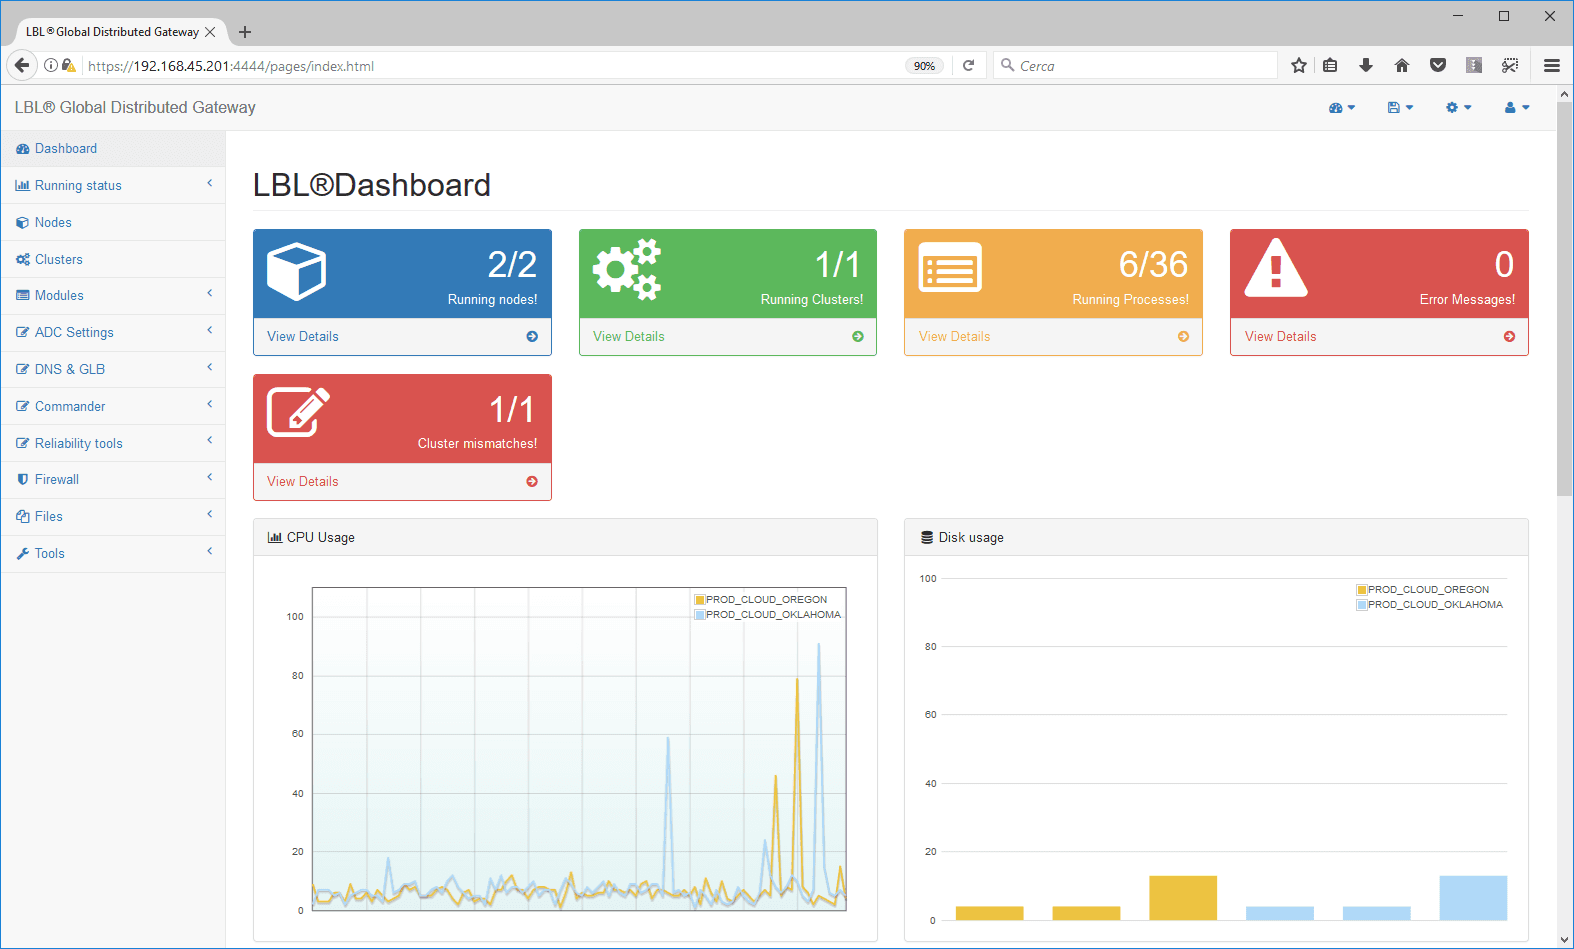
This is because the cluster node on which the configurations were made is not aligned with the configurations of the node that has only just joined the cluster, which must therefore be realigned. Oplon is equipped with a powerful engine that checks the consistency of the configurations of the cluster nodes: if they are misaligned, it shows an error message and then offers the possibility to reconcile the configurations. Select the configuration that you want to reconcile and click Edit.
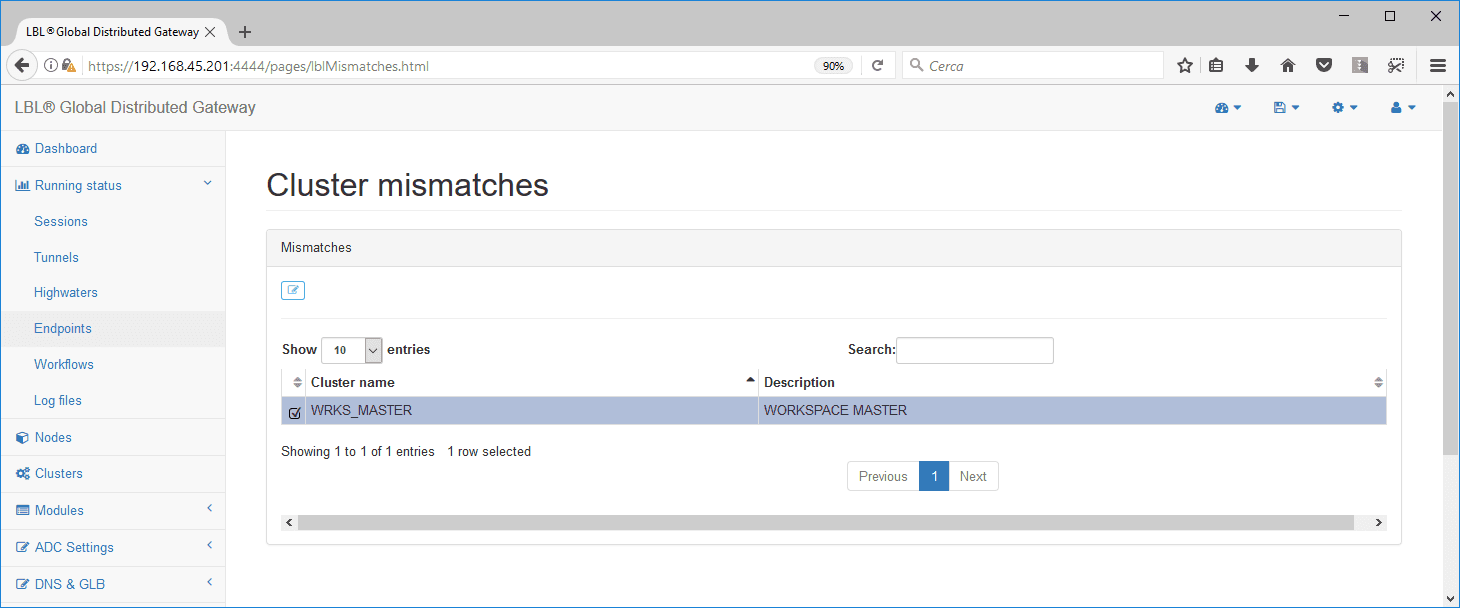
The system shows the misaligned configurations with their characteristics. The operator is asked to select the configuration to start from to align the other nodes of the cluster. In this case, start from Oklahoma, which has the most recent last-modified date and also a larger configuration than Oregon.
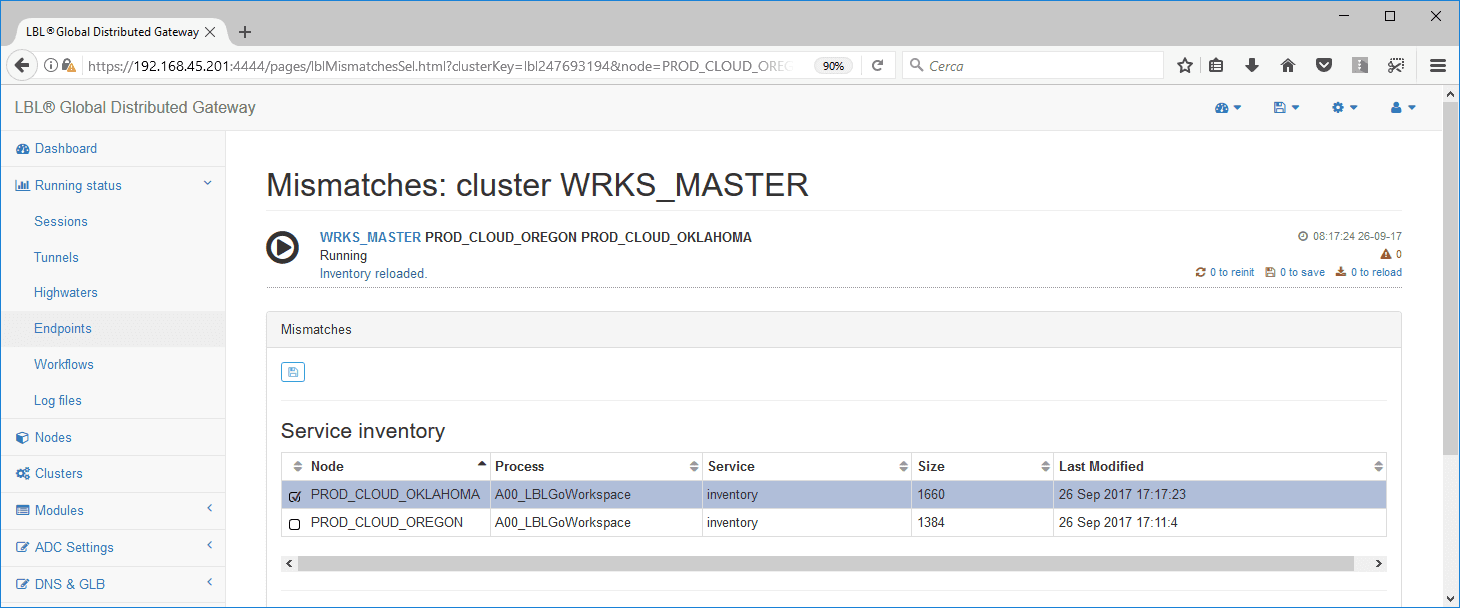
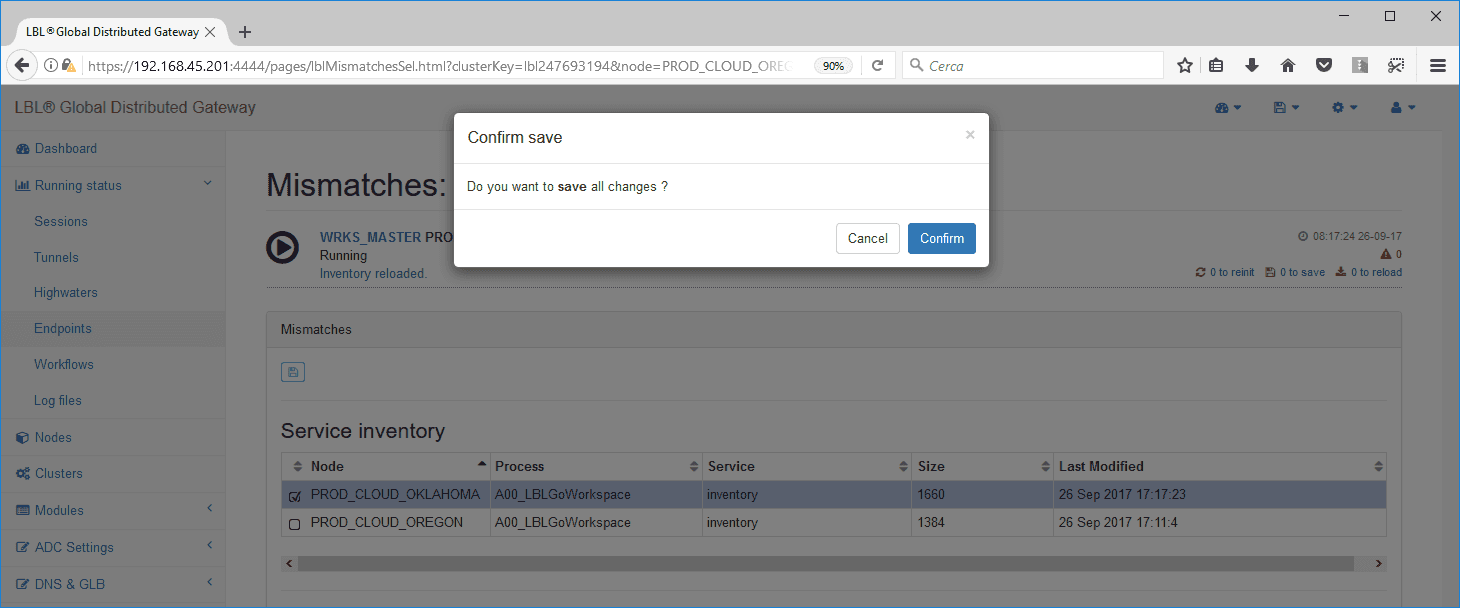
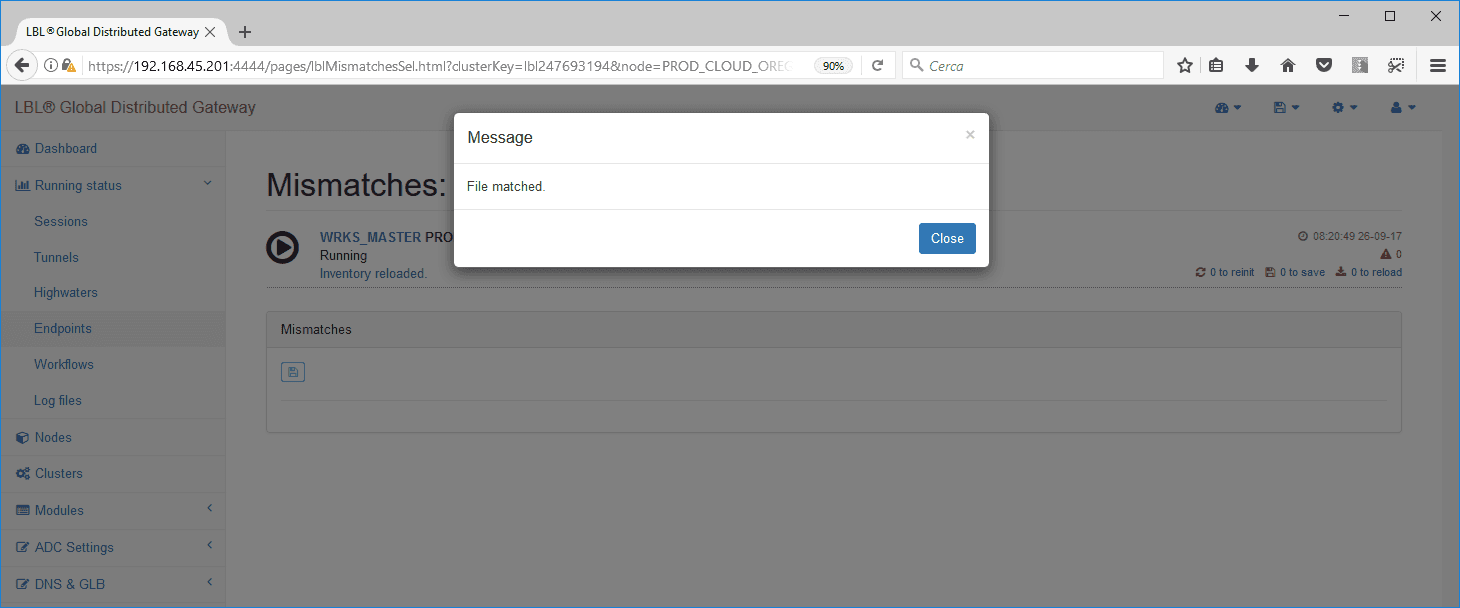
After confirmation, the system runs the consistency check again.
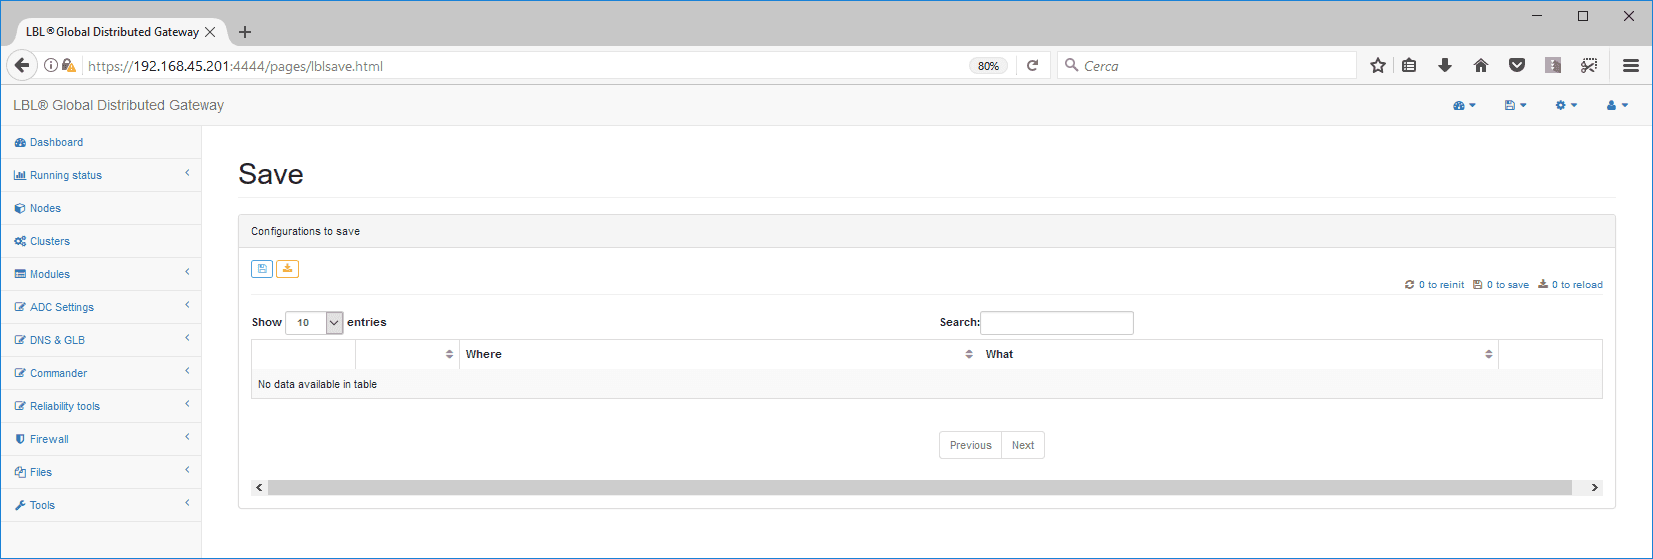
Back on the Dashboard, the inconsistency warnings will have disappeared.
Creating the Oplon ADC Standard HA Cluster
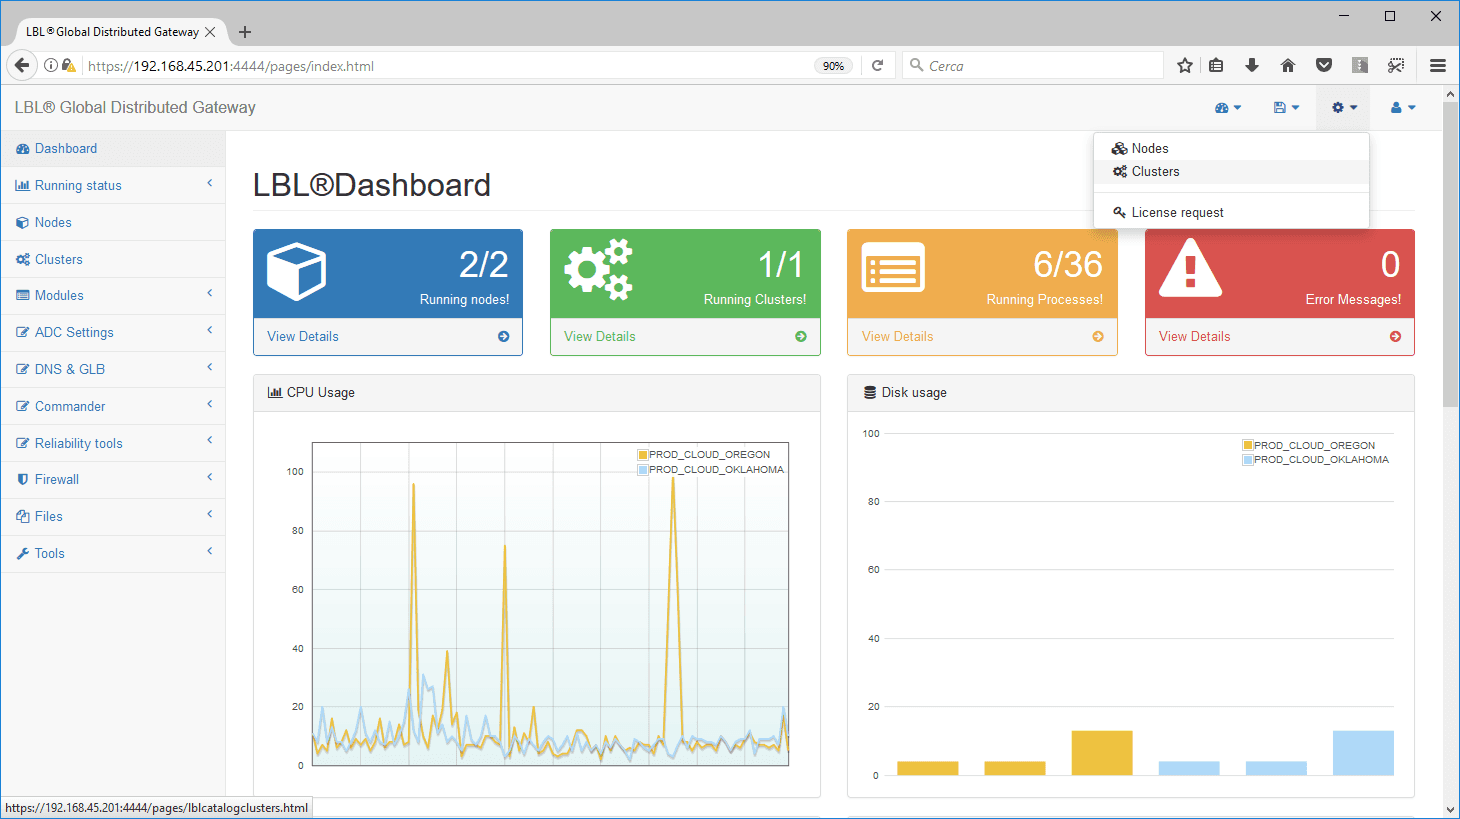
As for the creation of the first cluster, select the settings menu > Clusters.
Click the + button to add a cluster.
Set the cluster name and description.
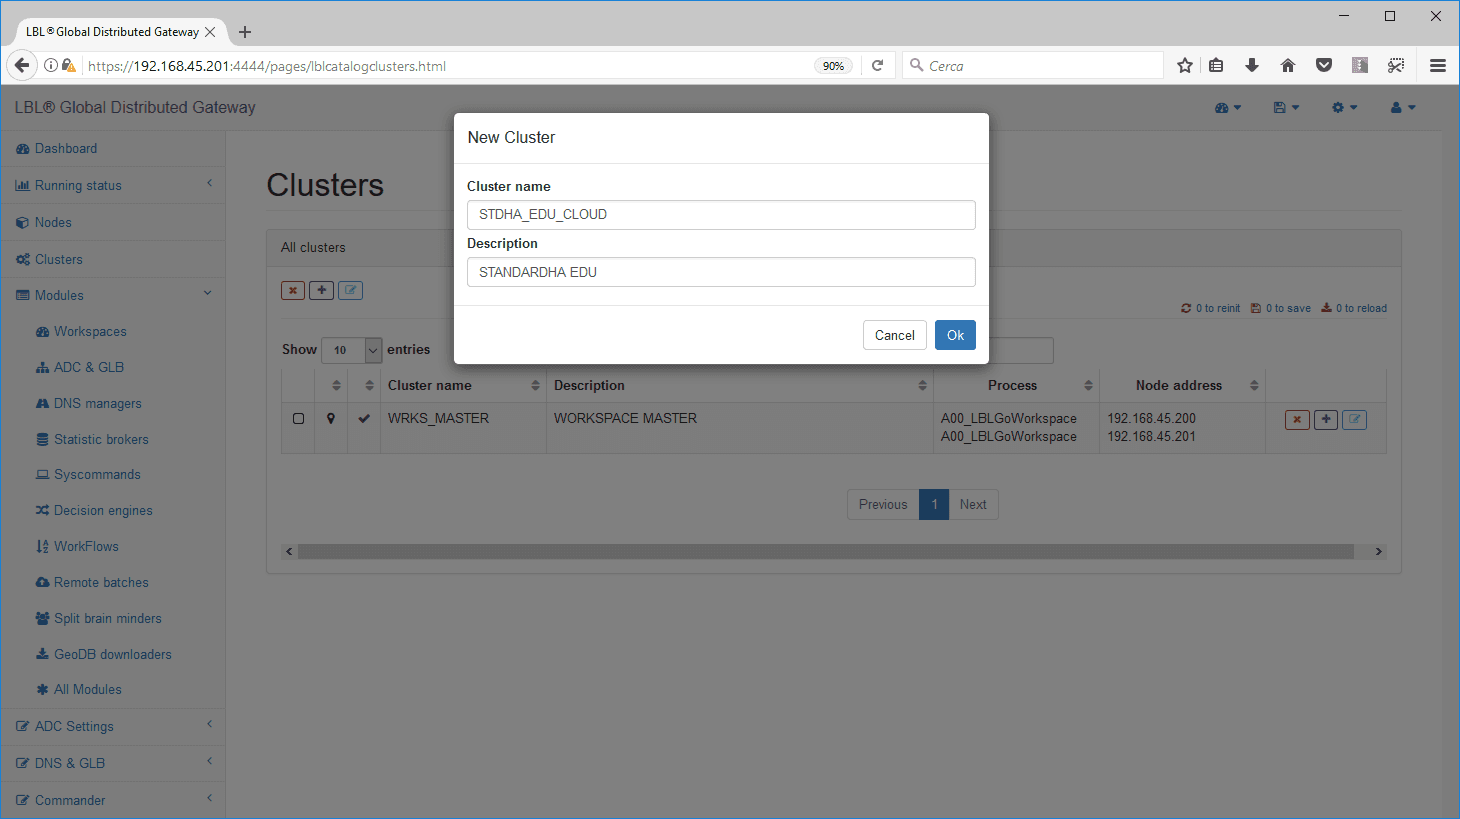
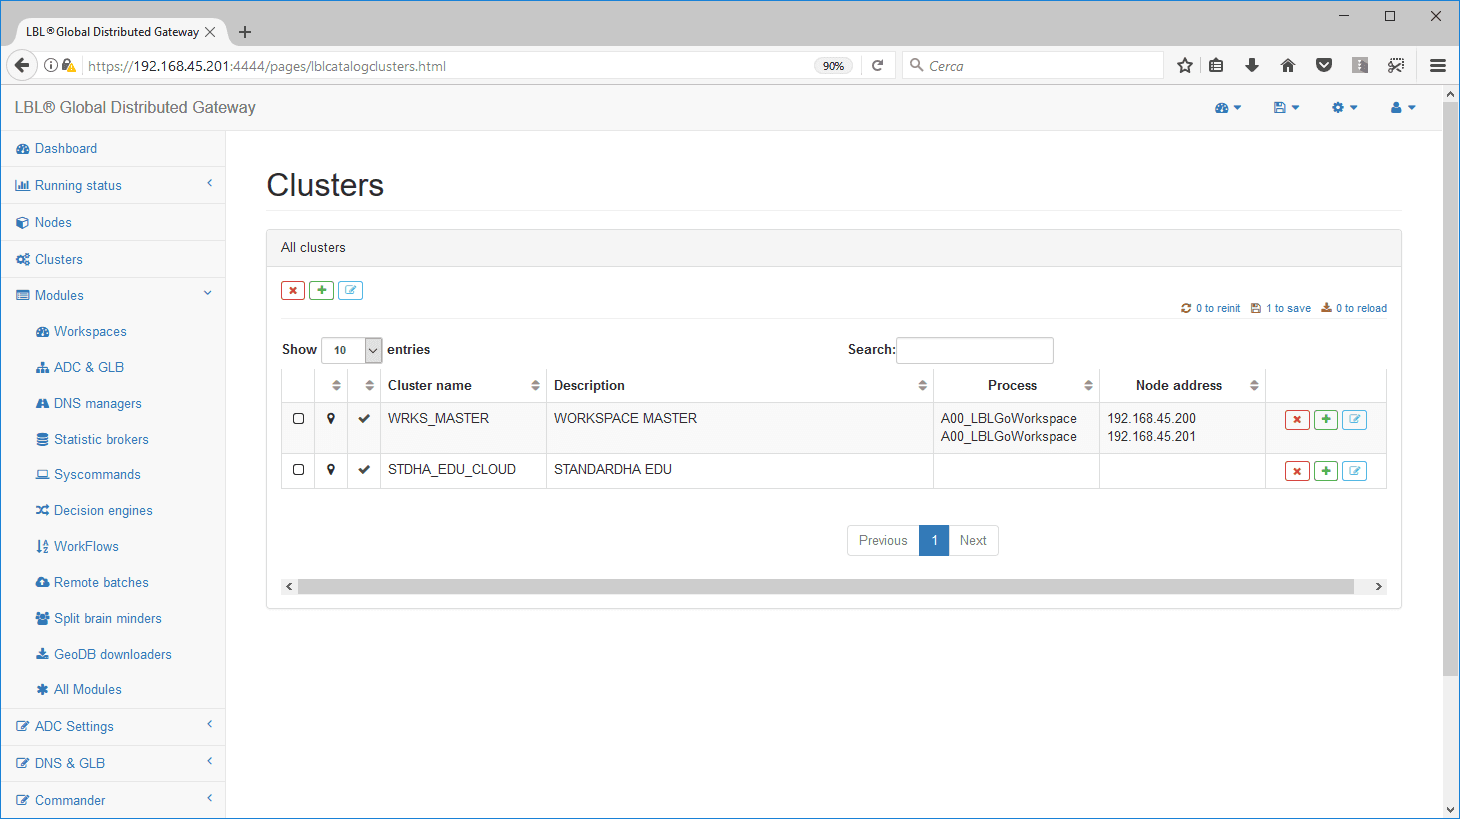
Go to Edit to complete the cluster configuration.
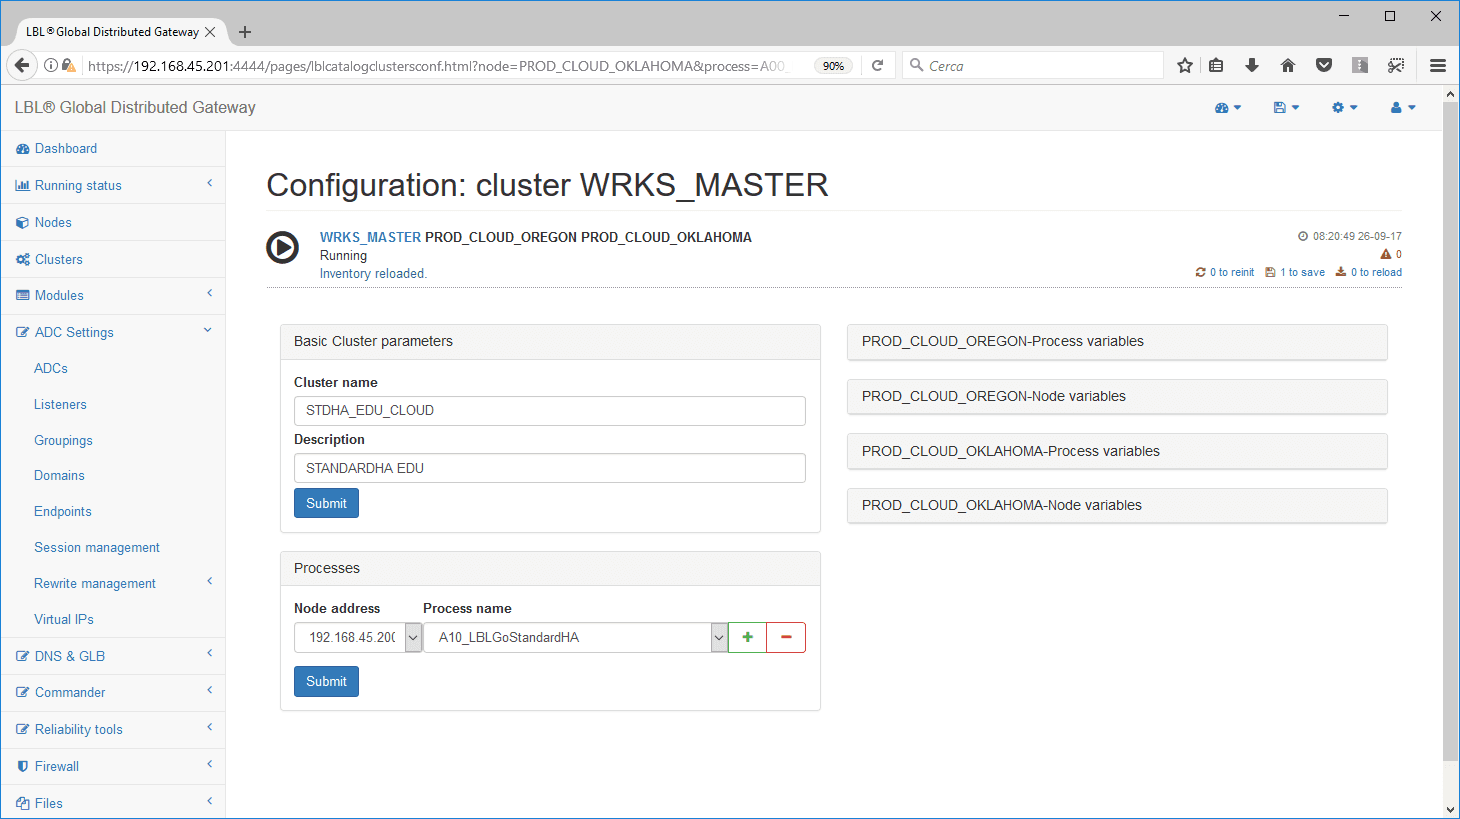
Set the address of the node on which to create the cluster and then the process (module) to add to the cluster.
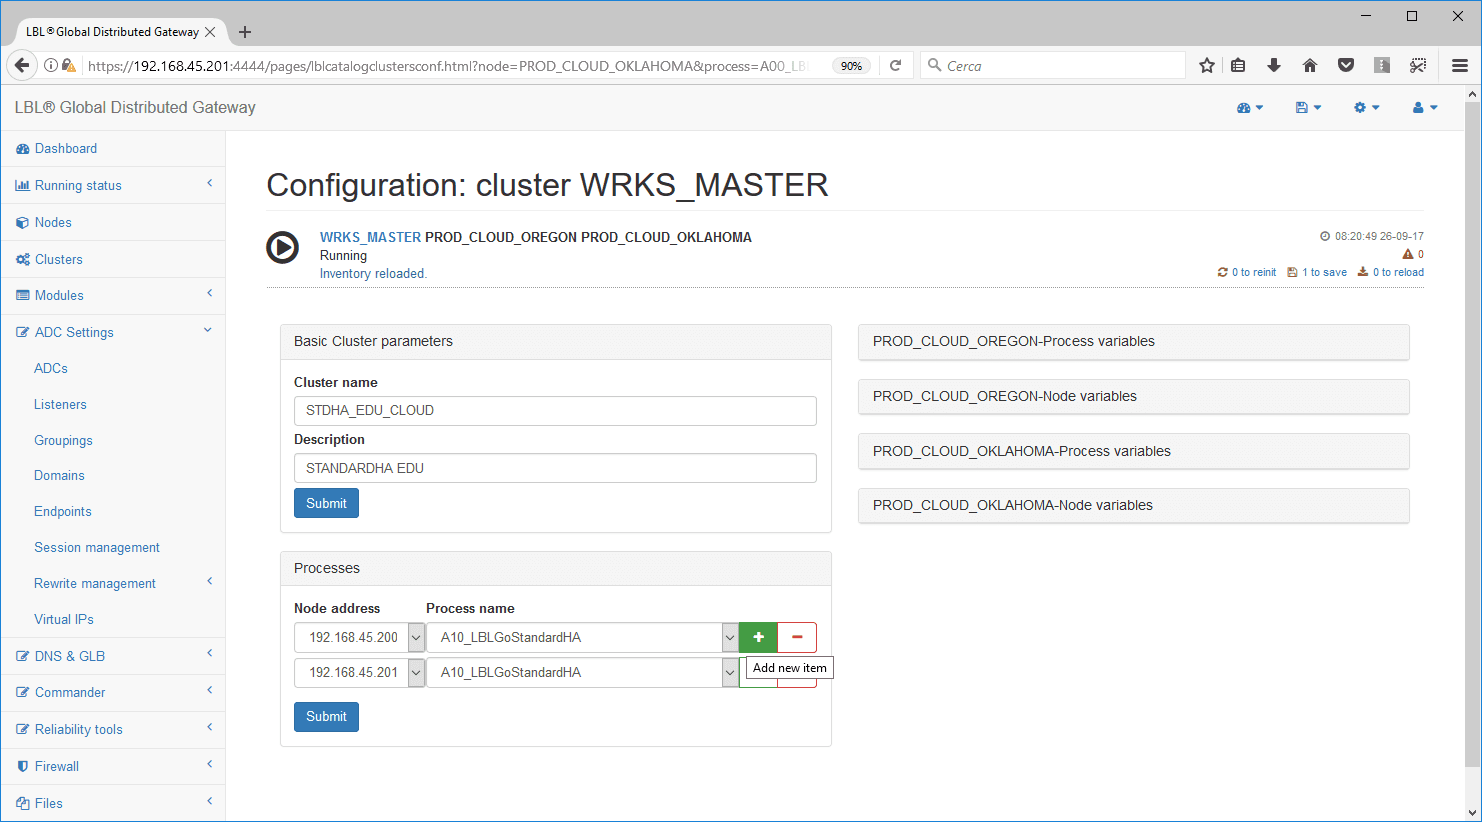
Click Add new item, change the address of the second node and then go to the 1 to save link…
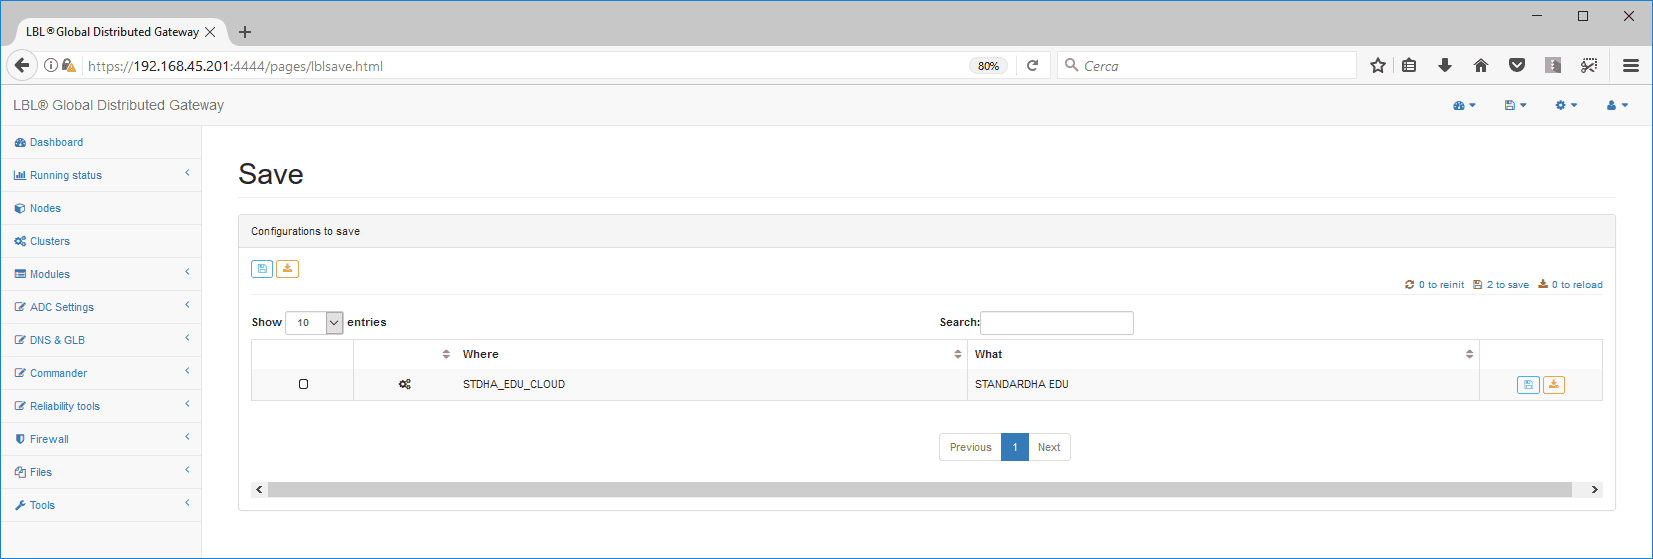
Save the configuration with Save.
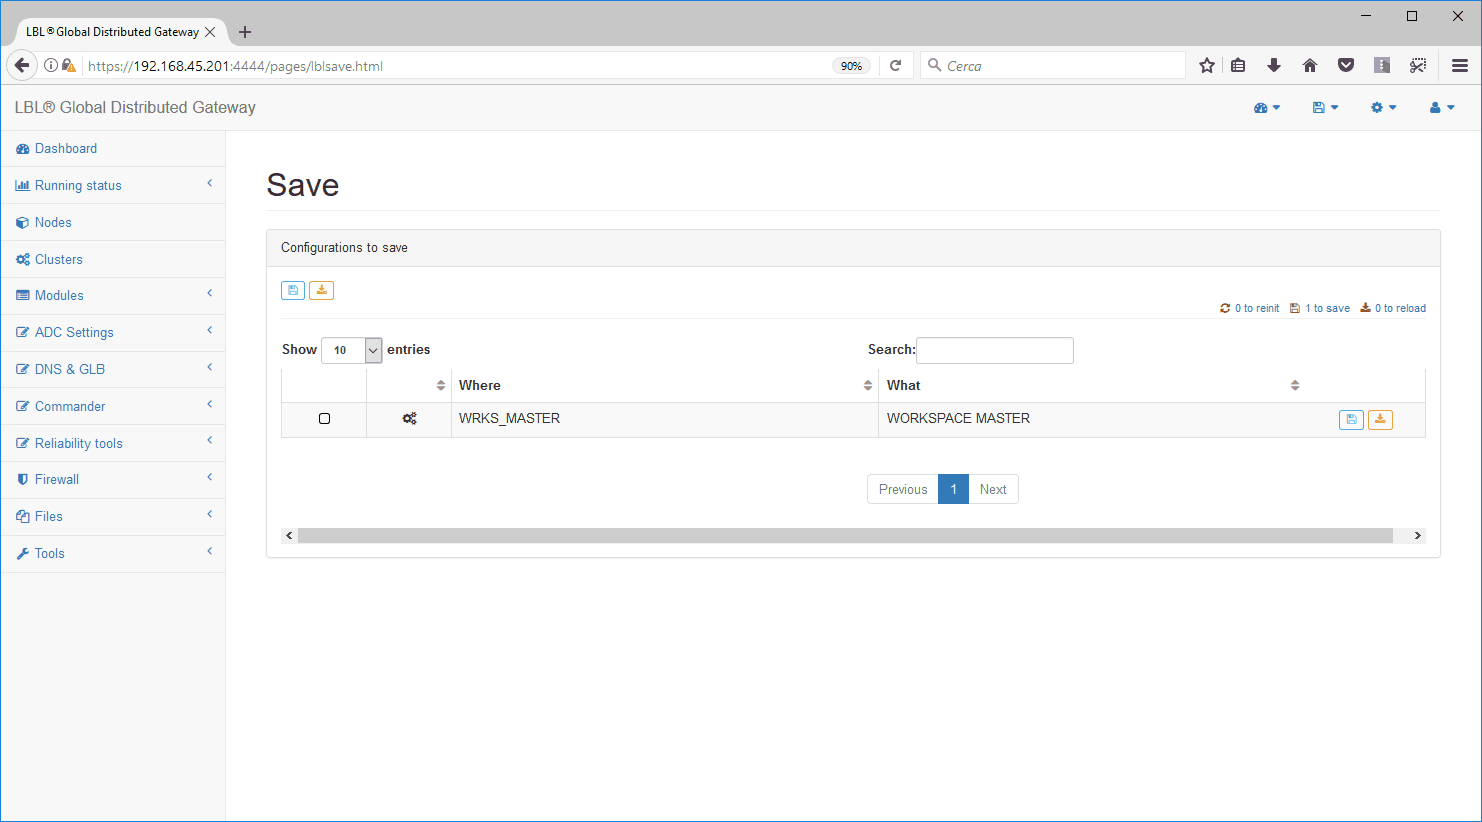
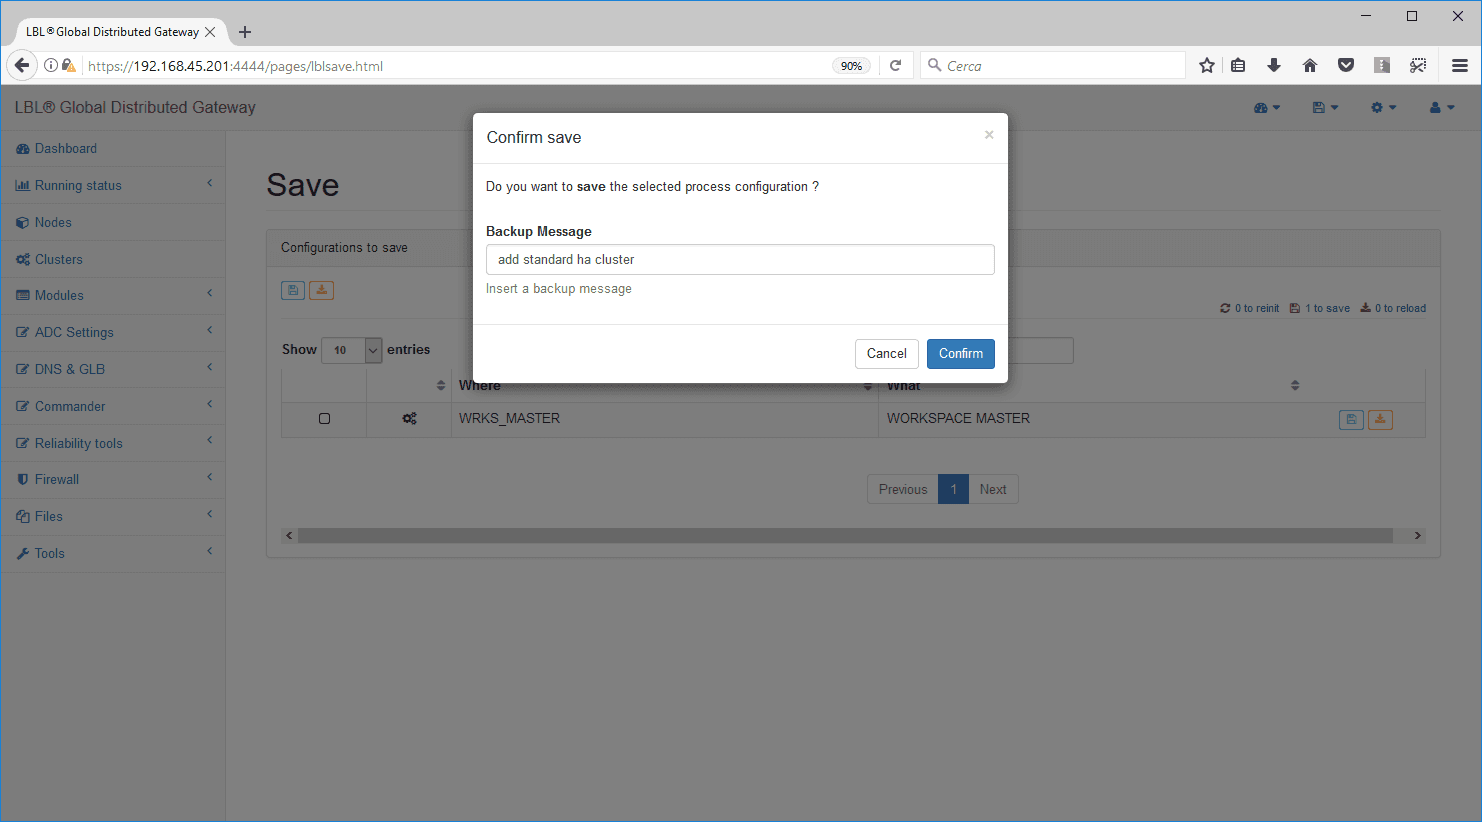
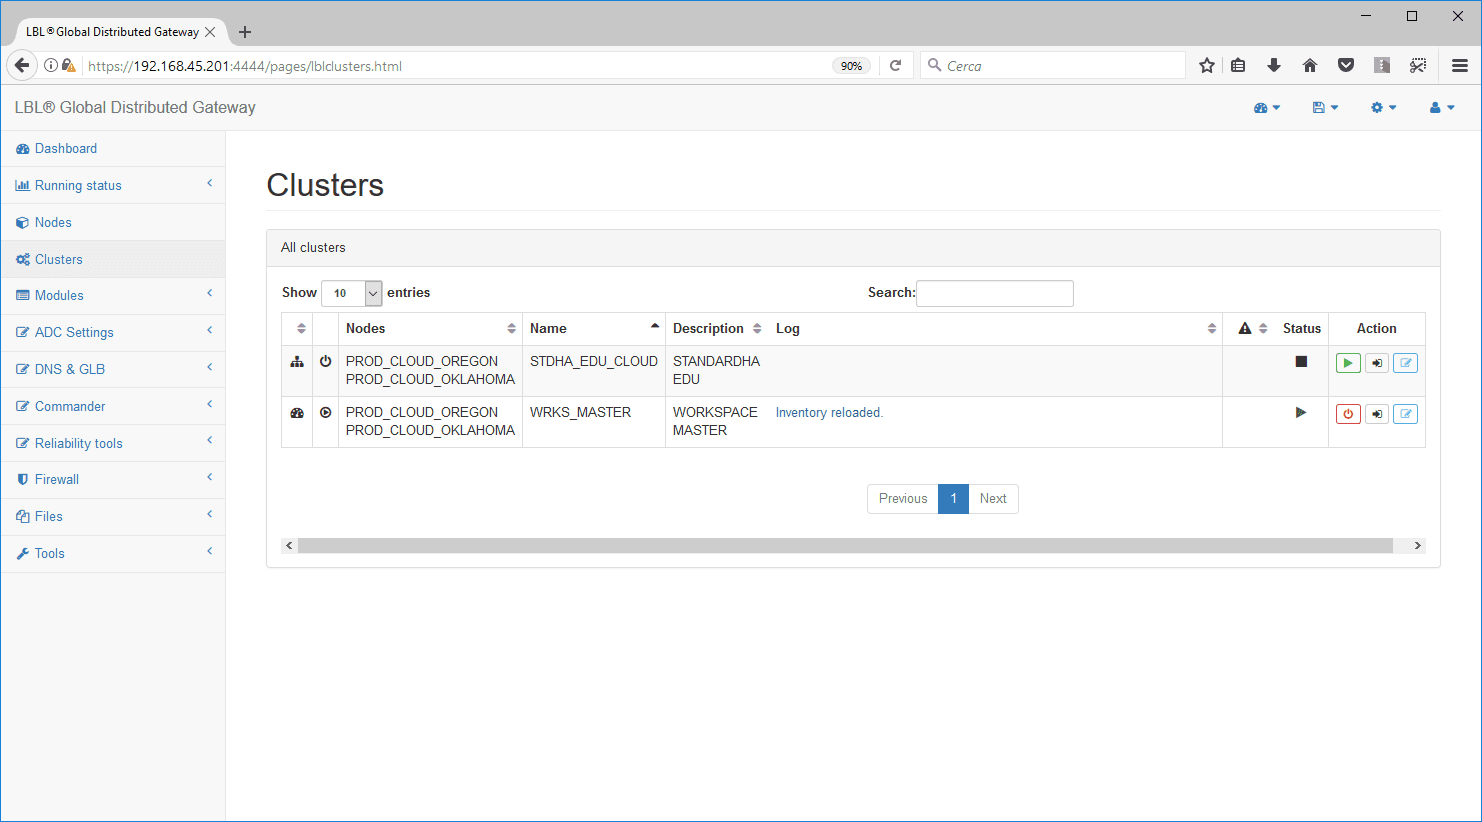
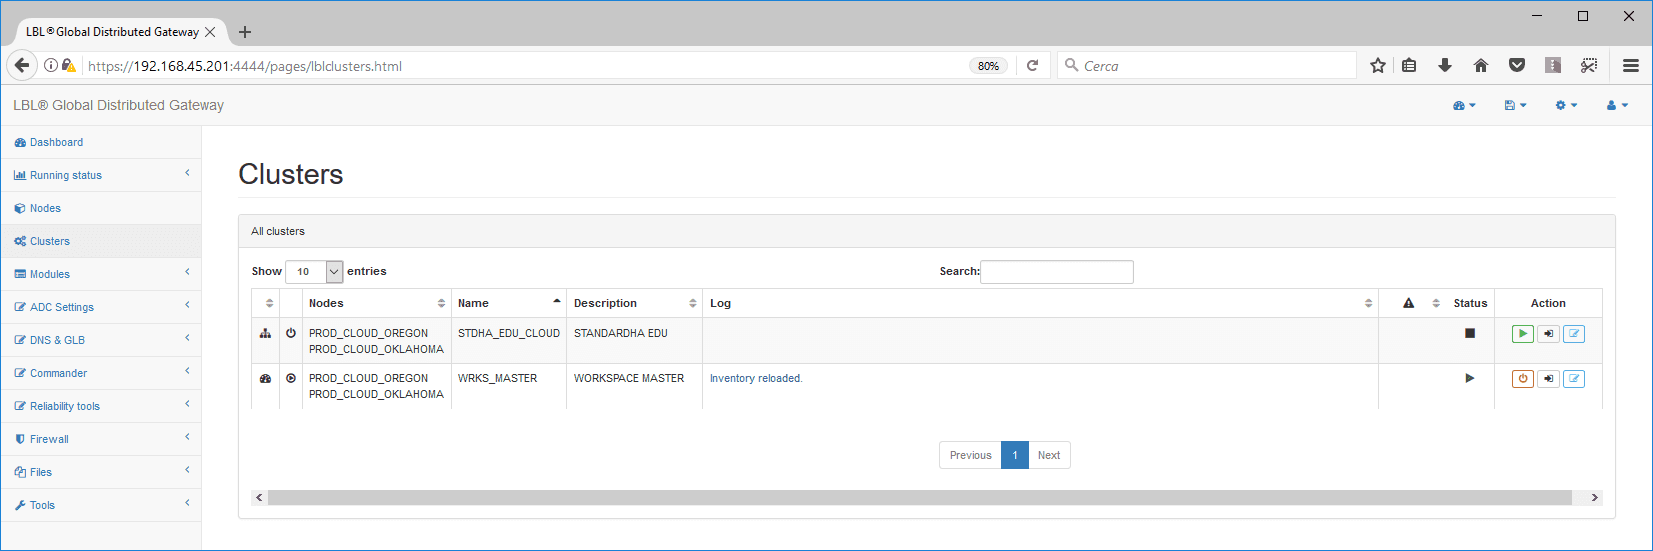
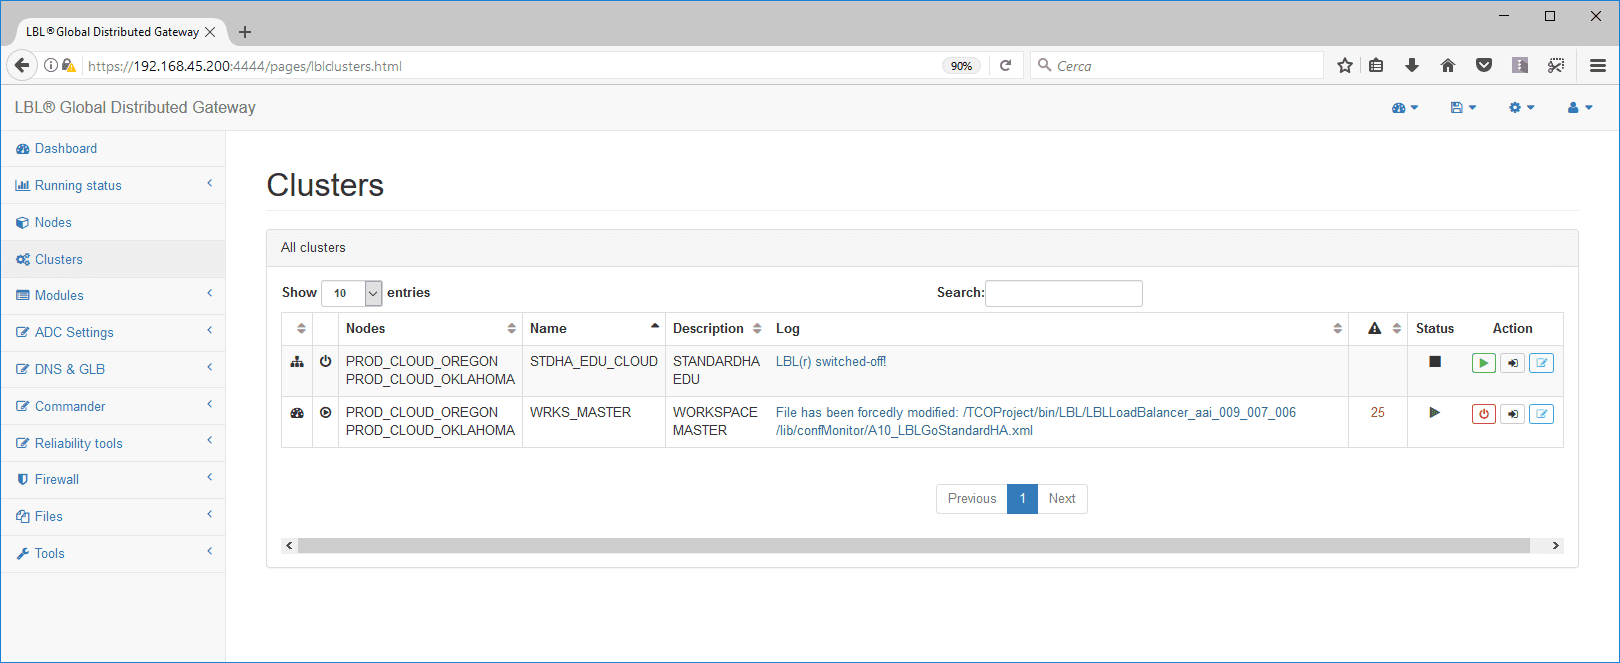
If you select Clusters, you will find 2 clusters, one for the Workspace configurations and one for the Oplon ADC Standard HA cluster.
Overview cluster management
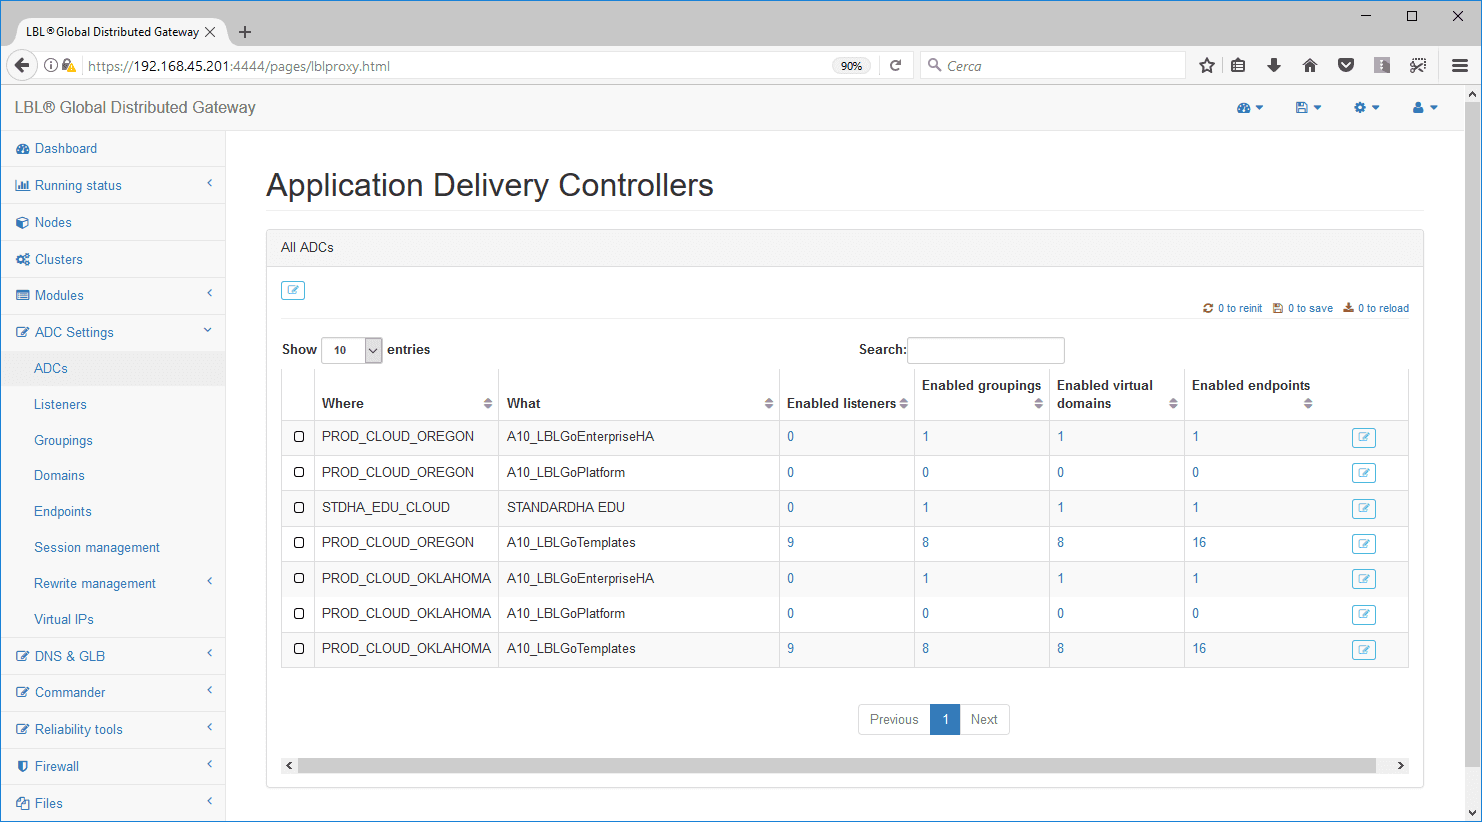
Select ADC Settings > ADCs to see a summary of all the ADC modules
managed by the Global Distributed Gateway. In this case, the ADC named
STDHA_EDU_CLOUD is highlighted: it is displayed as a single “cluster”
object made up of multiple processes that must be managed simultaneously.
For this reason, the system shows a single item.
If you click Edit and then select the cluster…
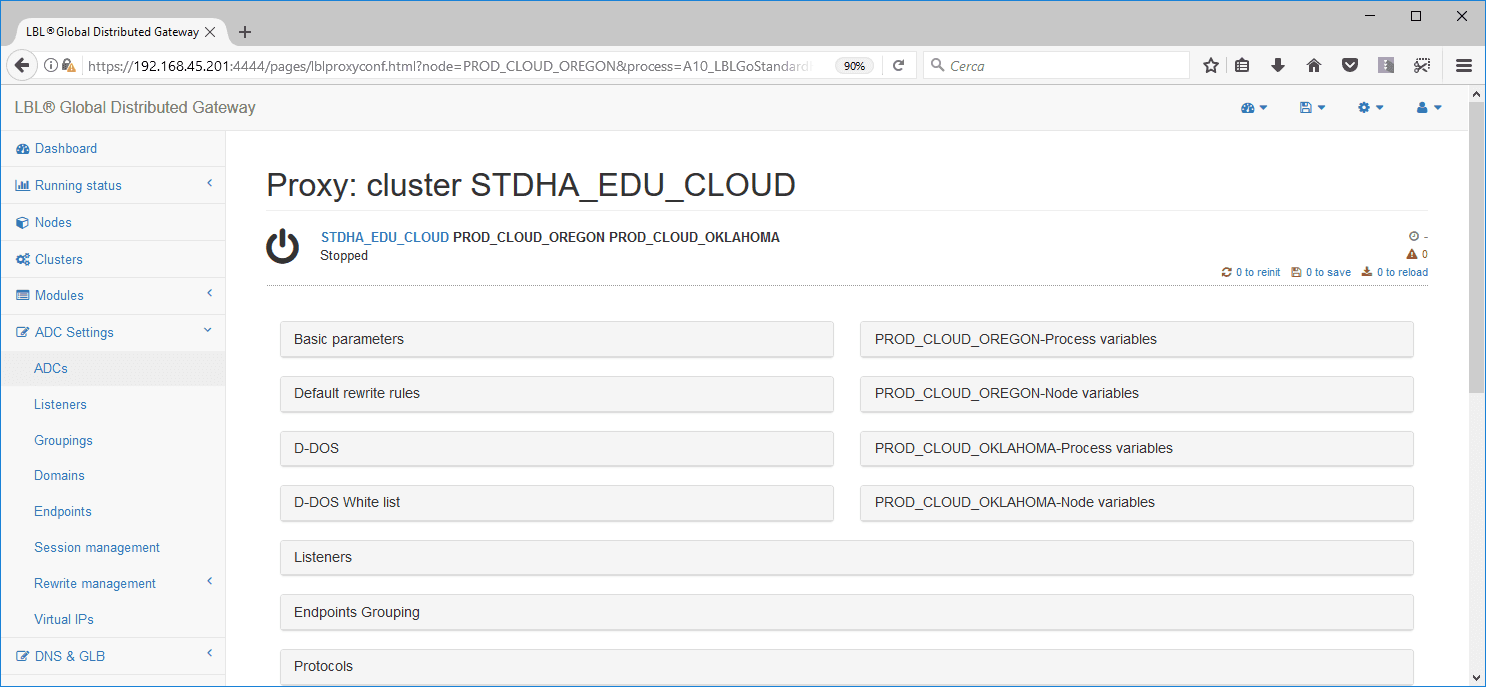
…the system shows a summary of the nodes that make up the cluster, letting you navigate to the specific sections to check their characteristics. If the cluster nodes are running, you can fully explore all the details.
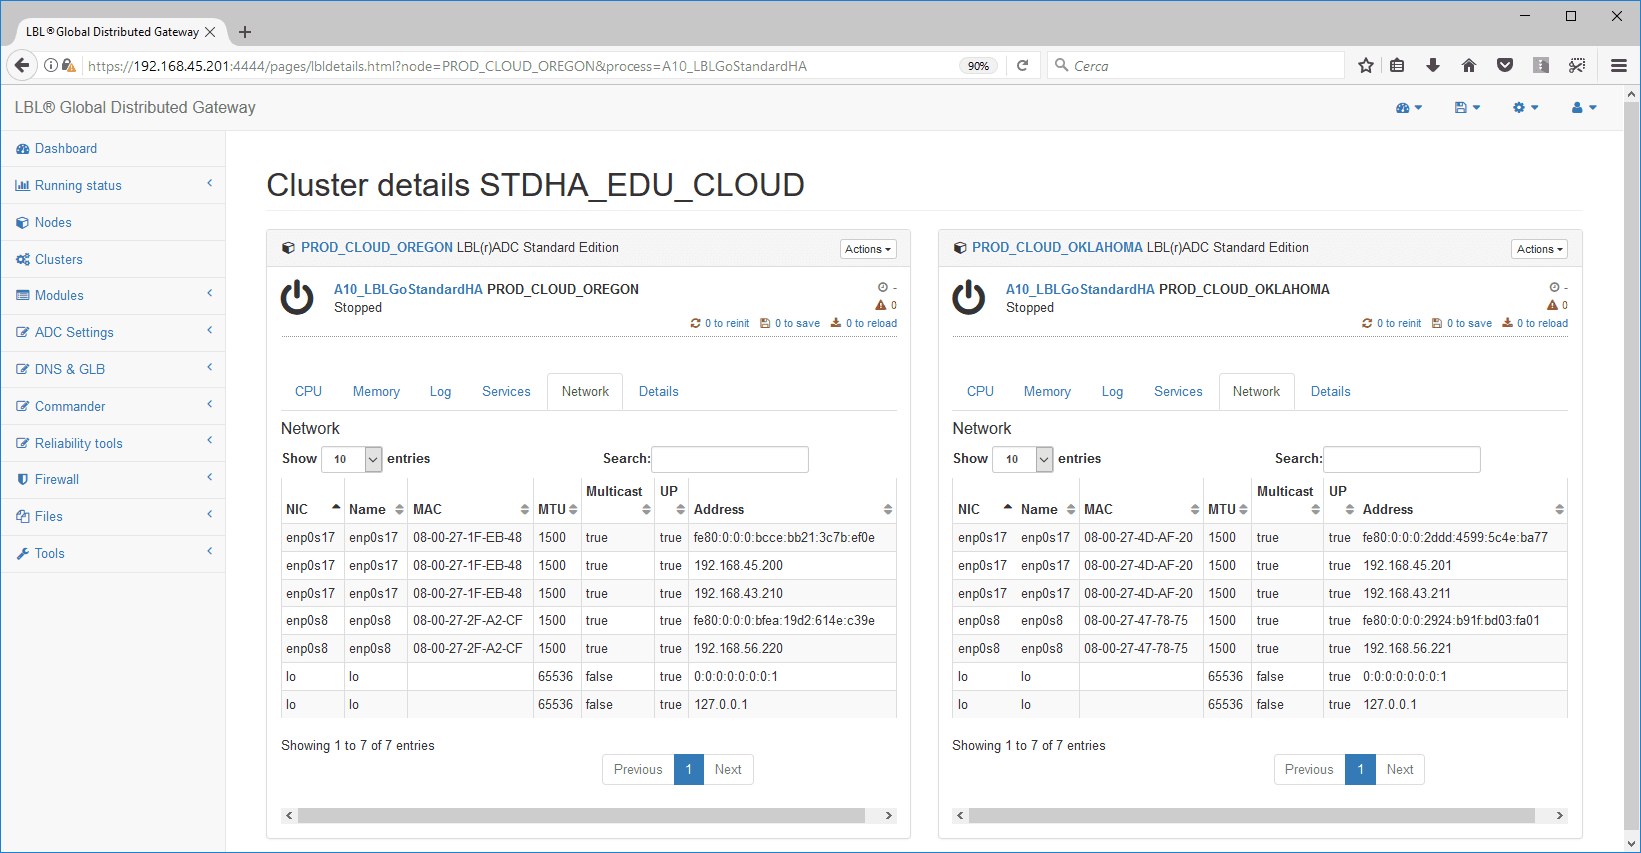
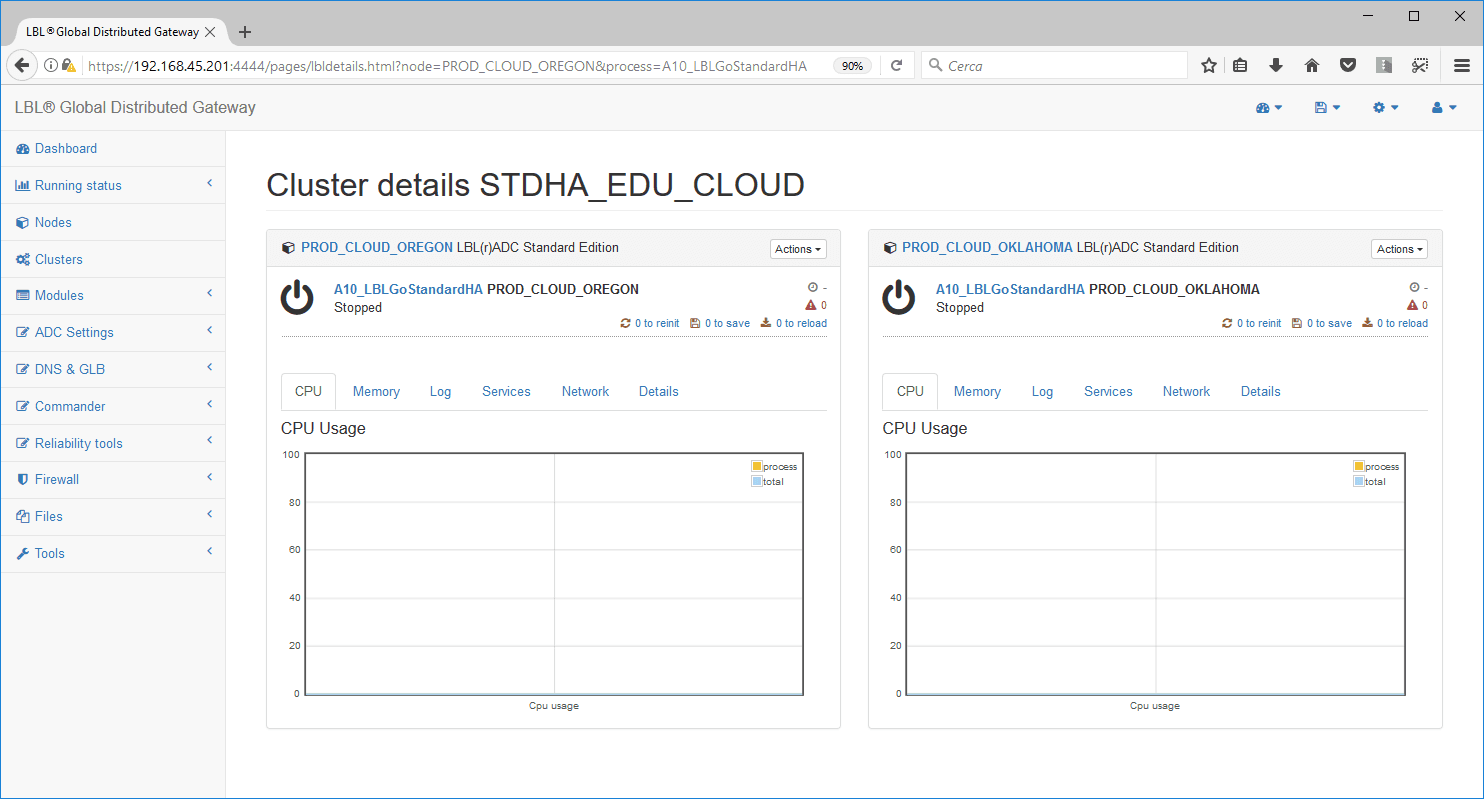
When you change settings in a cluster, all the operations you perform are replicated to all the modules that make up the cluster.
Oplon ADC Standard HA Network Settings
The configurations are therefore kept constantly aligned, transparently for the operator. To configure the “Oplon ADC Standard HA” cluster, go to Edit.
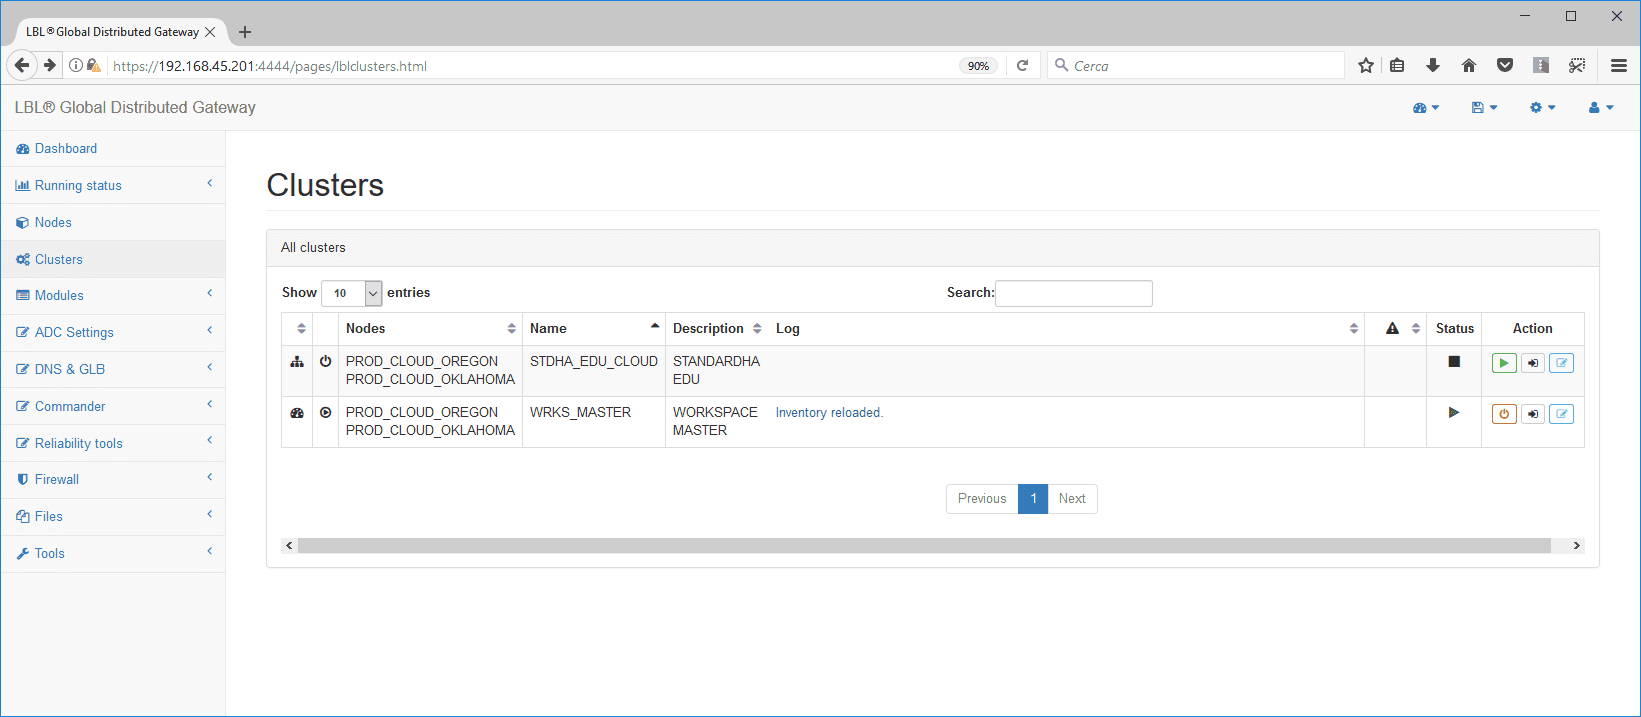
To use the same configurations on multiple nodes with different parameters, such as the IP addresses local to each node, you can use variables, which associate a name with a value locally to a node or process and are always available during setup.
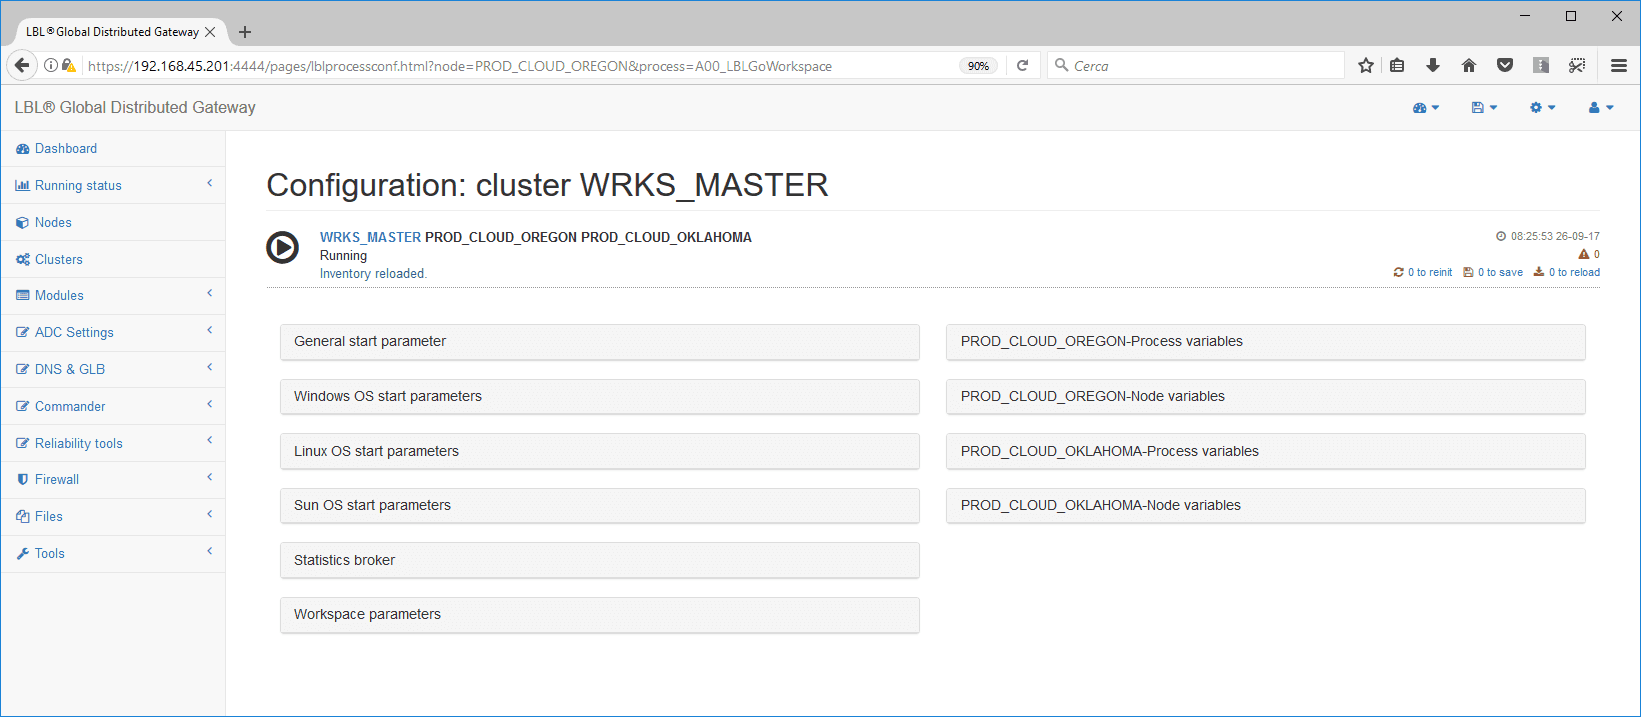
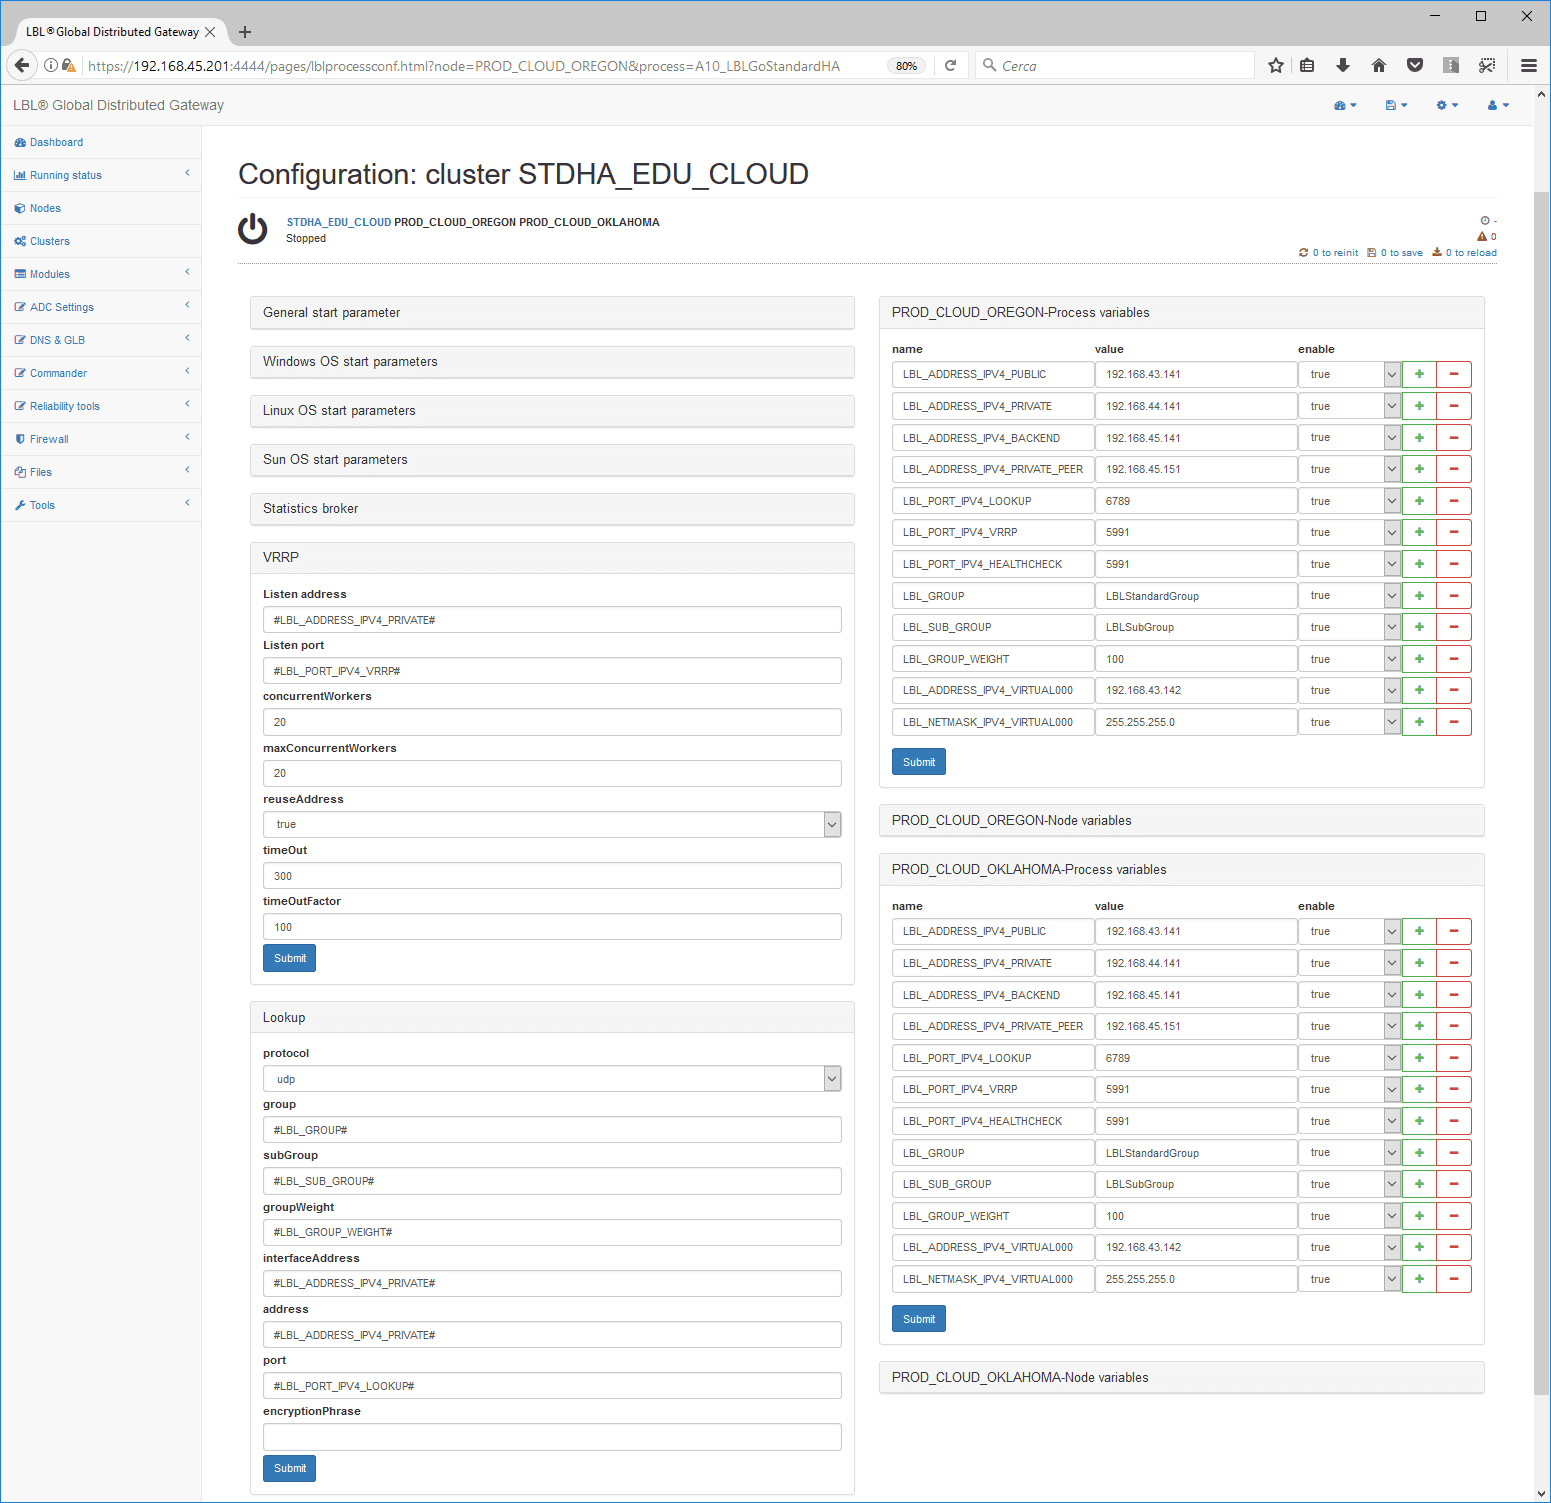
Variables can be of two types: associated with the node or associated with the process/module. In this case, variables associated with the process/module have been set up to describe the public network, the private network and the backend network. They also contain the value of a virtual address and its netmask.
You can use variables in the setup, thus keeping different values for each
process or node but identical configurations. To use a variable, simply
enter the name of the variable between two # characters in the
configuration.
E.g.: #OPLON_ADDRESS_IPV4_PRIVATE#
Oplon ADC Standard HA Heart-Beat Setting
To keep the application cluster consistent at runtime, the nodes that make it up must constantly check each other to determine which one has the master status. The Heart-Beat network serves this purpose: Oplon ADC Standard HA uses the Heart-Beat network to exchange information about the activity status of the individual nodes.
The Heart-Beat network can be set in two modes, Multicast or UDP, and both can be used in encrypted mode.
Multicast mode is very convenient where this protocol is allowed, as it enables the look-up discovery of the nodes belonging to the cluster. To use this mode, you must check during installation whether the protocol is enabled in the datacenter. Otherwise, use the UDP protocol, which is always enabled.
UDP mode is essential on geographic networks or on on-premises or cloud installations where the Multicast protocol is not enabled. The strength of this protocol is that it is always enabled in all circumstances.
UDP Oplon ADC Standard HA Heart-Beat Setting
Setting the Heart-Beat through UDP is an alternative to setting the Heart-Beat through Multicast. If you have already set the Heart-Beat through Multicast, skip this paragraph.
Setting the Heart-Beat through the UDP protocol is required for installations in geographic environments or where the Multicast protocol is not available.
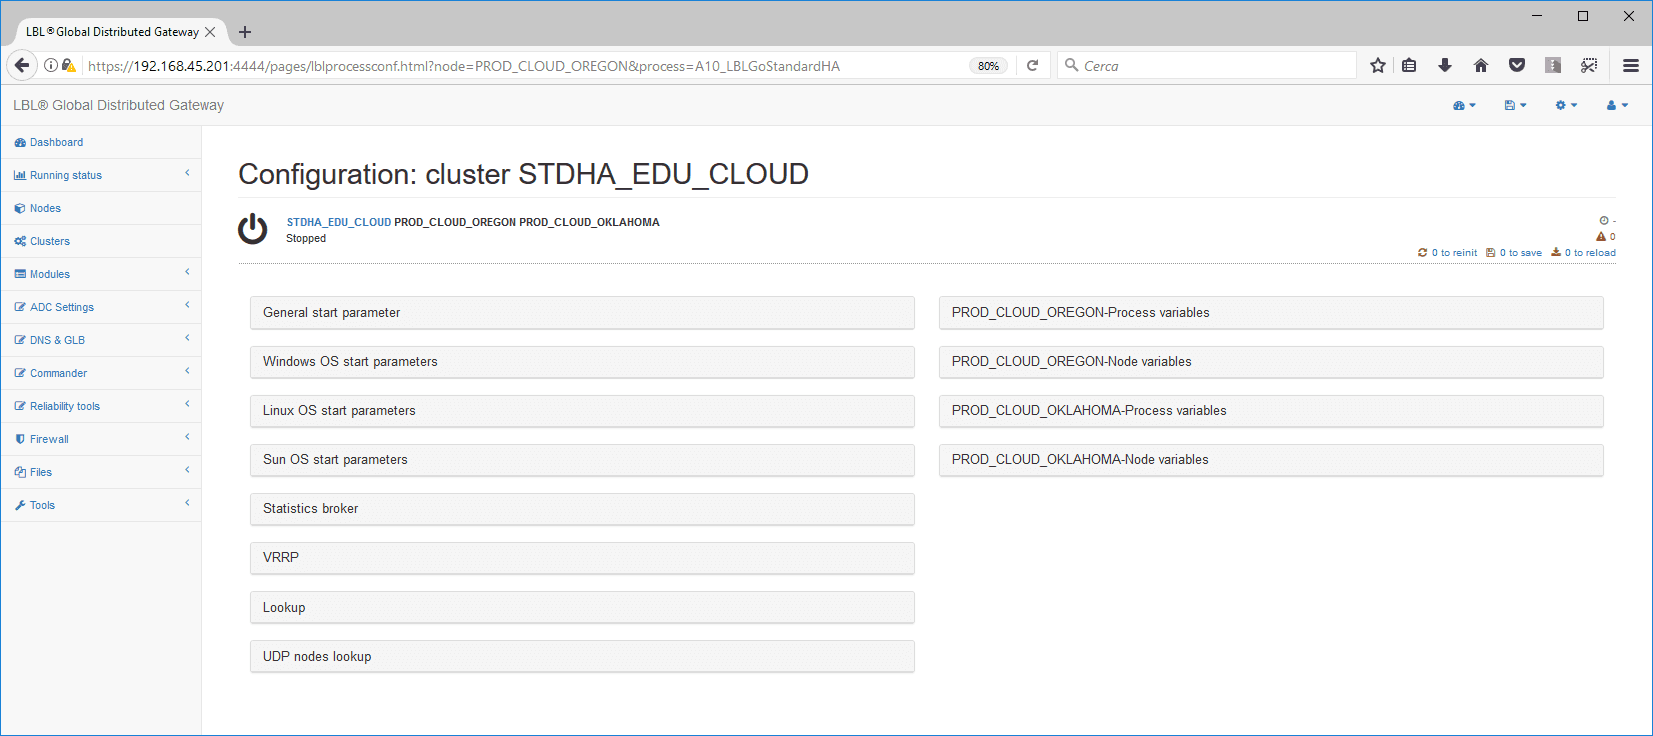
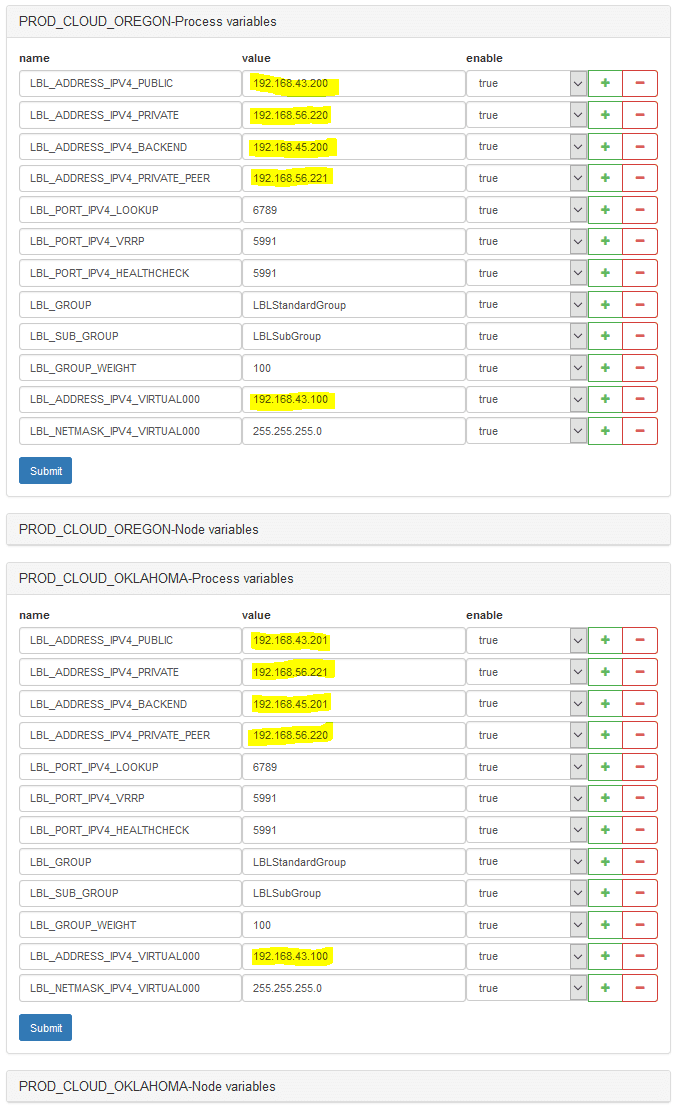
Change the values according to the network schema…
In the Lookup panel, the UDP Heart-Beat protocol is set by default. All the other parameters have already been set in the variables, so no further operations are needed.
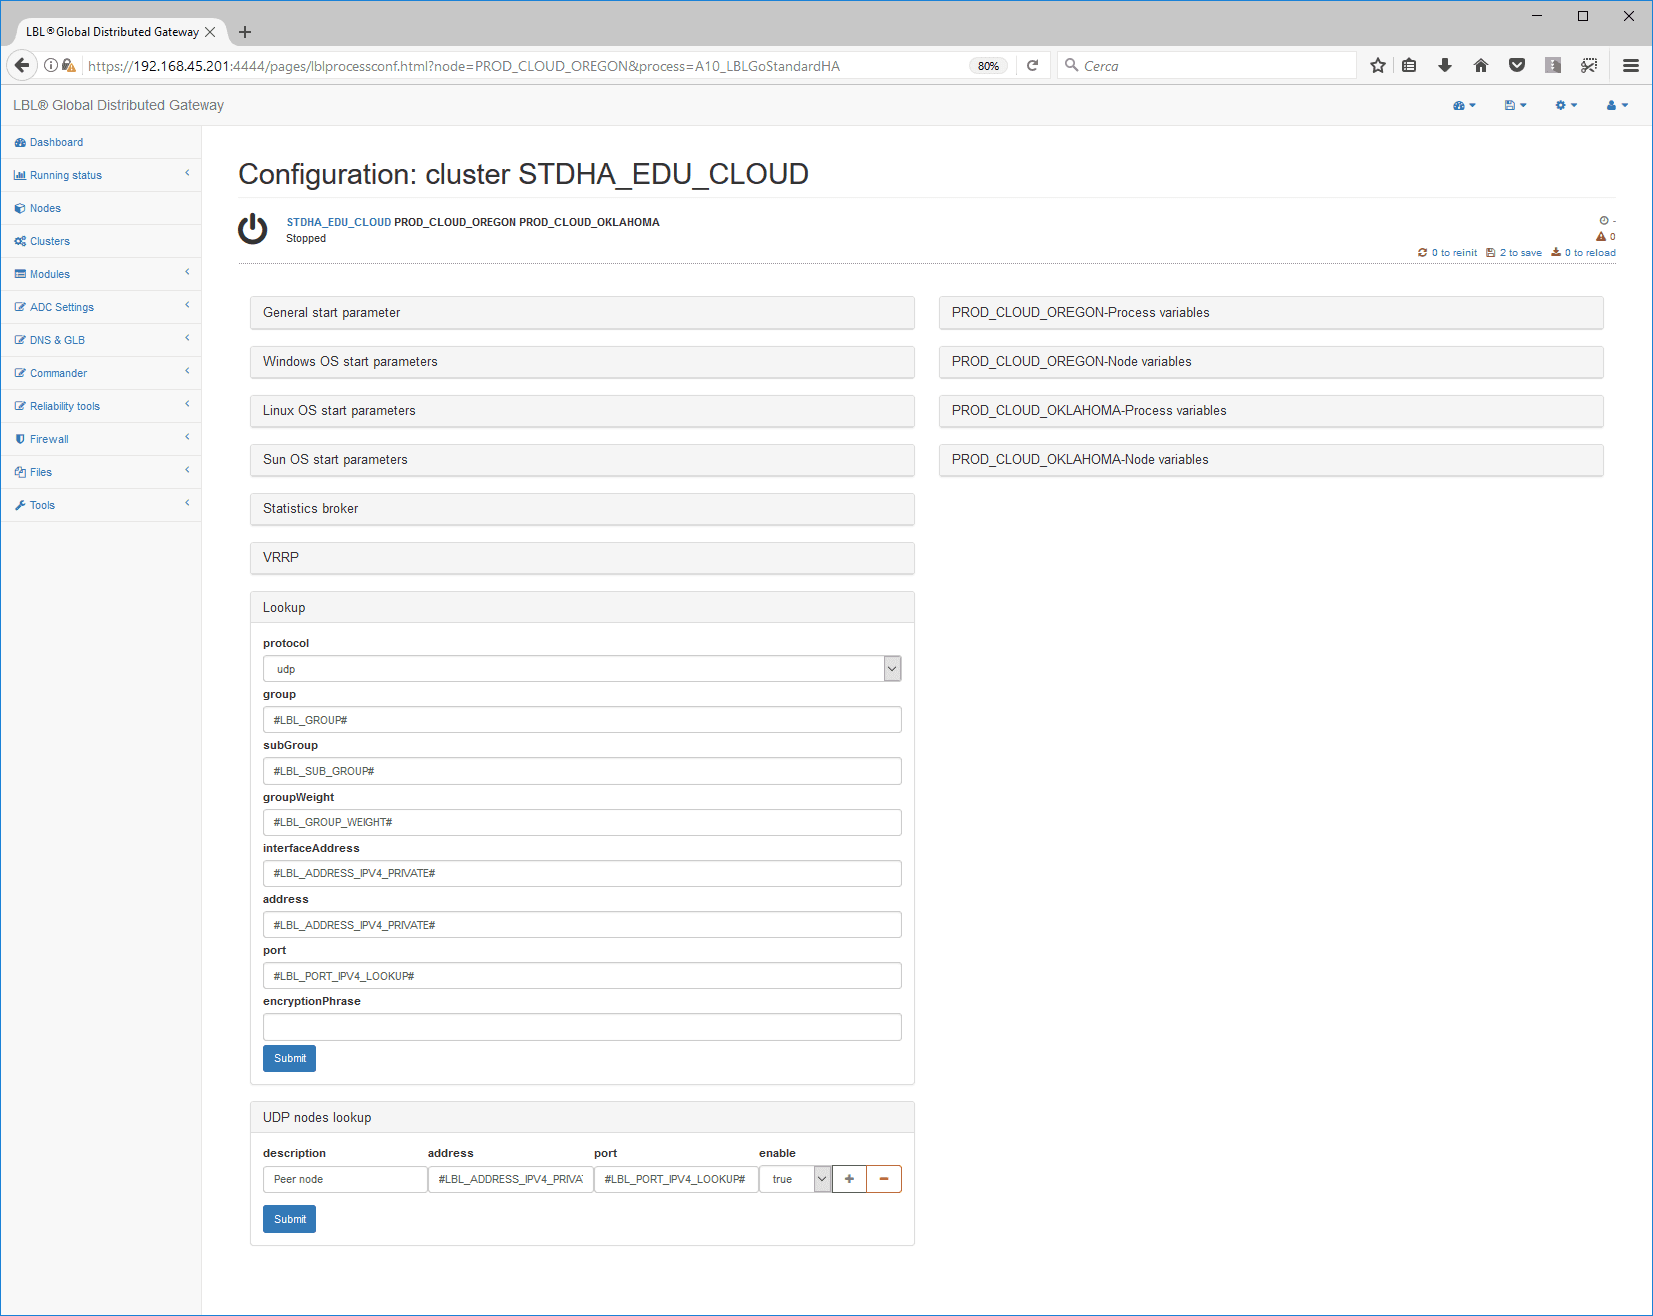
Unlike Multicast, which can perform an automatic lookup-discovery, with UDP
you must specify the peer nodes that make up the cluster. Since these
parameters differ from node to node, a variable previously set in the
process/module variables already contains the address of the peer node of
the cluster: OPLON_ADDRESS_IPV4_PRIVATE_PEER.
For clusters with more than two nodes, add as many variables as the additional nodes of the cluster and then add them to the UDP nodes lookup panel.
Save the configuration…
MULTICAST Oplon ADC Standard HA Heart-Beat Setting
Setting the Heart-Beat through Multicast is an alternative to setting the Heart-Beat through UDP. If you have already set the Heart-Beat through UDP, skip this paragraph.
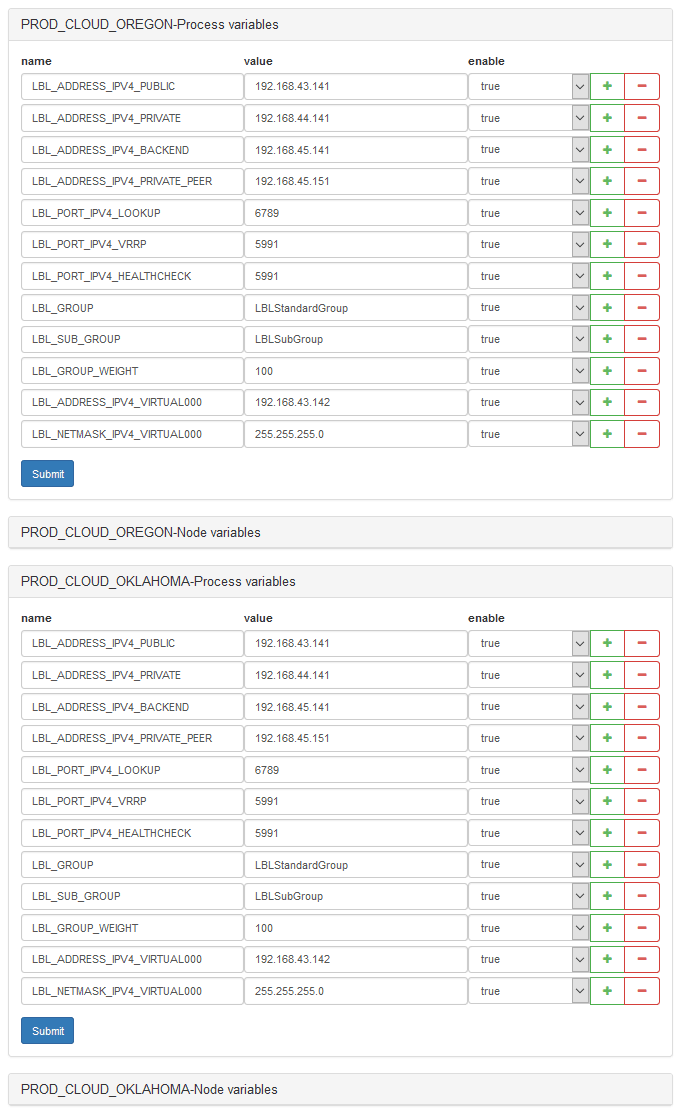
To set the Heart-Beat through Multicast, simply change the values of the process variables to the corresponding values of the network schema and change from UDP to MULTICAST.
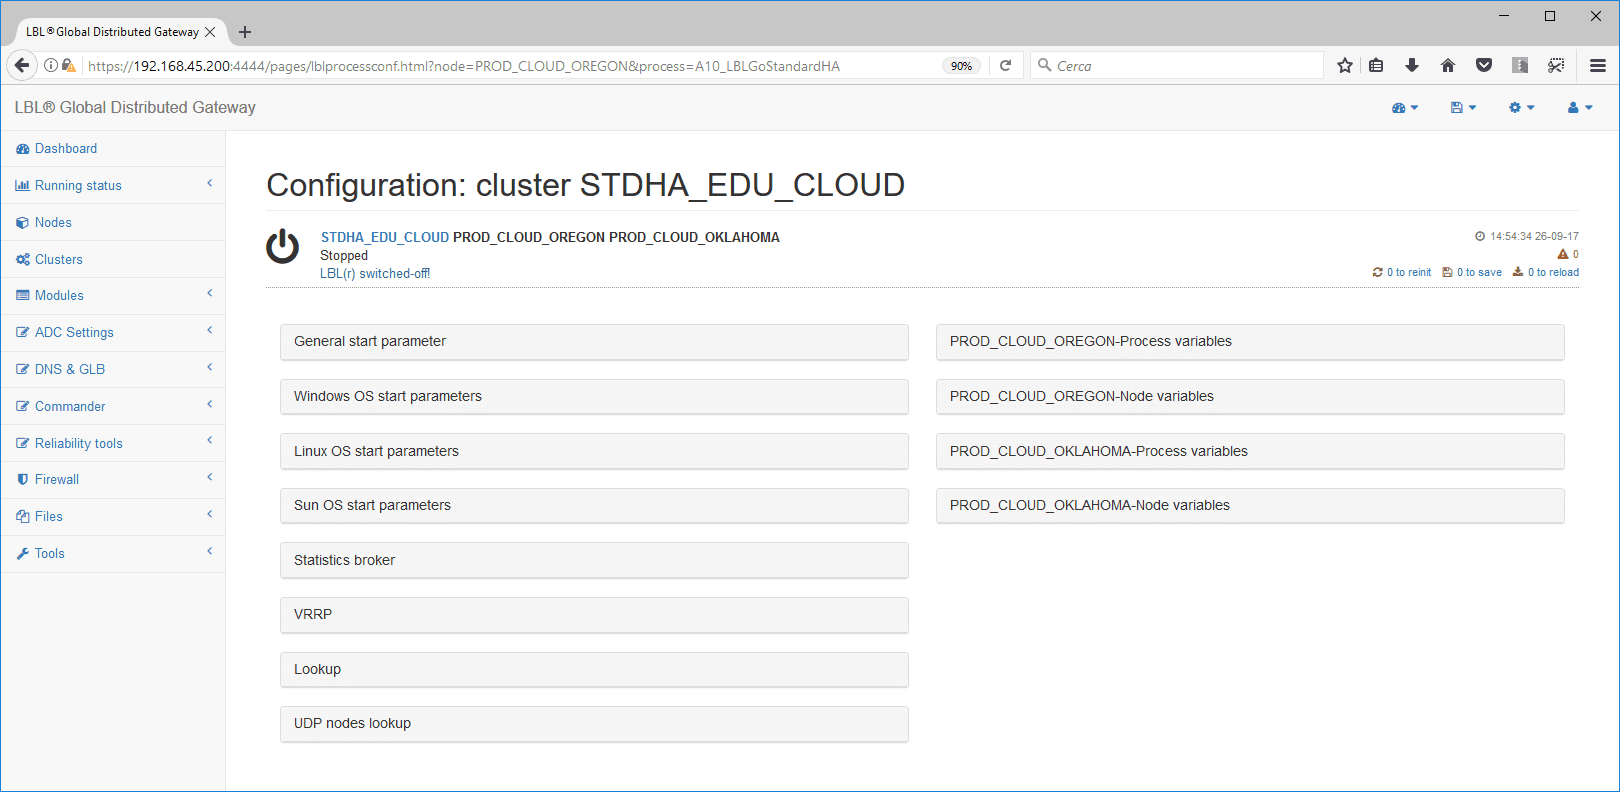
Change the values according to the network schema…
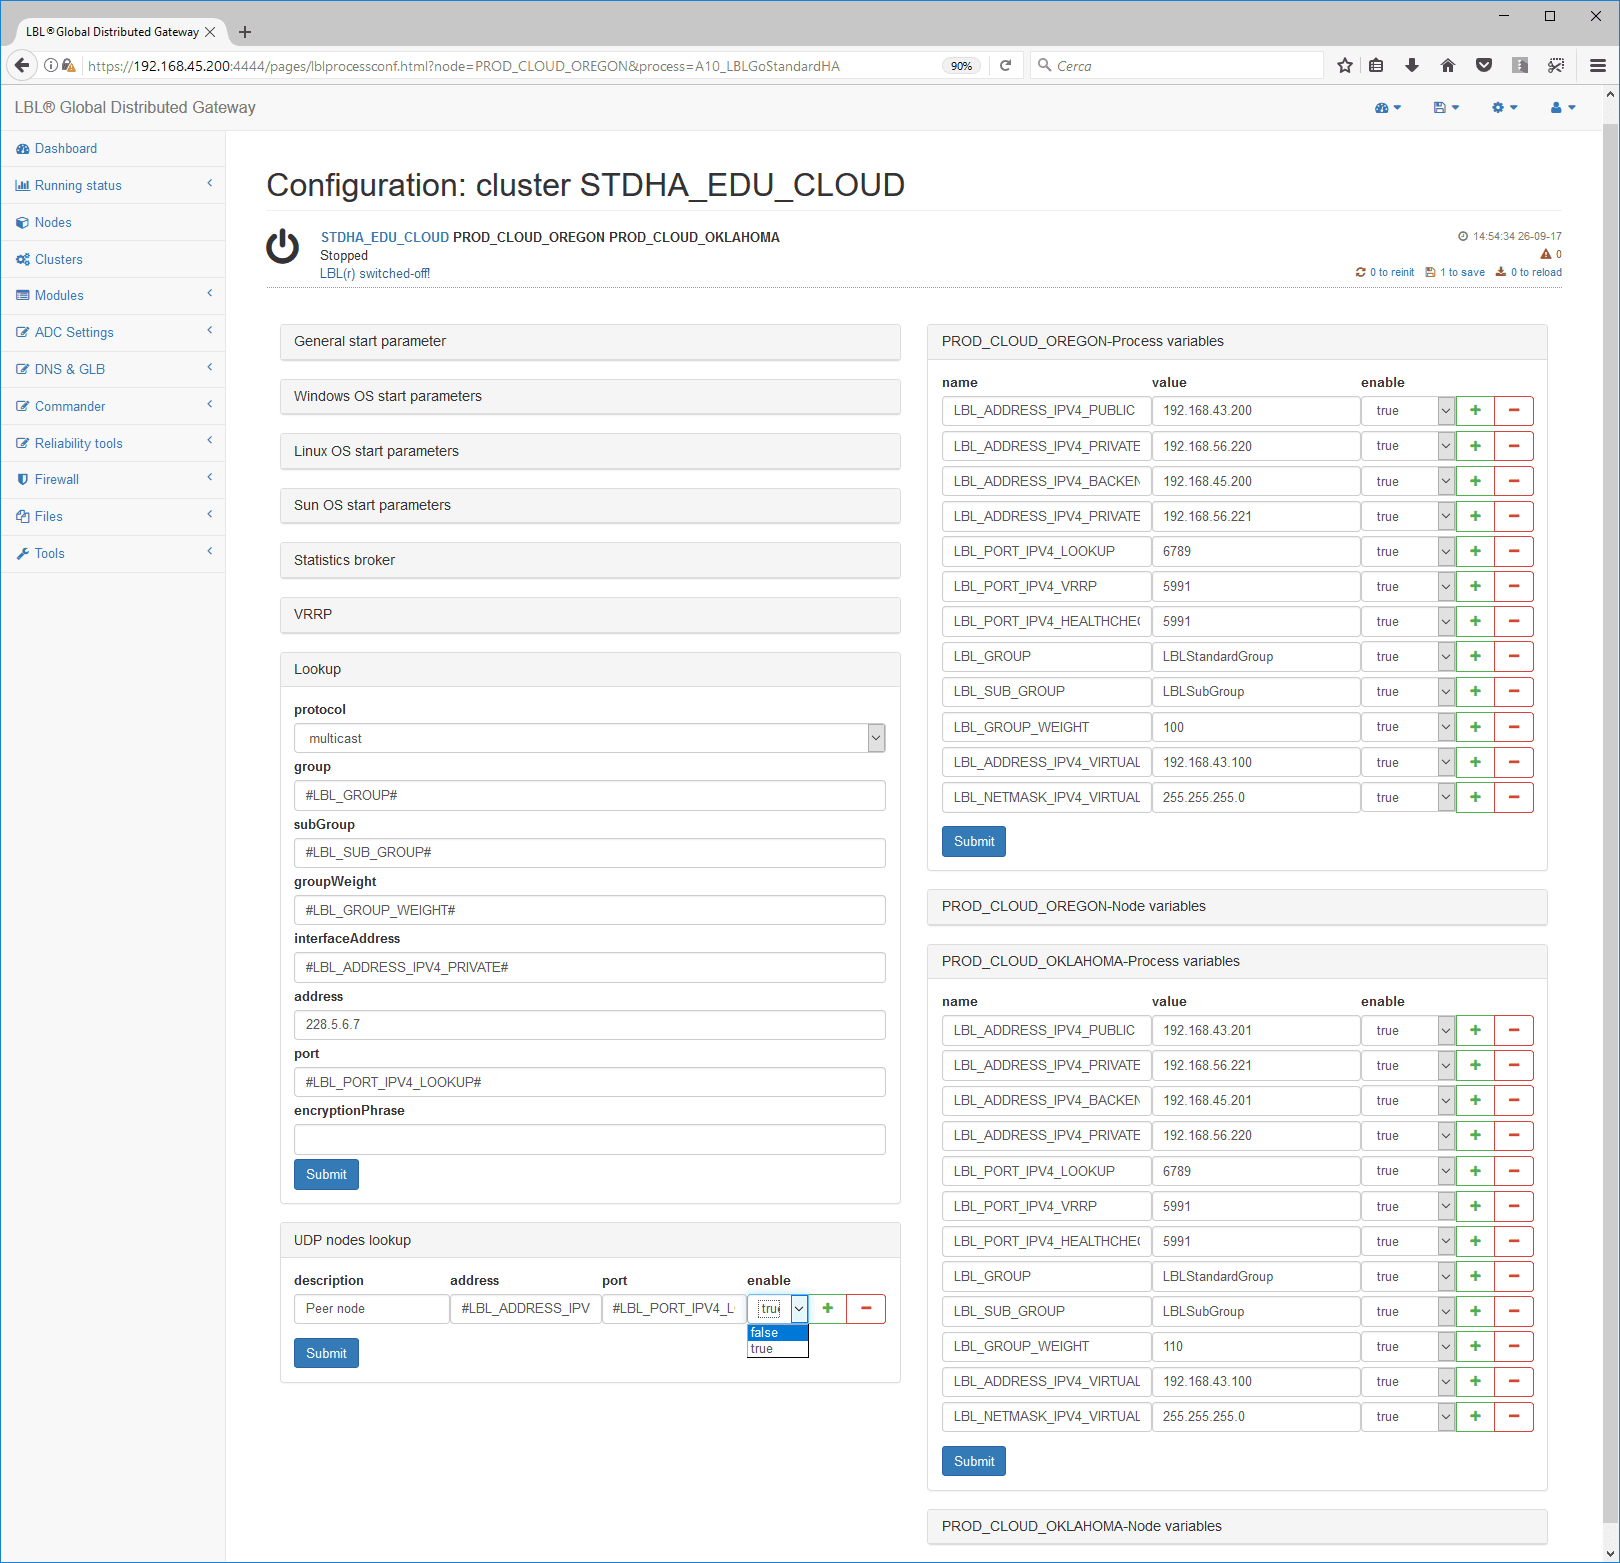
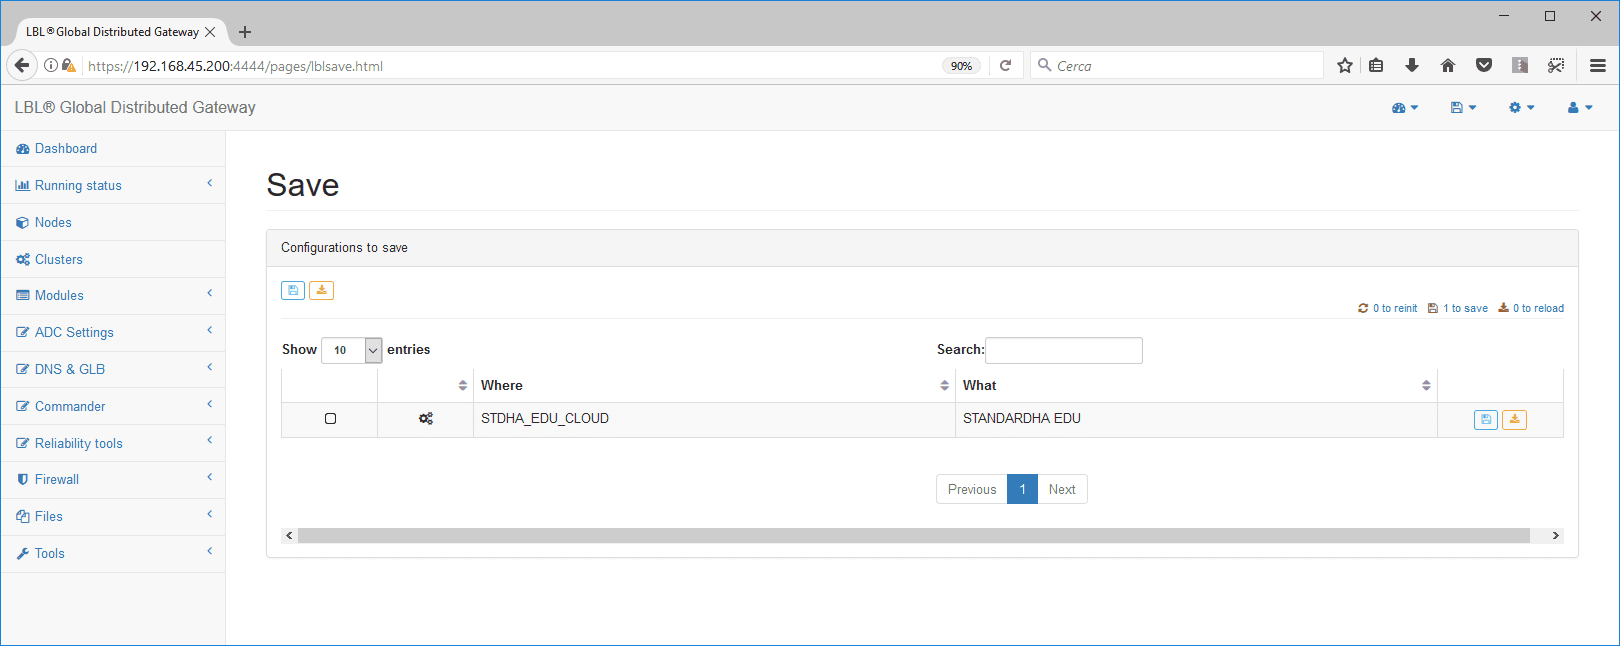
…and save…
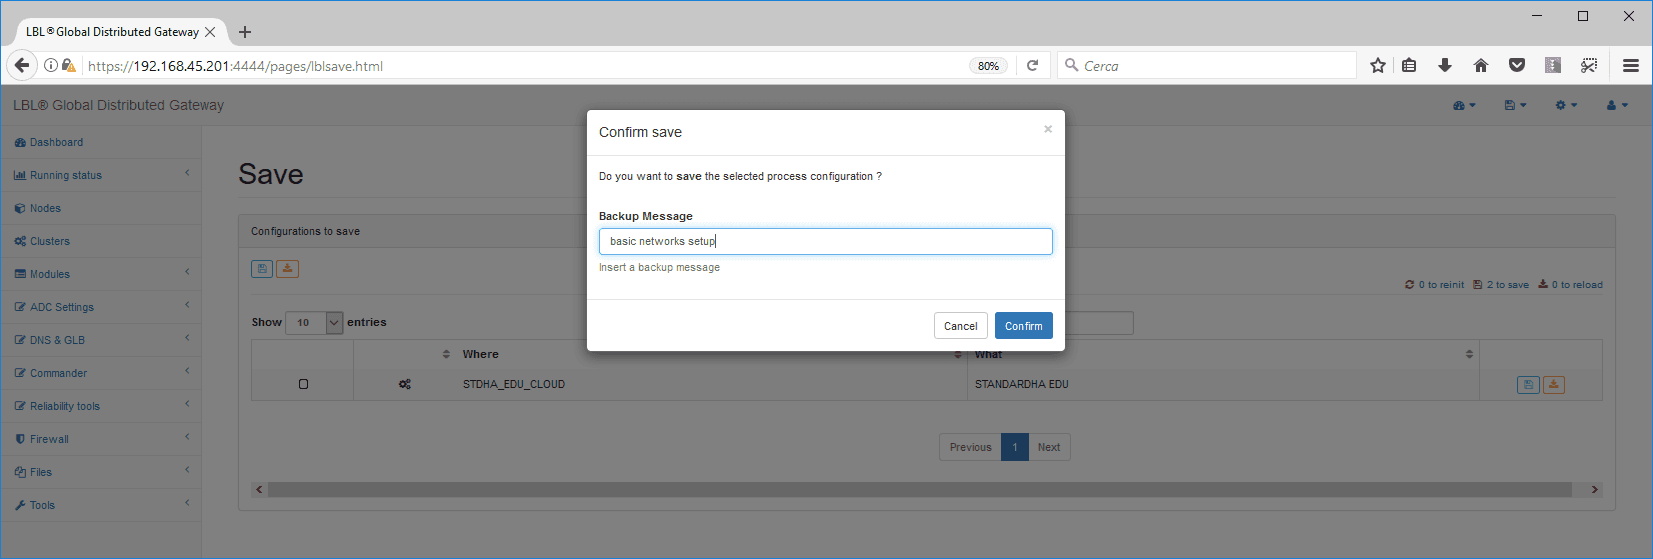
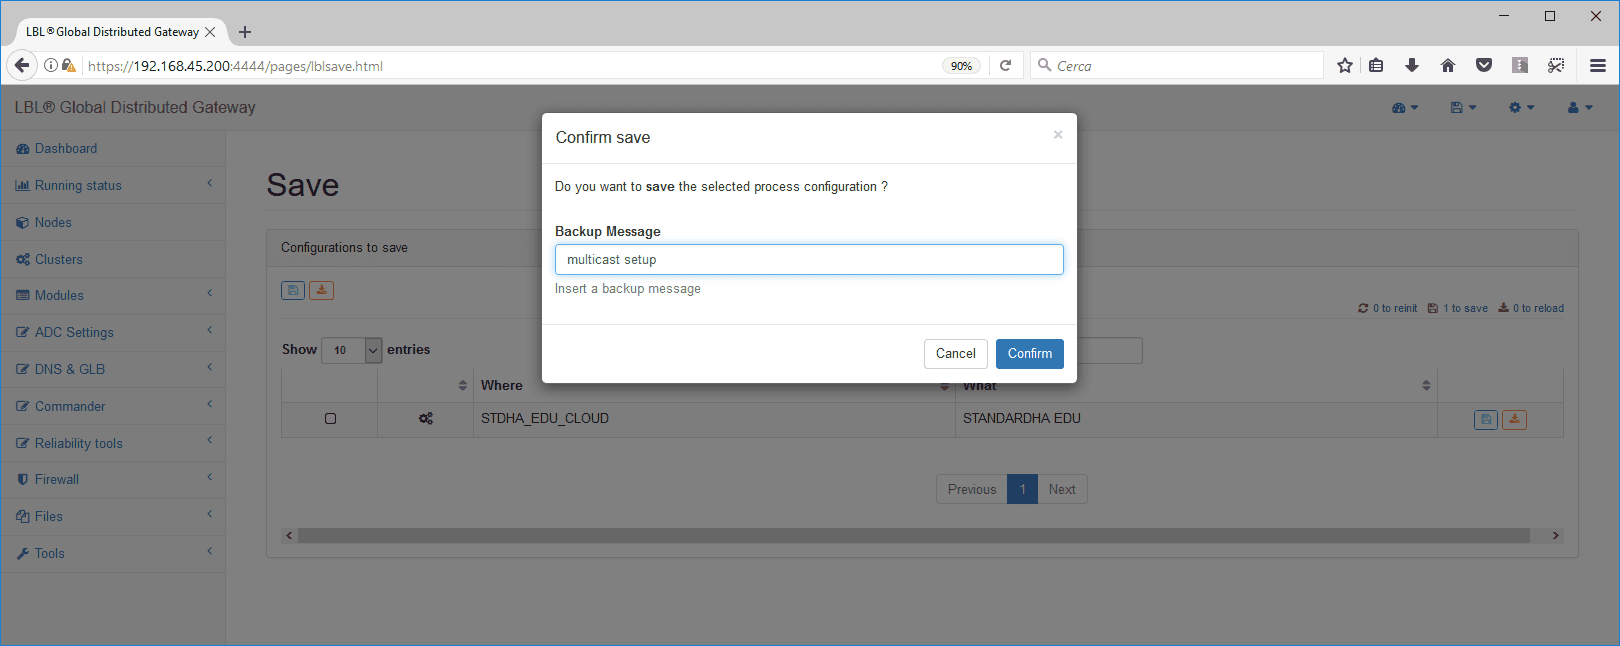
Describe the reason for changing the parameters…
Oplon ADC Standard HA Virtual IPs (VIP) Setting
To set the VIPs (Virtual IPs), select ADC Settings > Virtual IPs.
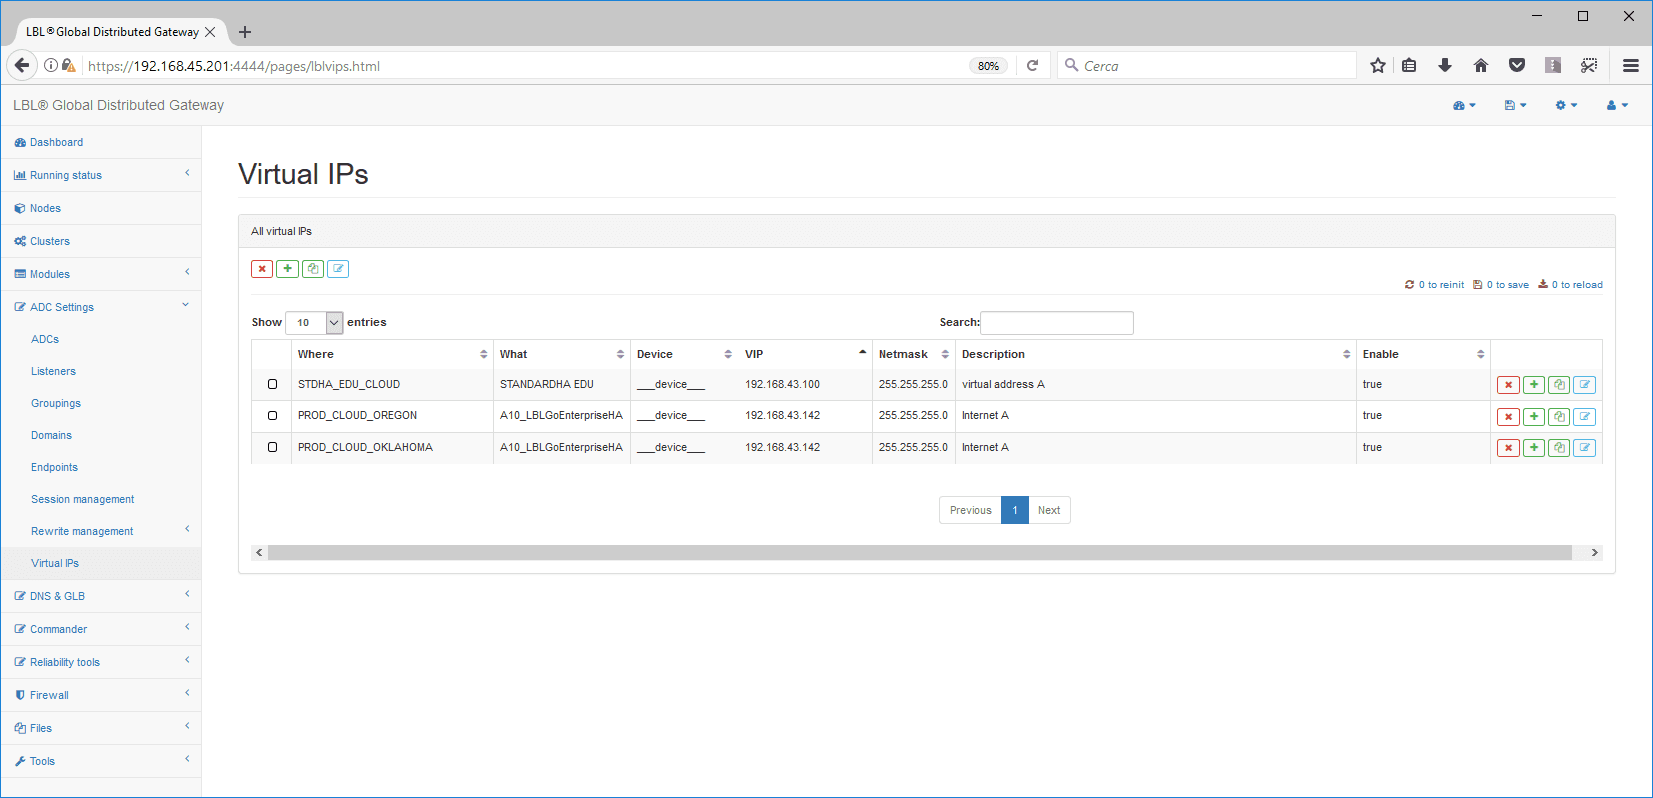
The processes and clusters that can manage virtual addresses are displayed. In this case, choose the cluster created earlier.
A VIP basically consists of three panels:
-
Basic parameters
-
Public network health check
-
Backend network health check
Basic parameters panel:
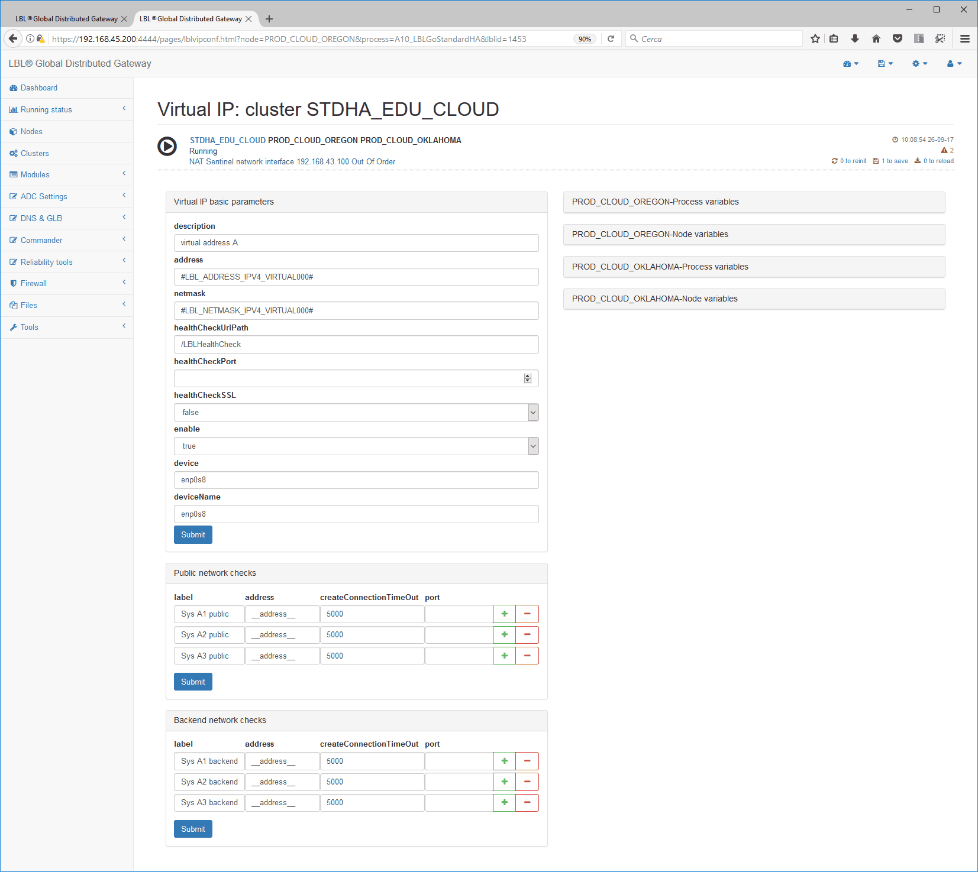
enable — default value: true
Enables or disables the virtual address.
description — default value: ""
Describes the virtual address.
address — default value: ""
The virtual address in numeric form (e.g. 192.168.43.10).
For IPv6, the address must be written in square brackets:
[fdd4:3c3f:aaaa::99].
netmask — default value: 255.255.255.0
The netmask of the virtual address in numeric form (e.g. 255.255.255.0).
If the address refers to the IPv6 protocol, the value is determined by the
precision you want to obtain; for example, for 64 the address setting will
be fdd4:3c3f:aaaa::99/64.
healthCheckPort — default value: ""
The port on which to run the health check test. If the value is empty
(""), the health check is not performed. This value is very important
because it determines the activity status not only of the IP address but
also of the balancing and routing system. IT MUST BE SET, usually to 80
or 443; if the port uses SSL, set healthCheckSSL to true!
healthCheckSSL — default value: false
If set to true, it performs an HTTP health check over an encrypted
connection.
healthCheckUriPath — default value: /OPLONHealthCheck
The path of the activity health check of the balancing system. This value
is normally never changed, unless it is already used by other
applications. If you change this value, you must also change it in
systemsmonitor_m.xml, iproxy.xml and healthcheck.xml.
The minimum values to enter are:
-
healthCheckPort
-
Network adapter (device and deviceName)
-
At least 3 public addresses (for certification)
-
At least 3 backend addresses (for certification)
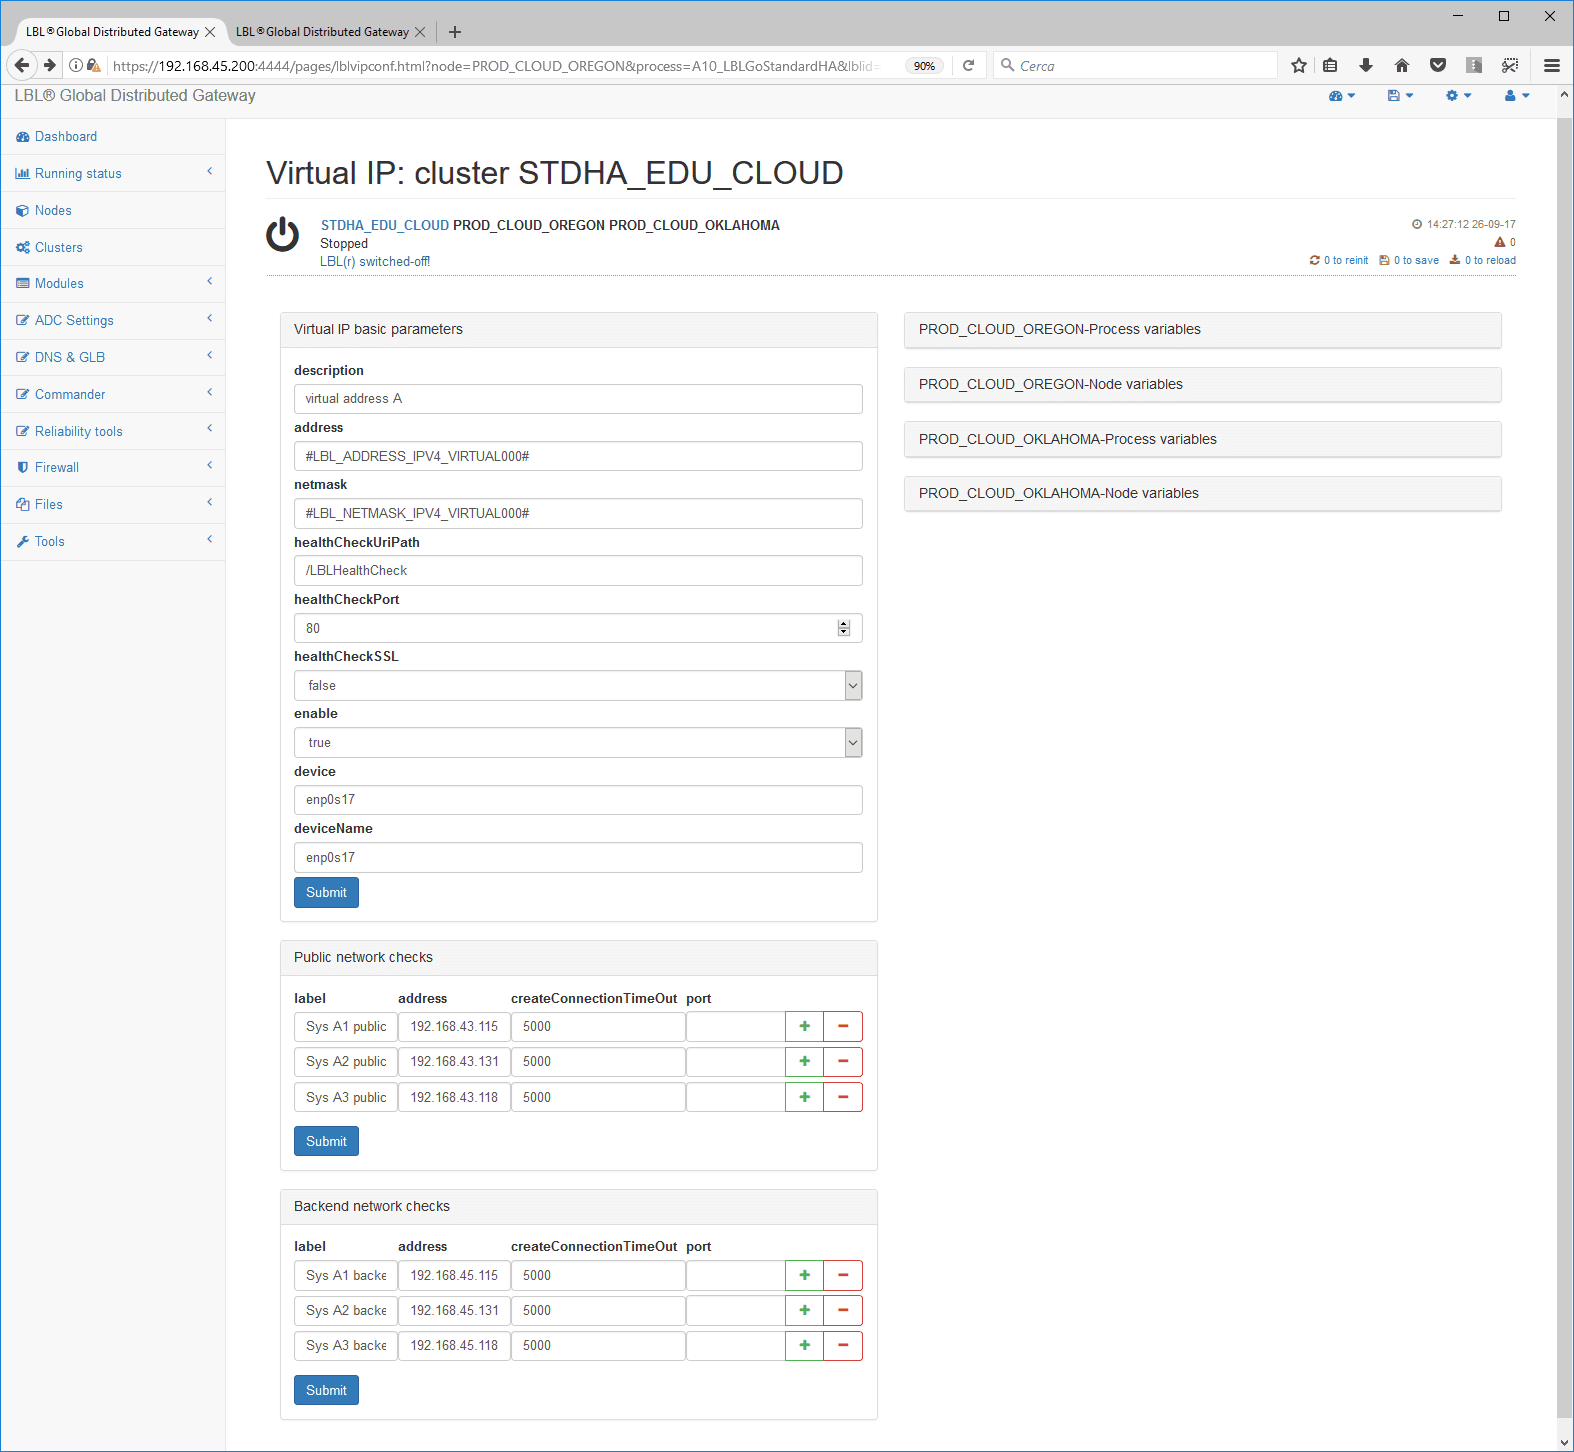
For the cluster VIP, configure the basic parameters panel, identifying the network adapters simply by exploring the cluster nodes.
To explore the network adapters, simply go to the link that displays the cluster nodes, from which you can get the names of the network interfaces.
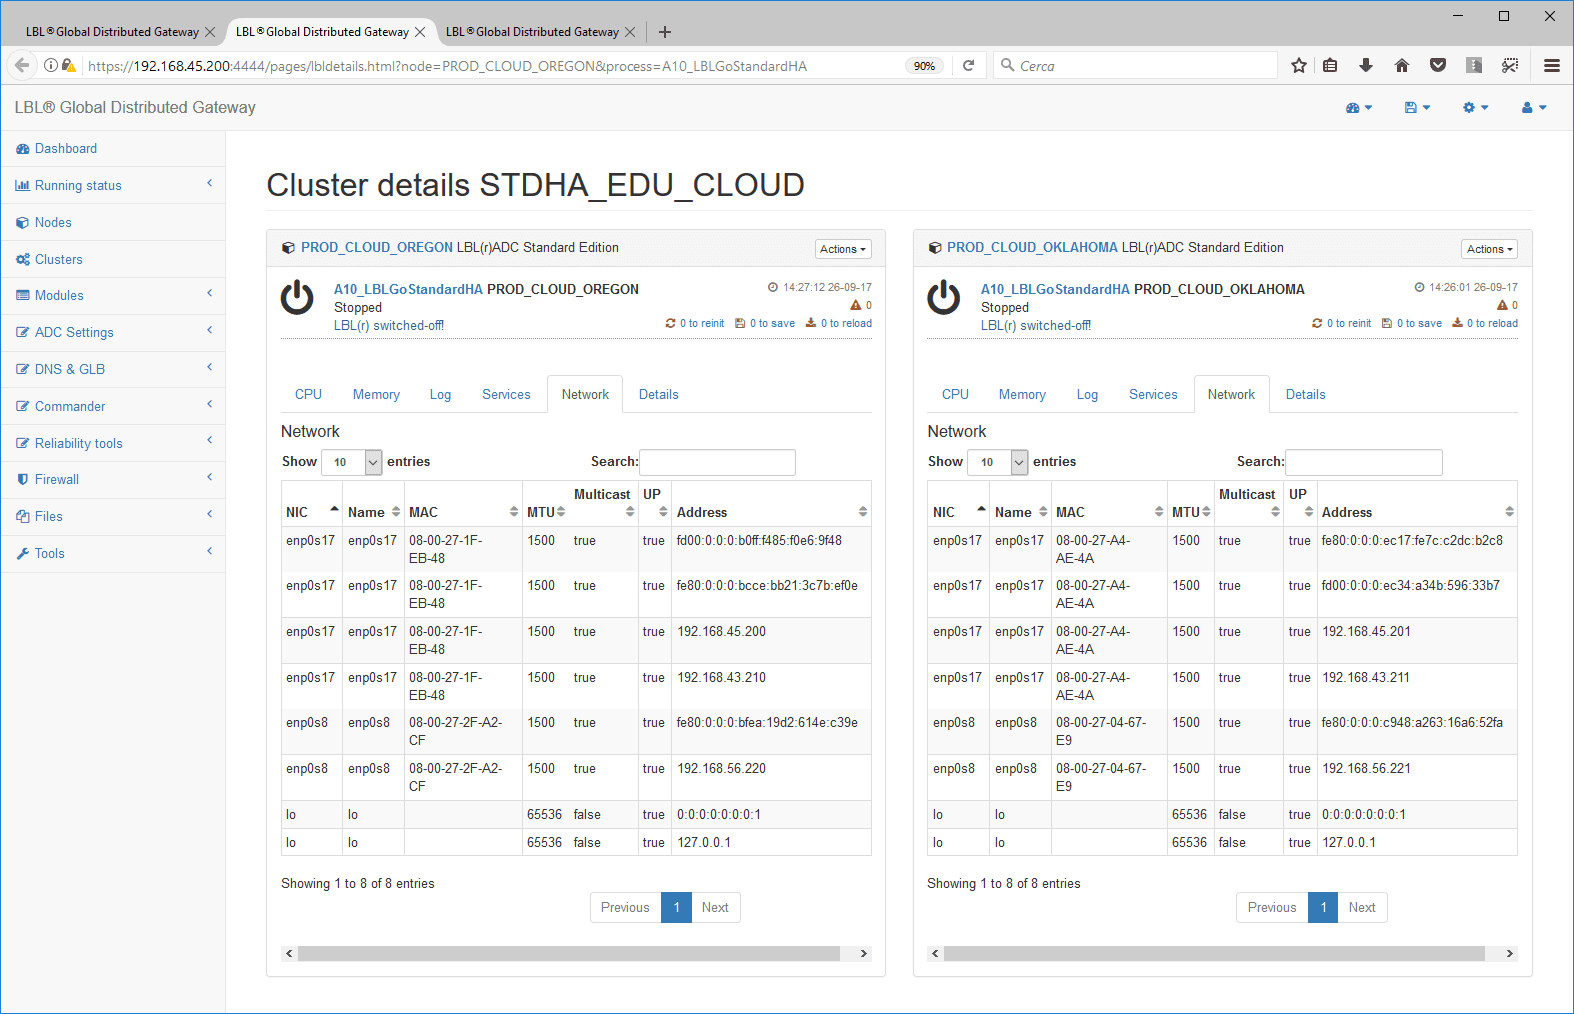
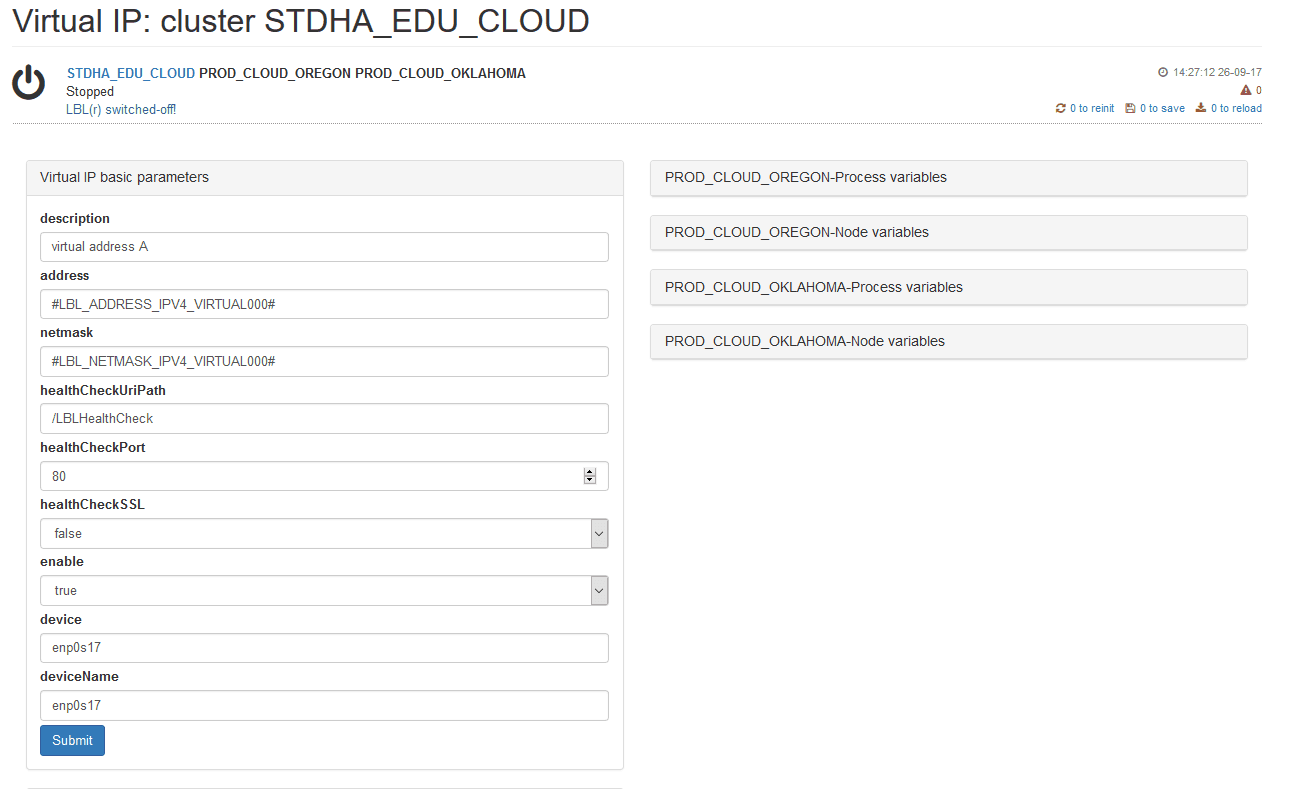
If the device names are different, as in the case of hybrid installations, you can set a variable local to the process or node, with the value corresponding to the local interface, and enter the name of the variable in the device and deviceName fields.
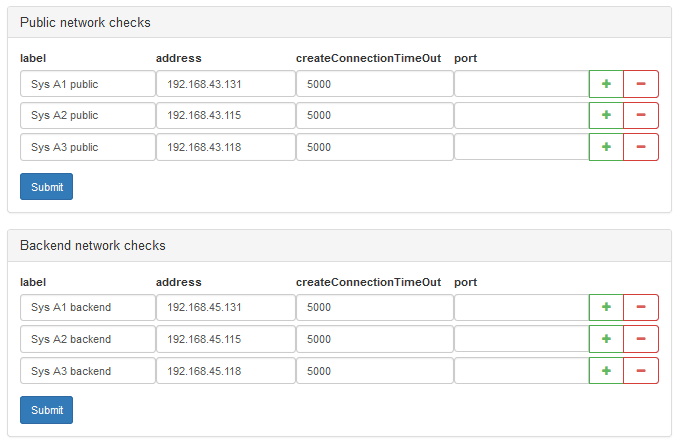
The Public network health checks and Backend network health checks panels are used to check that the networks actually work. In fact, it is not enough to check whether the link is UP, because the connection to a switch usually remains UP even when the services are unreachable.
To do this, you must identify at least 3 public network services and at least 3 backend network services to check reachability. You can use both ICMP-based services (ping) and connectivity services (TCP connect), on which no operation is performed.
You can run the tests in advance with the Network checks utility, available from the Navigation bar.
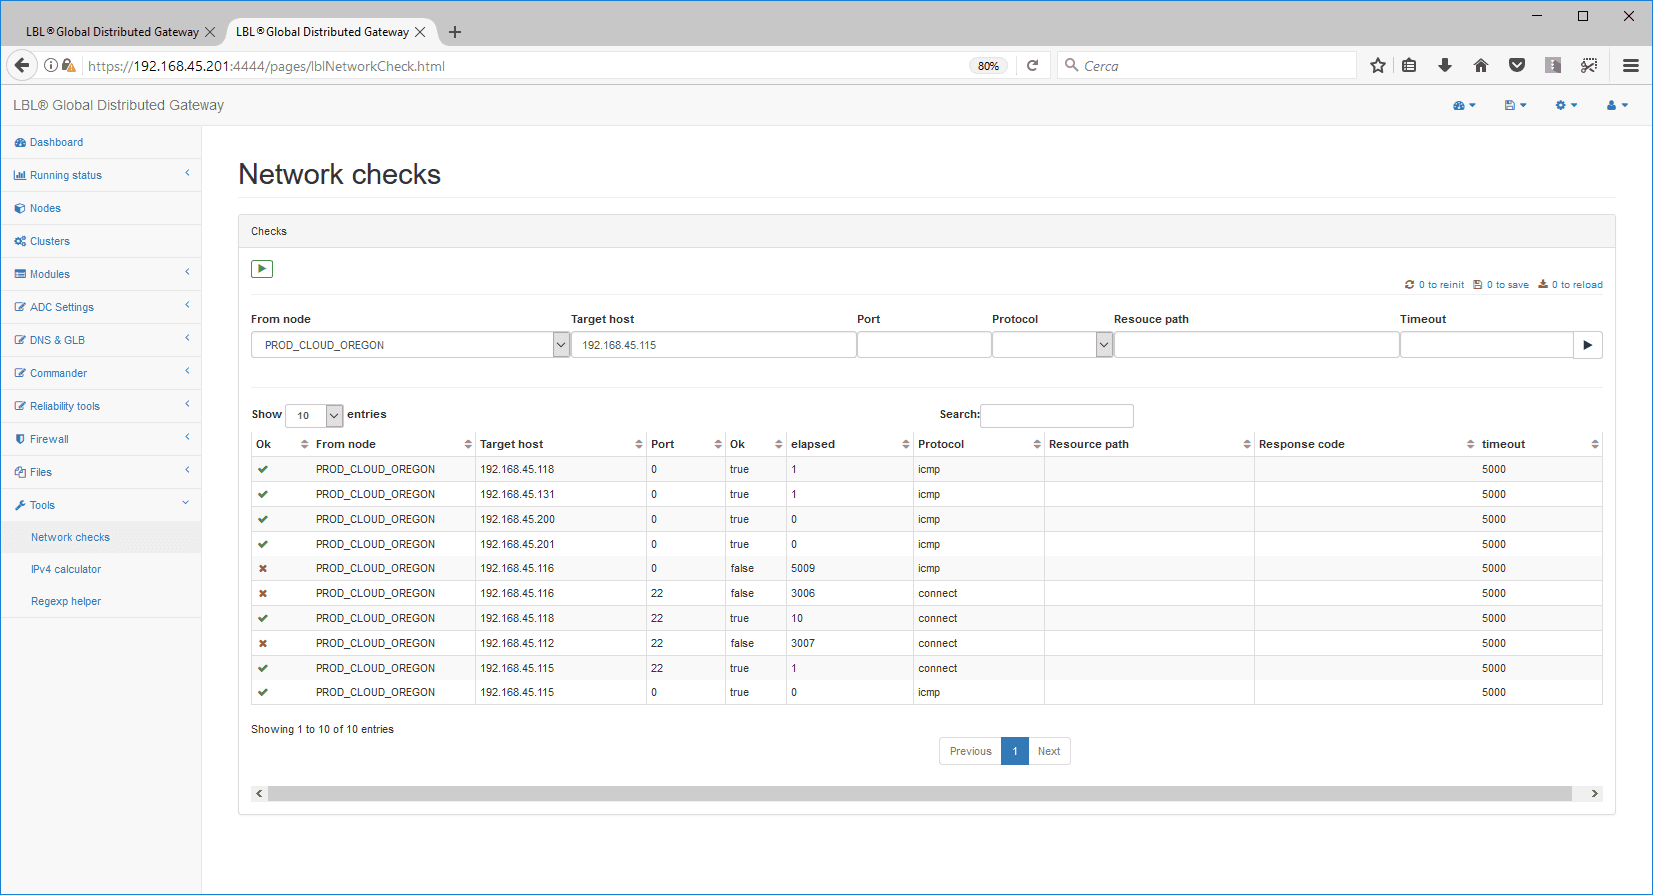
In this case, the public addresses 192.168.43.131, 192.168.43.115 and 192.168.43.118 are reachable via ICMP.
The backend is reachable via ICMP at the address 192.168.45.131, while the addresses 192.168.45.115 and 192.168.45.118 are reachable via a connect to port 22 (SSH).
The parameters will then turn out to be:
Once the configuration is complete, save it…
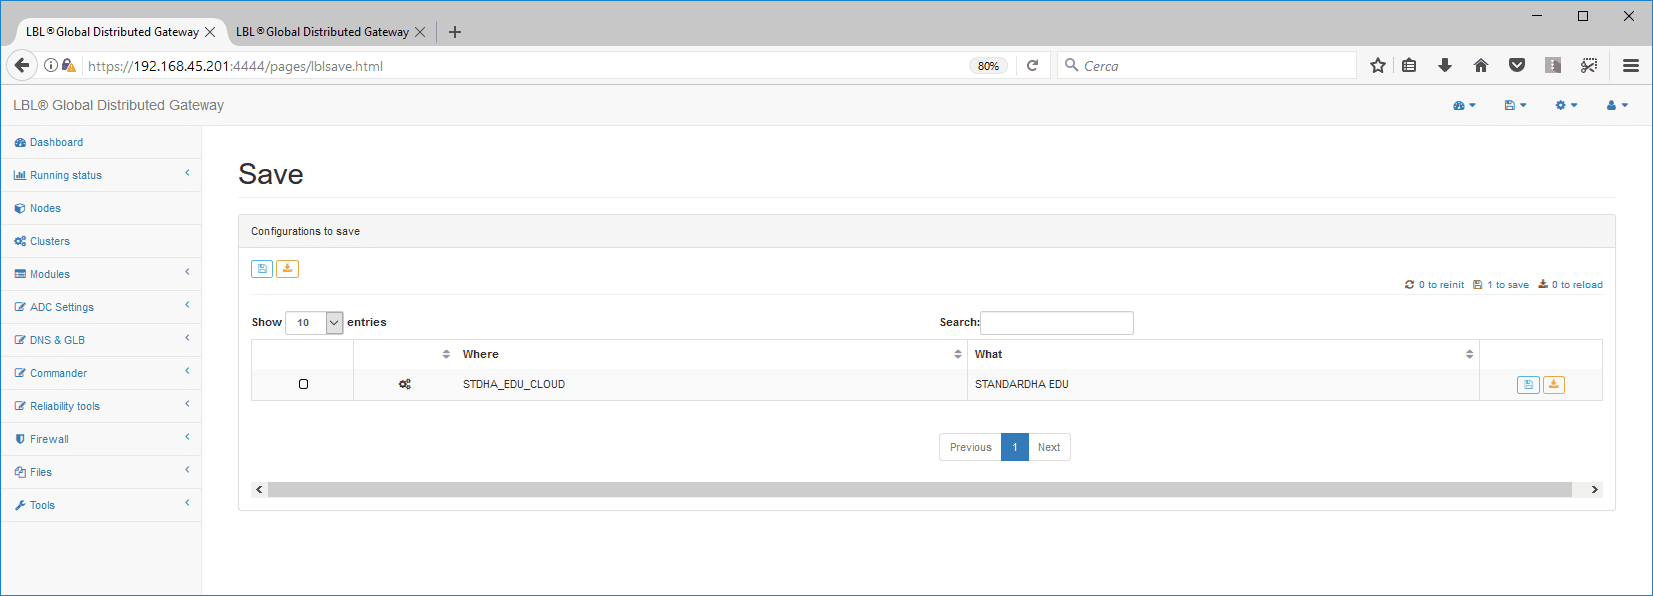
Describe the reason for the parameter change and confirm…
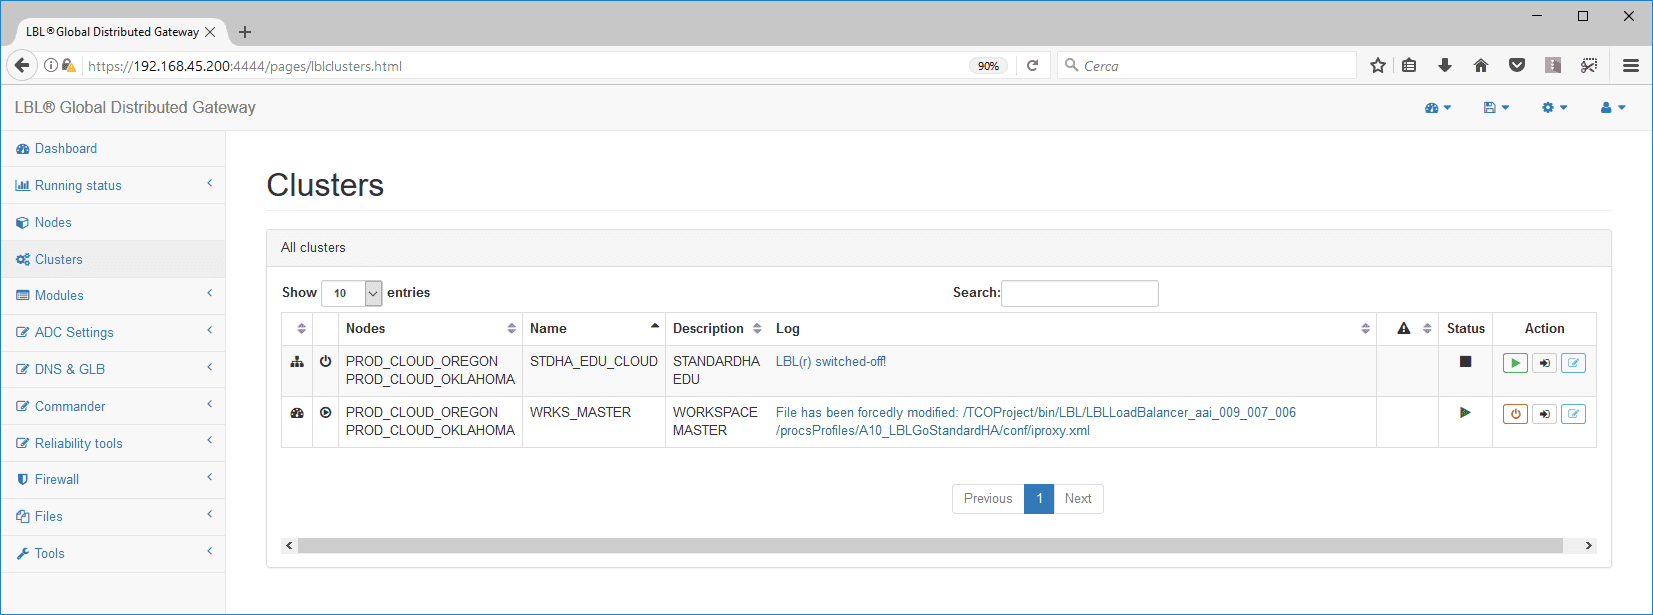
Start of the Oplon ADC Standard HA Cluster Nodes
Once you have set the heart-beat parameters and the first VIP, you can start the cluster processes. You do this from the Clusters page…
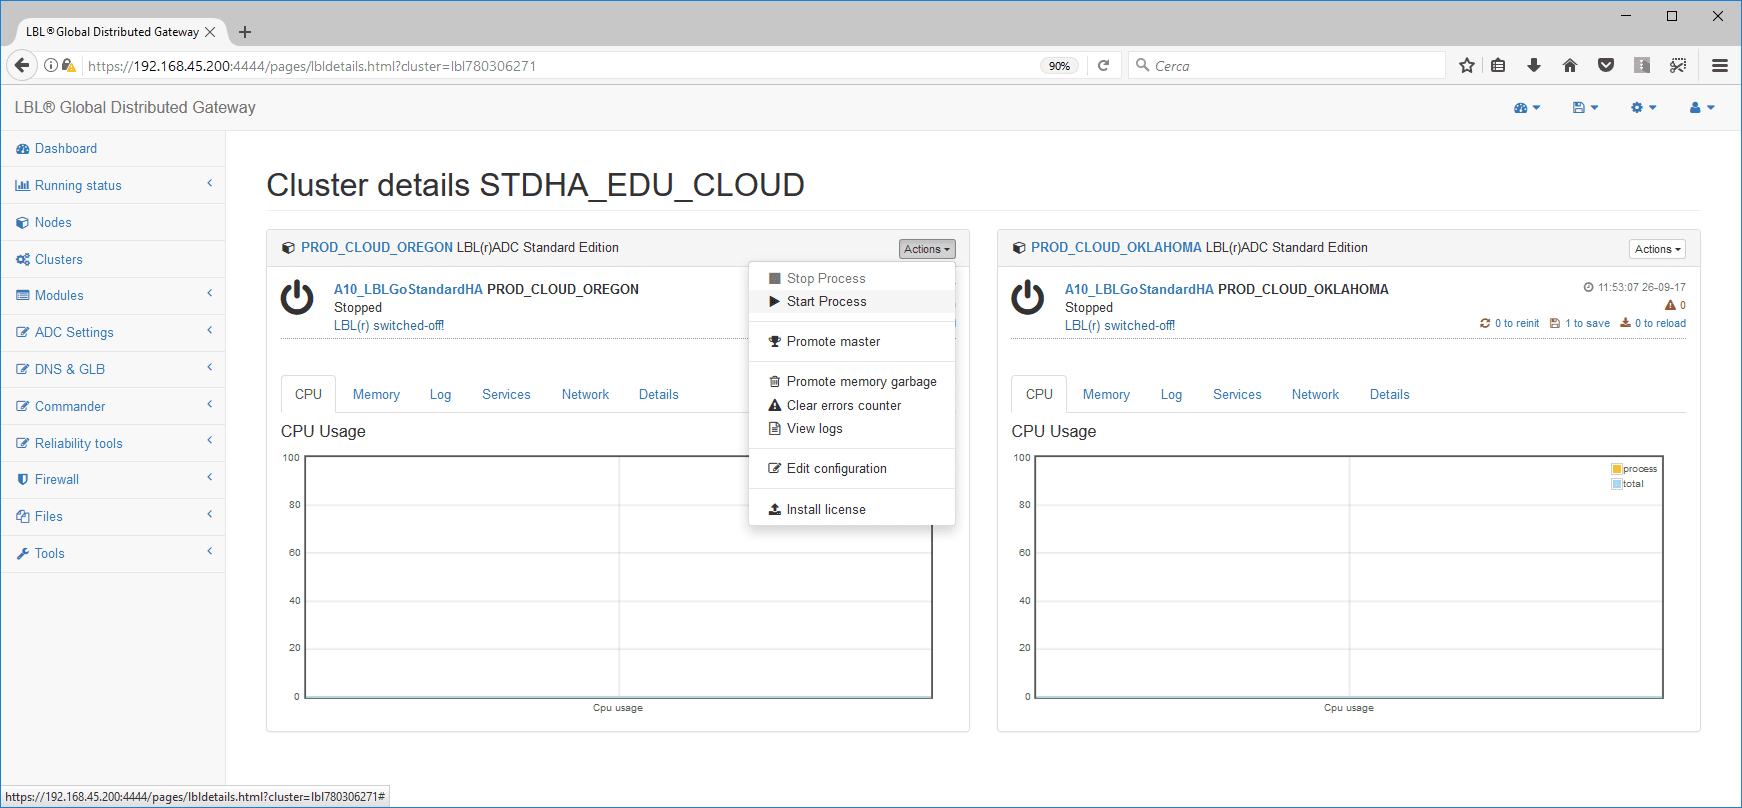
Select one of the cluster nodes, and then click Actions > Start Process…
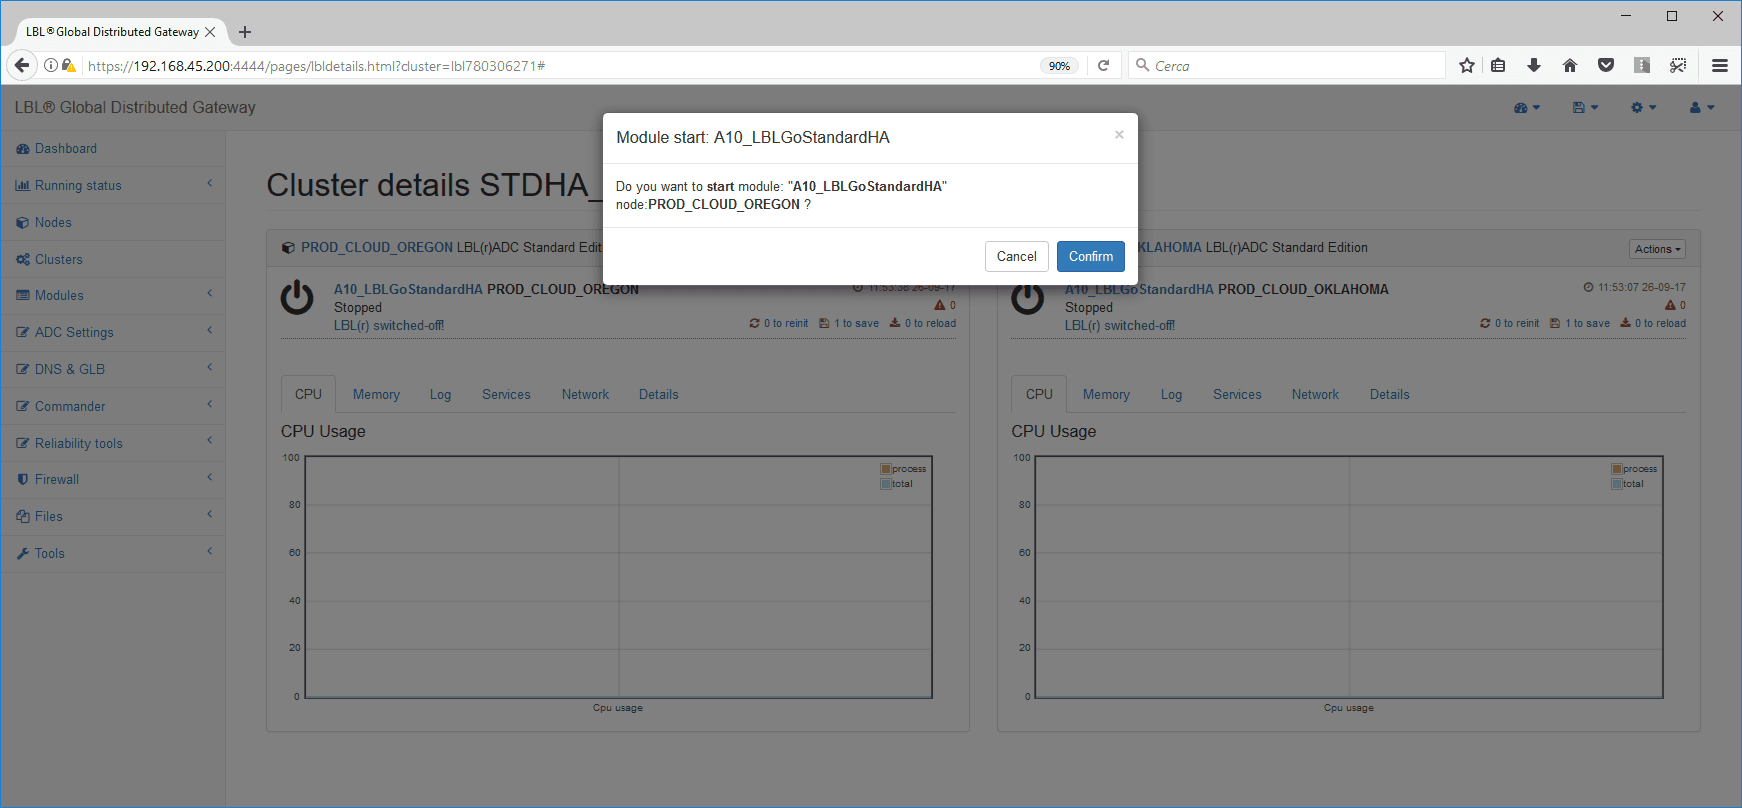
You are asked to confirm the operation…
Once confirmed, the symbol changes to Running and you start to see CPU activity…
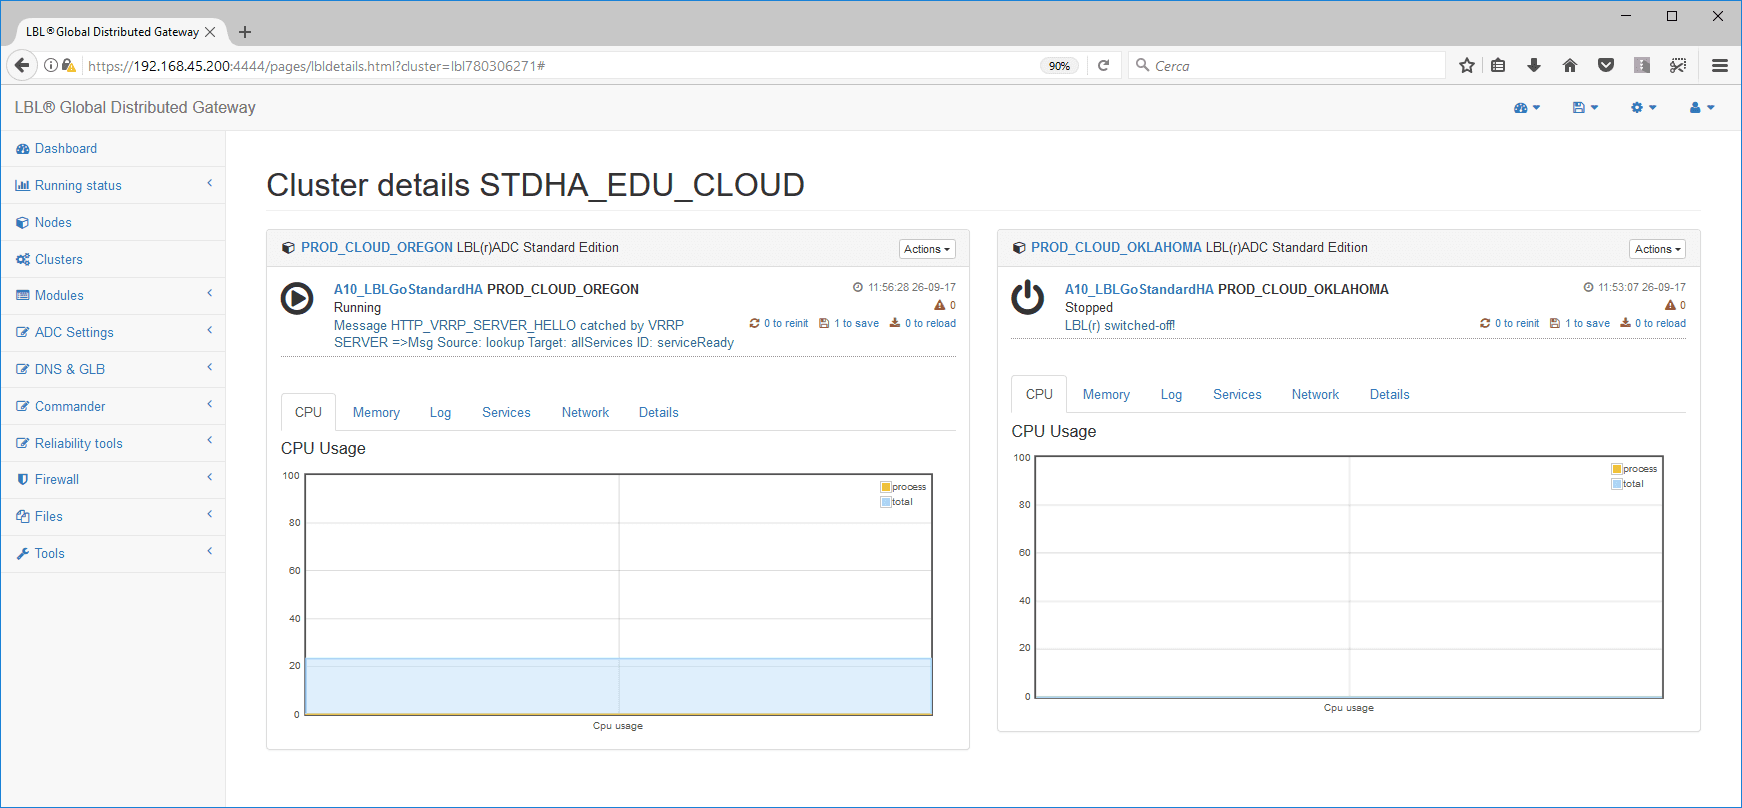
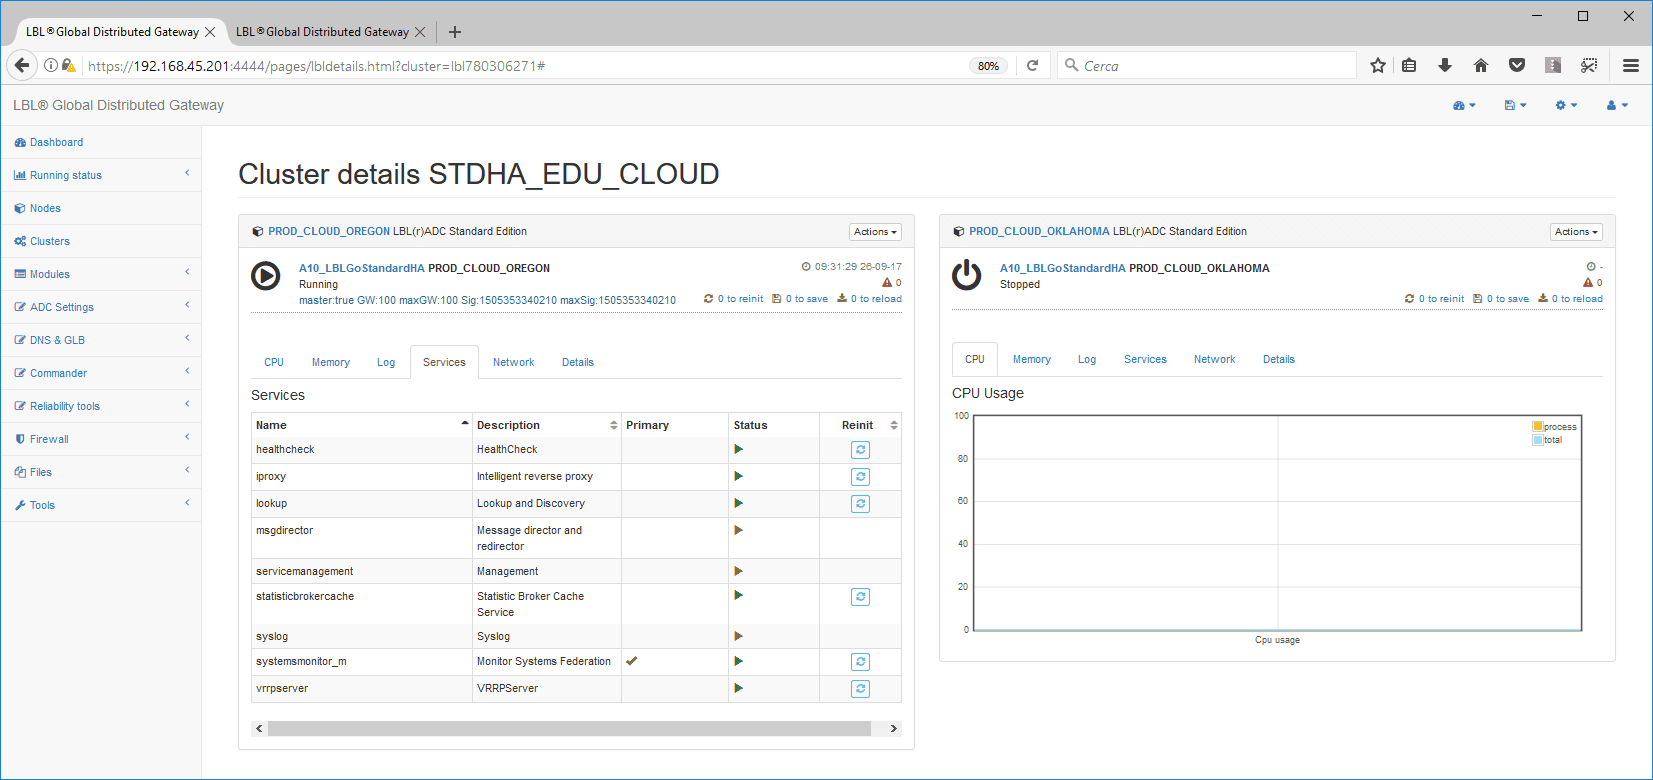
After a few moments, you can check on the Services tab that the node, being the only one running, has taken the master status…
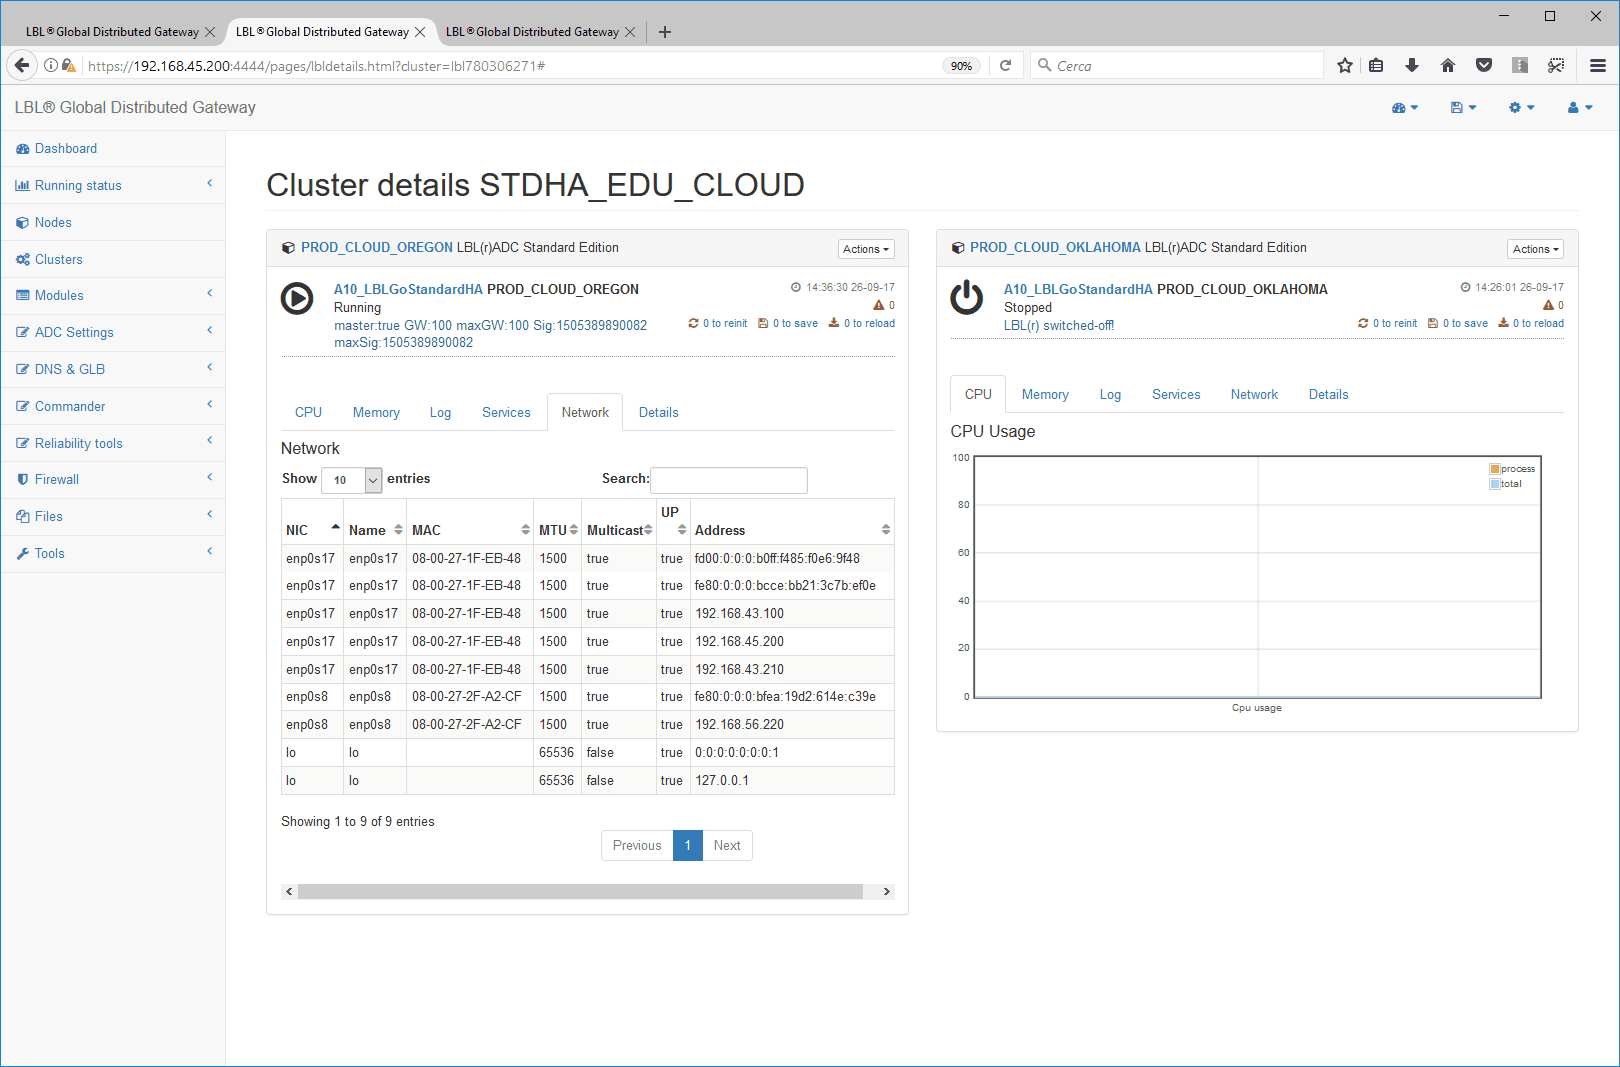
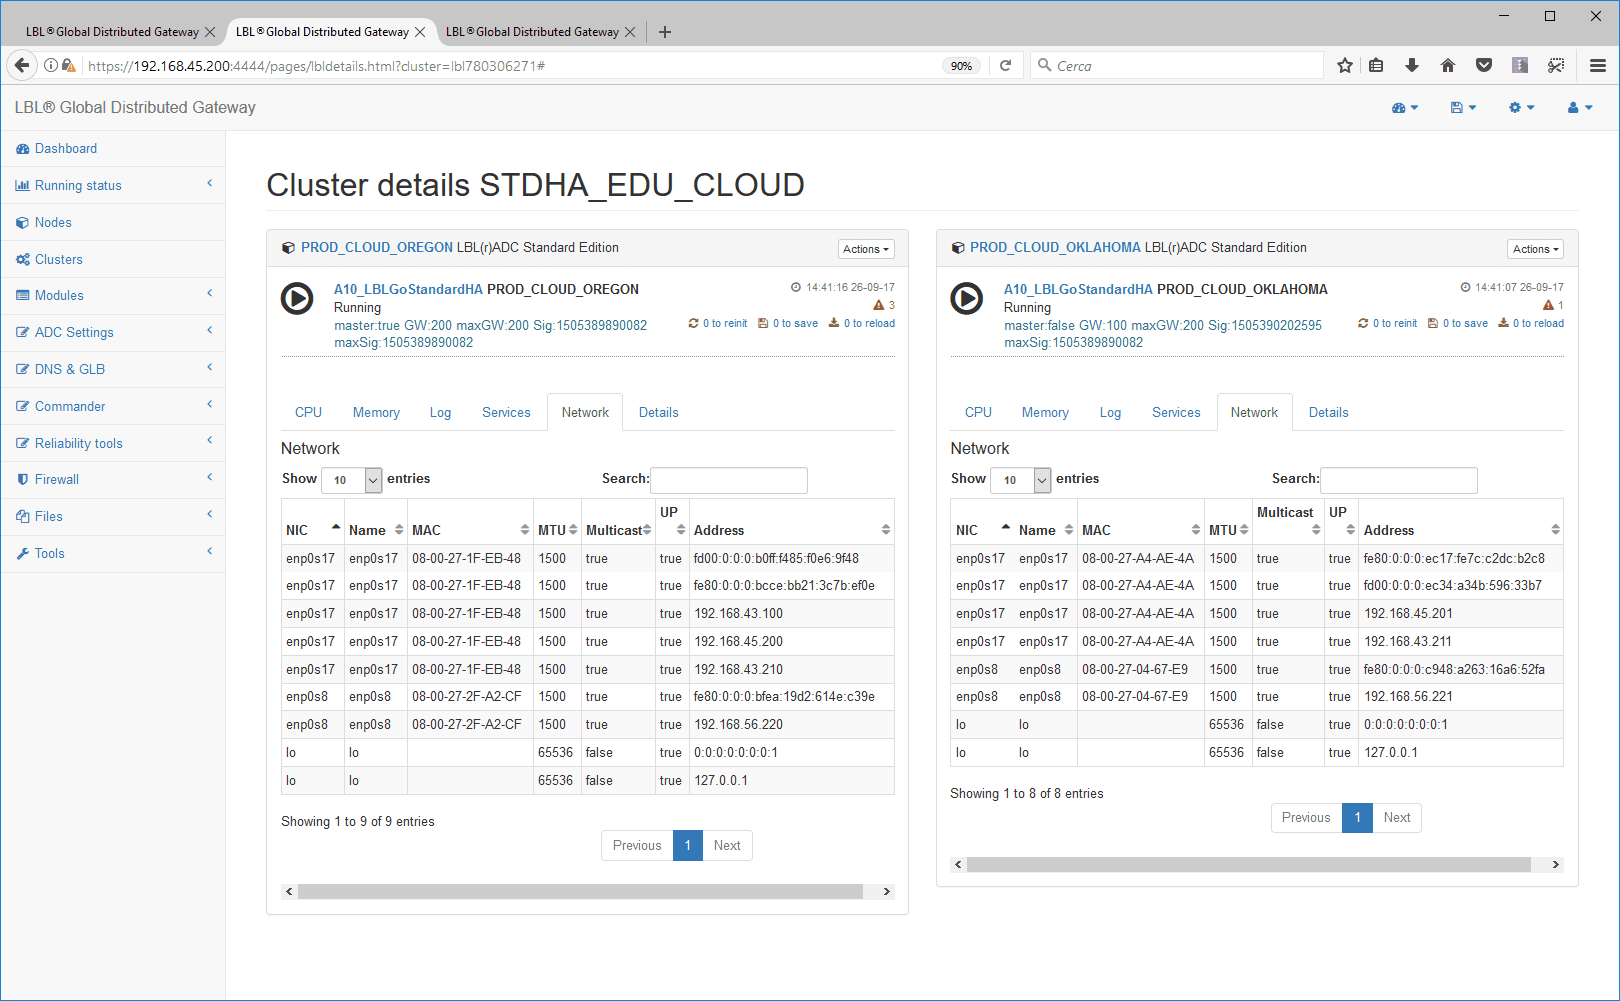
On the Network tab, you can verify that the VIP IP address has been assigned to the designated interface…
Next, start the second node of the cluster…
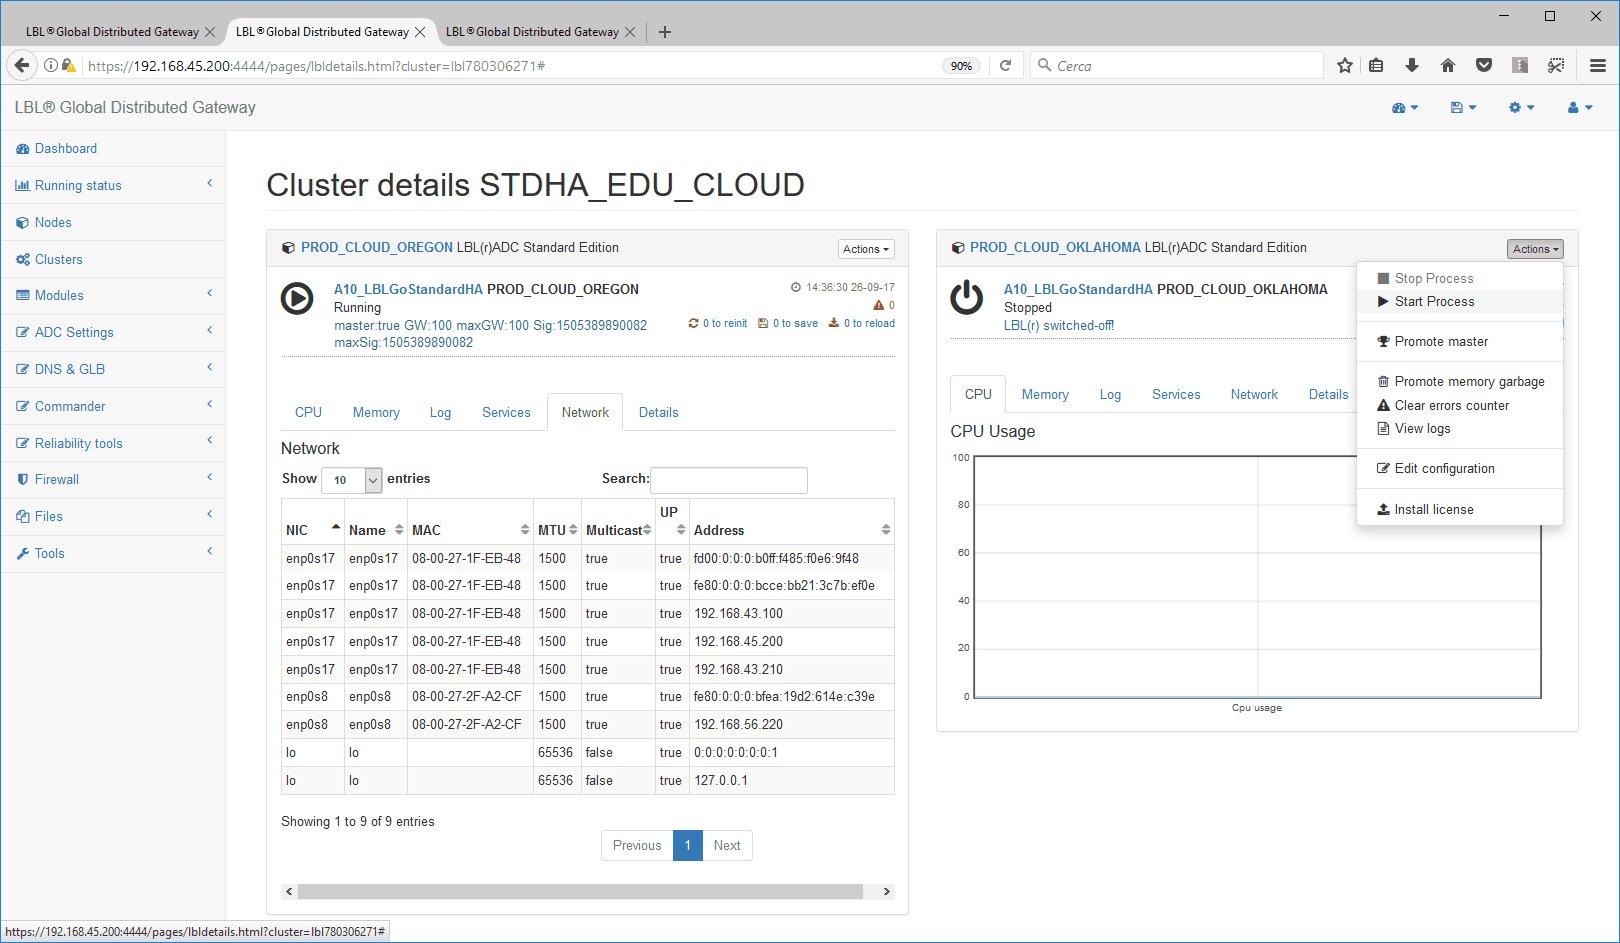
As soon as it starts, you will notice the status change and the CPU activity of the node…
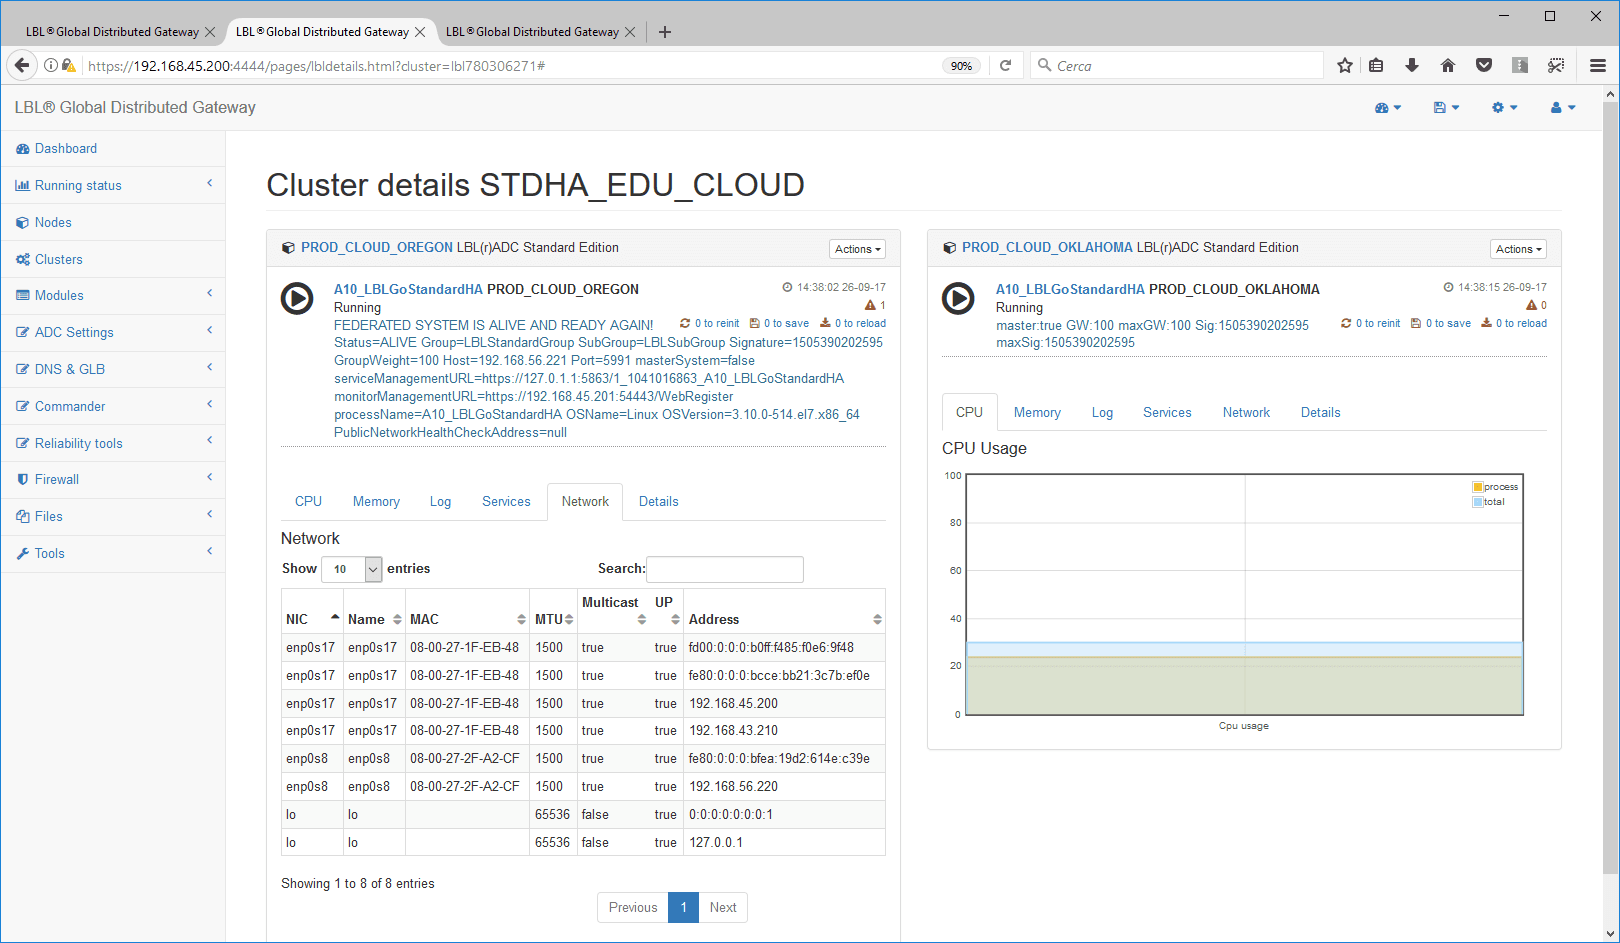
…with the corresponding assignment of the VIP.
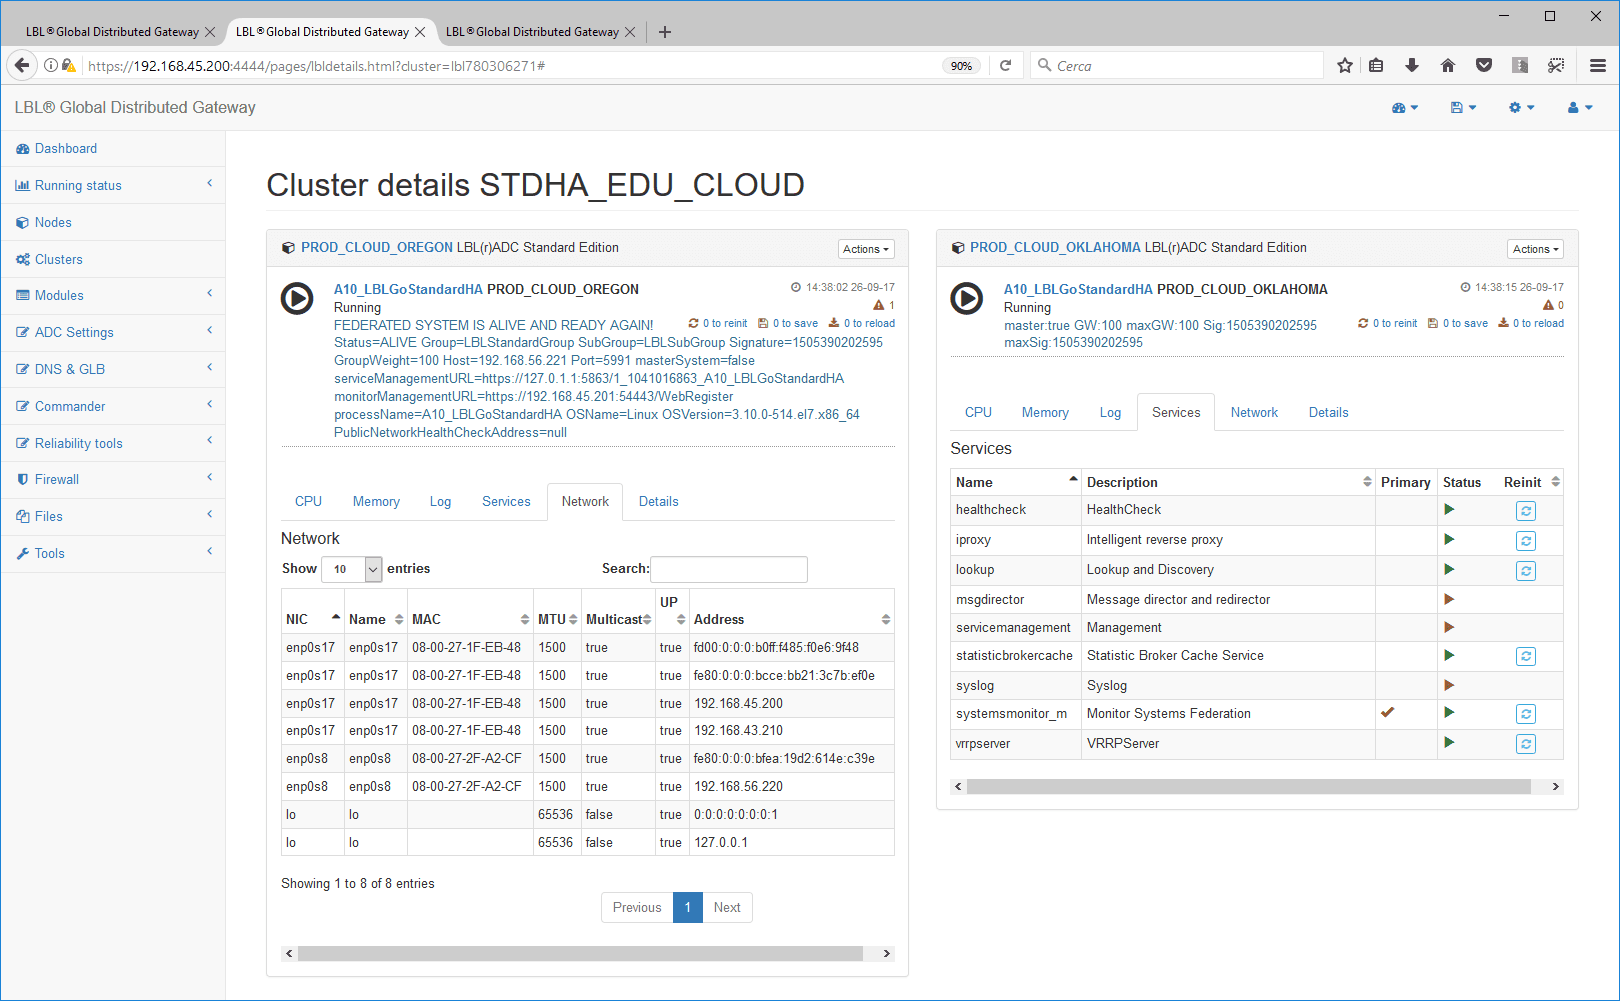
The virtual address has migrated to the newly started node.
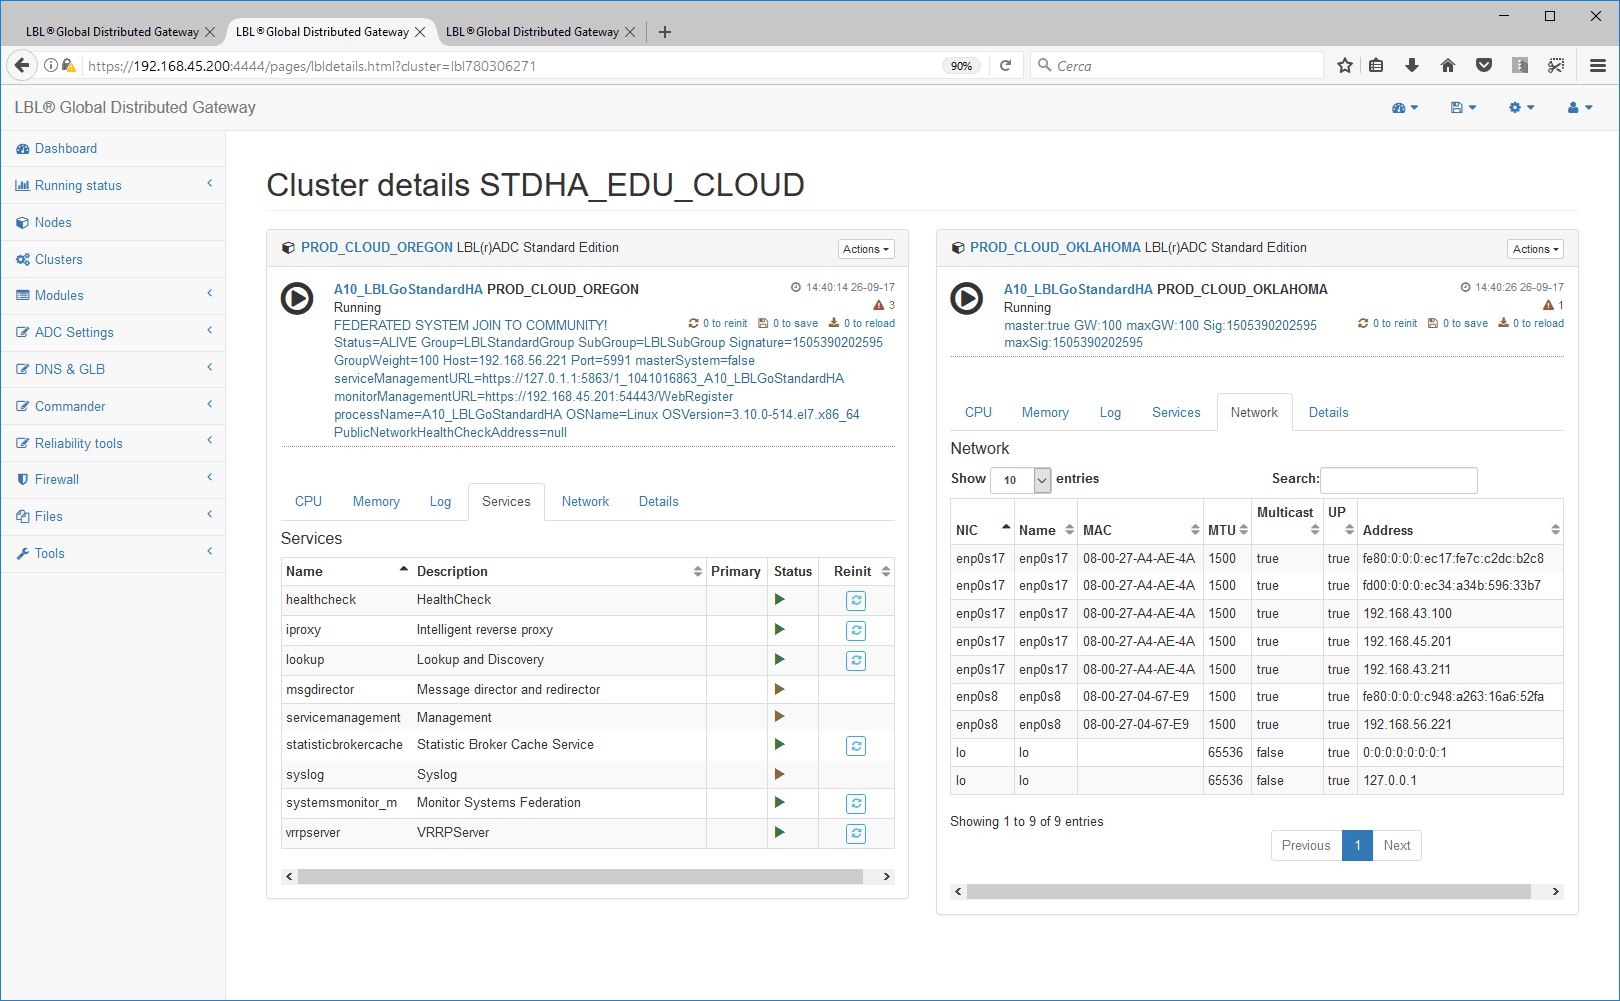
You can move the virtual address (VIP) from one node to another at any time simply by running Promote master from the panel of the node that you want to promote to master…
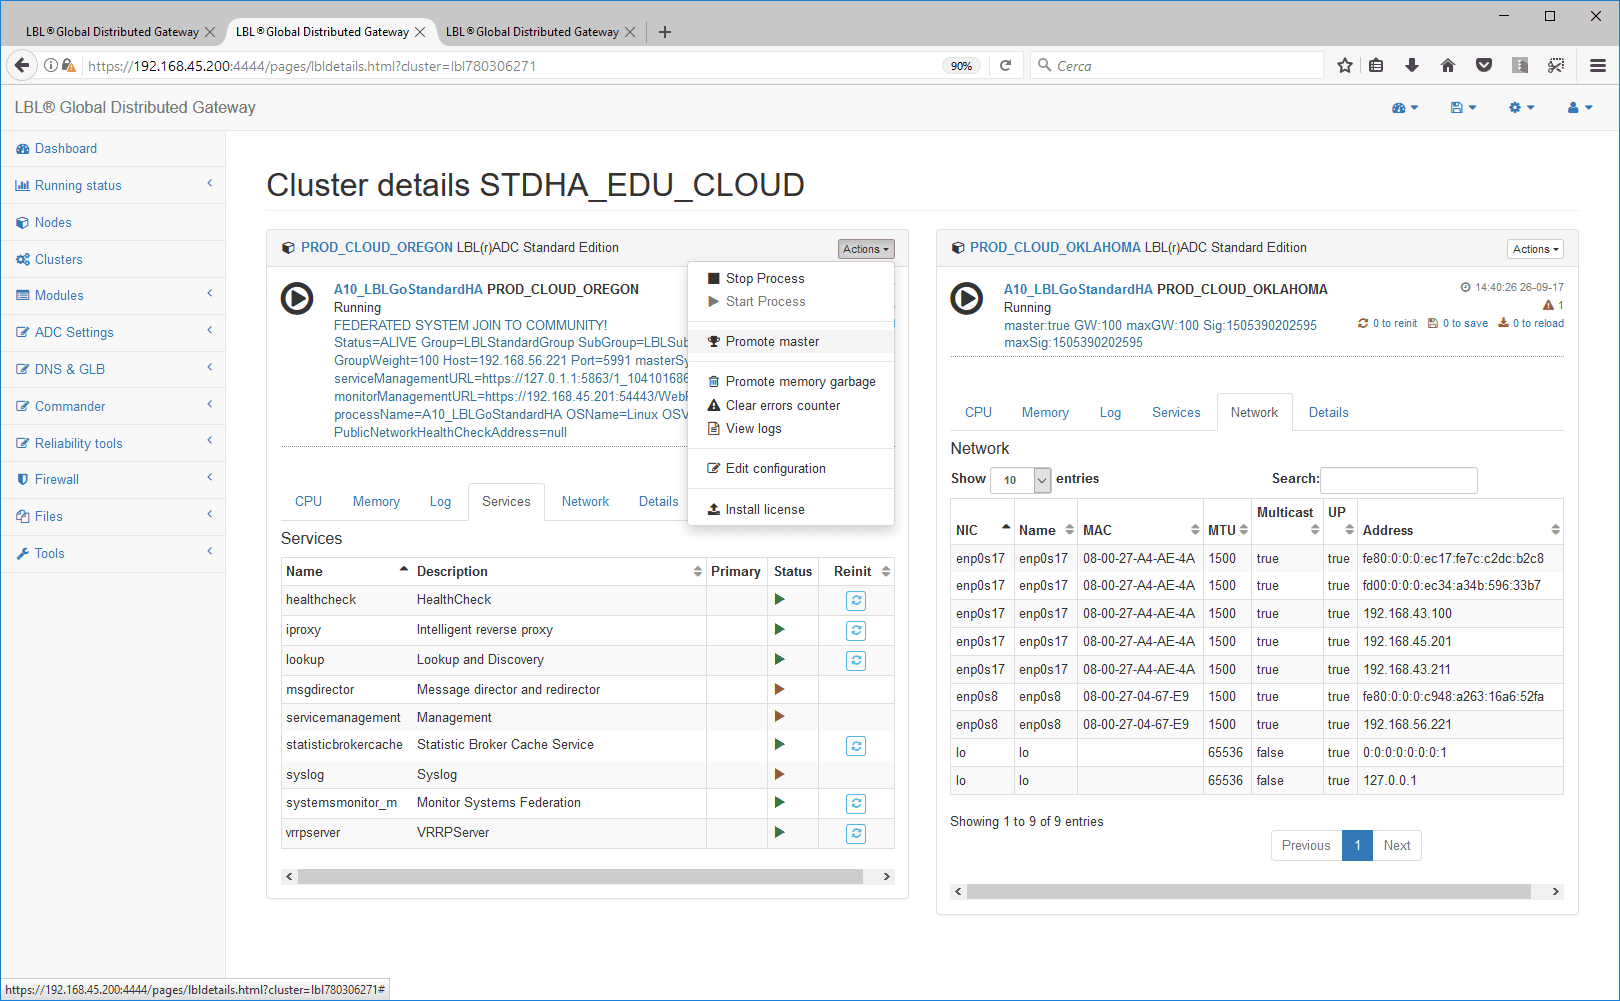
After a few moments, the virtual address migrates to the chosen node.
Enable automatic start of processes when starting VAPPs
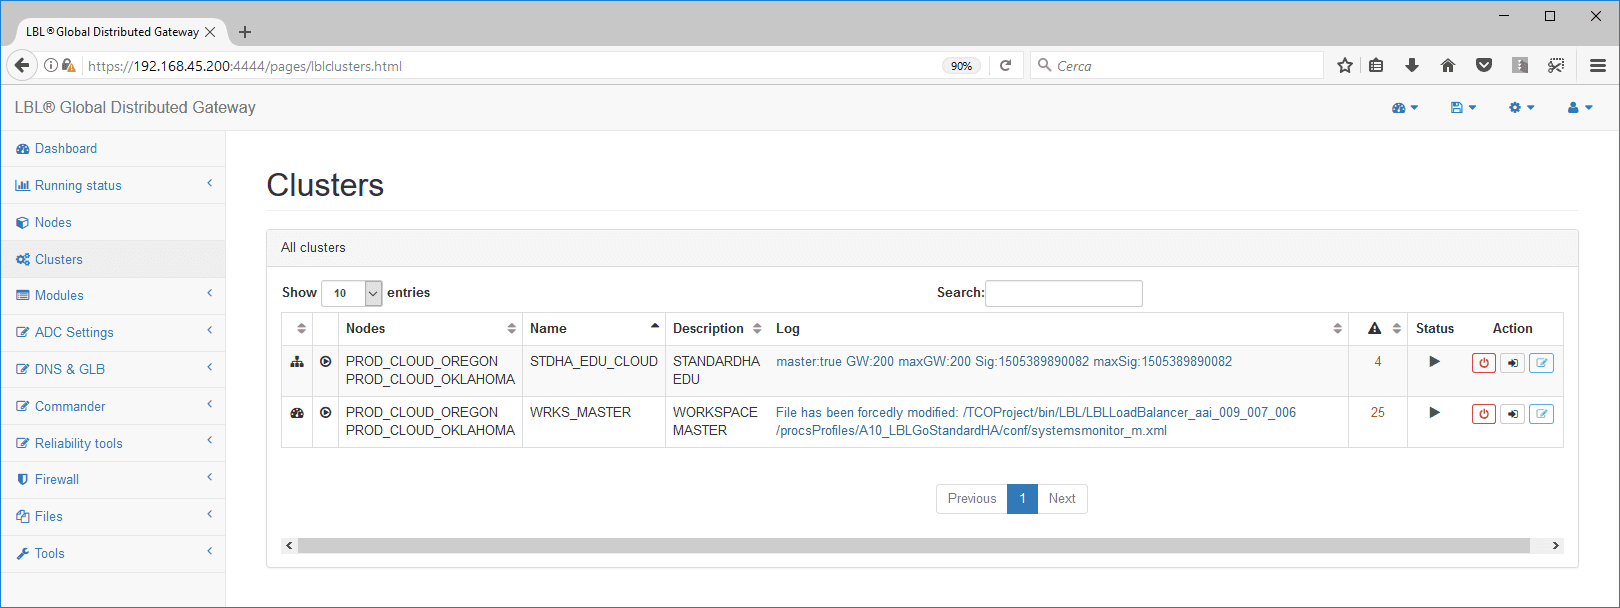
To make the processes start automatically when the virtual appliances start, go to Clusters > Edit.
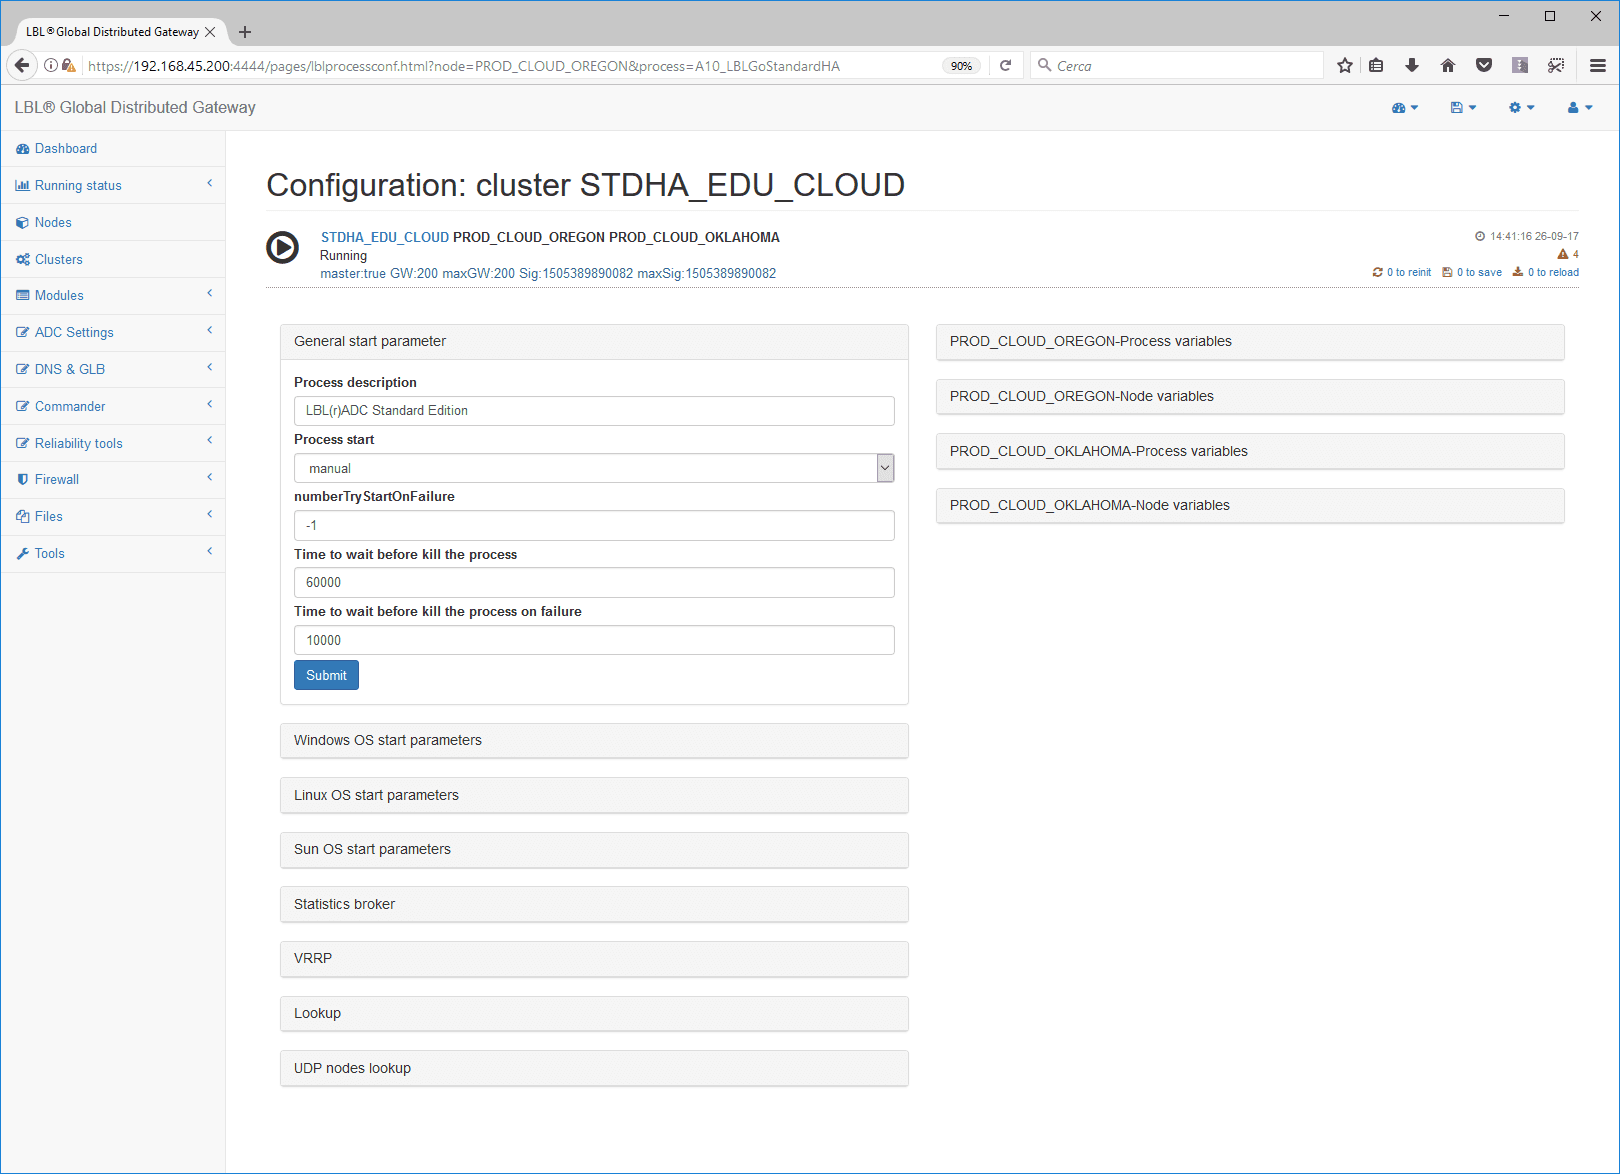
In the General start parameters panel, change the Process start parameter from manual to automatic.
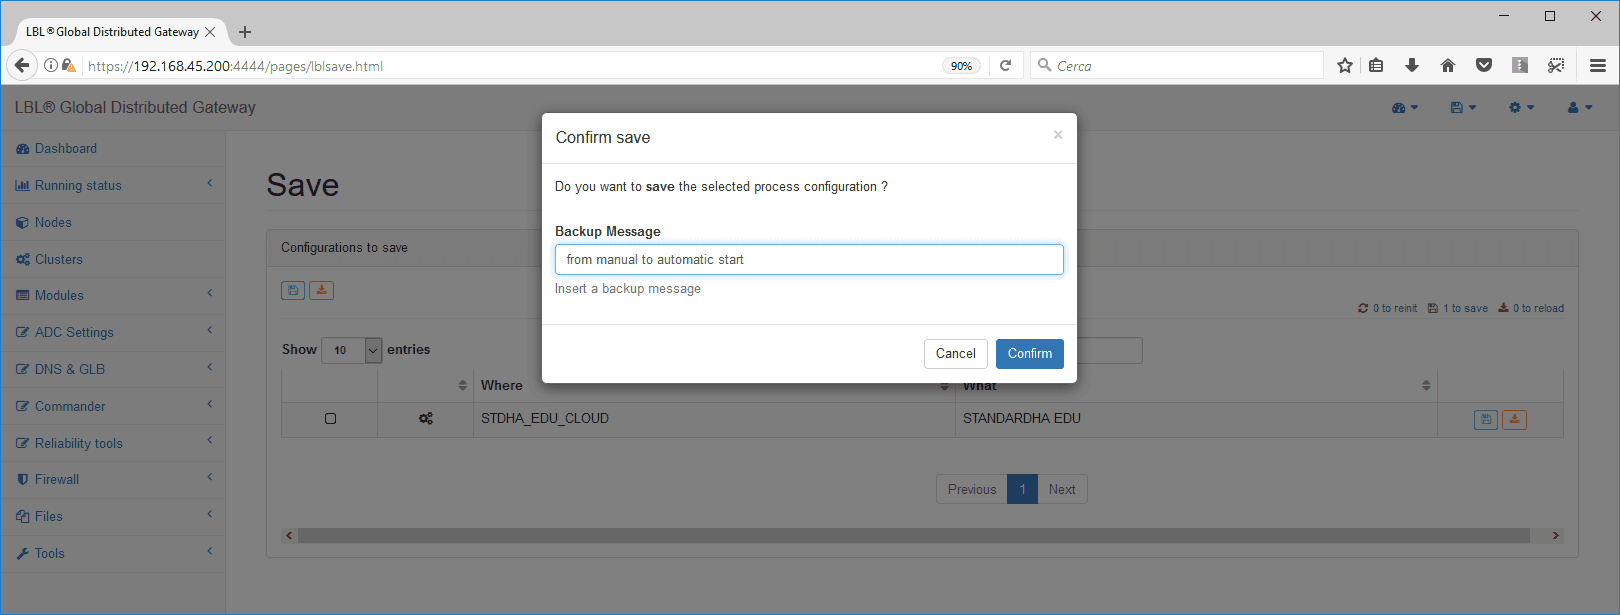
Save the configuration with Save: the processes restart automatically with the new configuration.
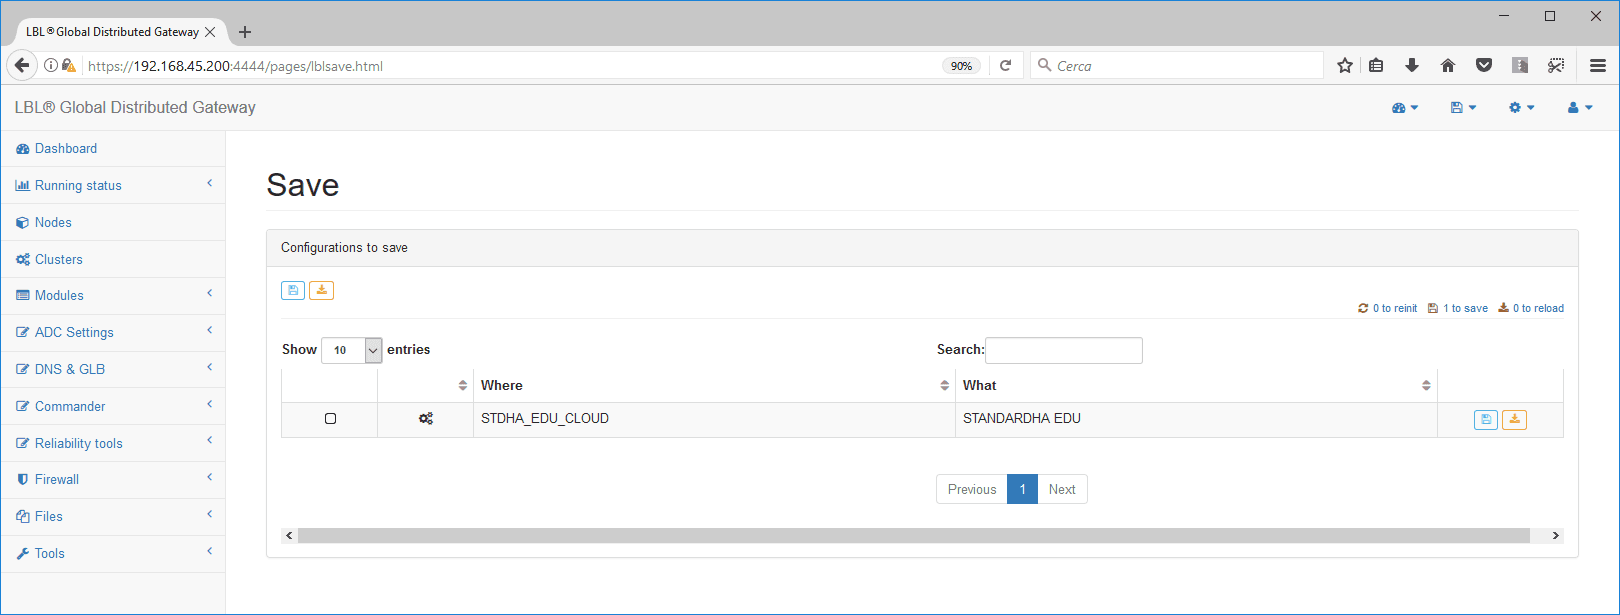
Describe the change.
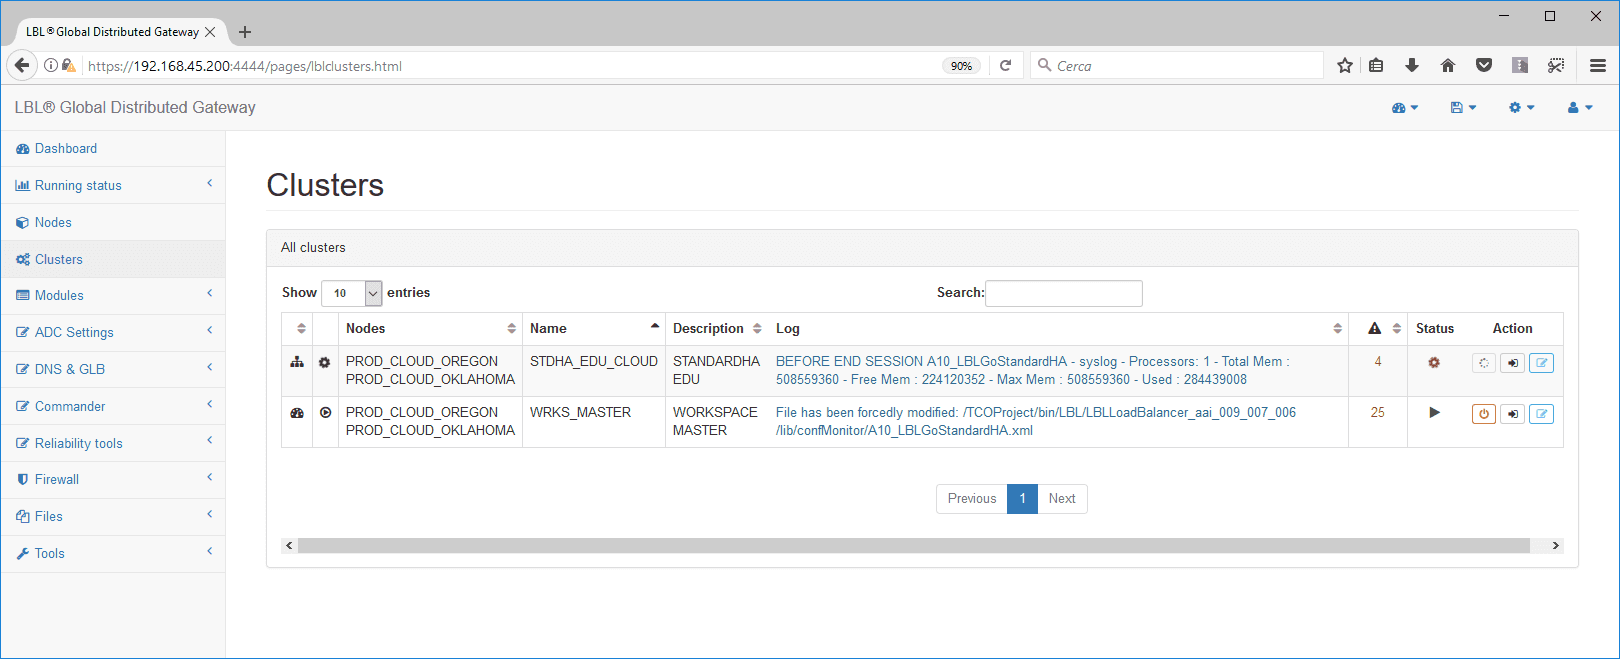
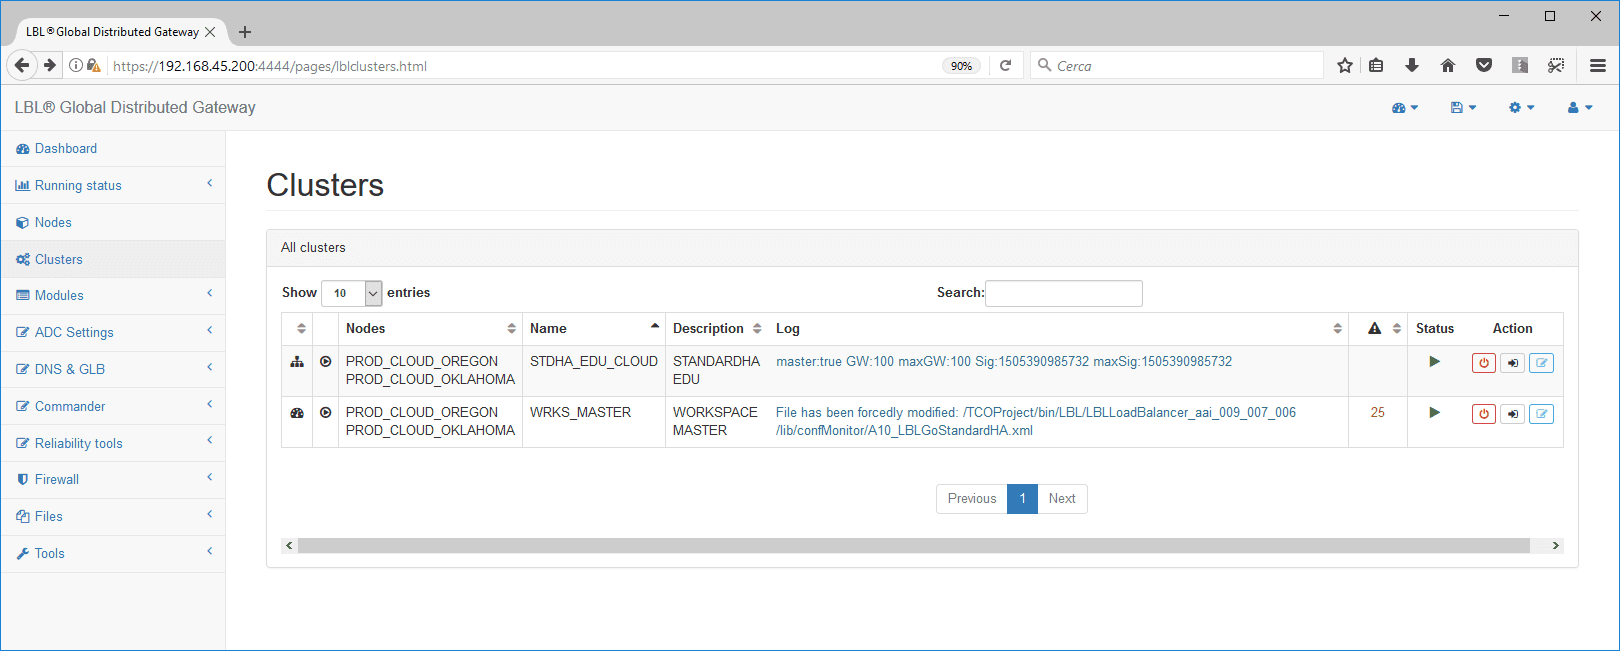
Both nodes of the cluster restart and return to the running state.
Master node attribution hierarchy
With Oplon ADC Standard HA, you can define a hierarchy for assigning the master status to the individual nodes. This feature is very useful when you have sites where, under normal operating conditions, one node is preferred as master over another. A typical use case for this feature is a Business Continuity configuration or geographic networks with addresses located in different regions (e.g.: Elastic IPs).
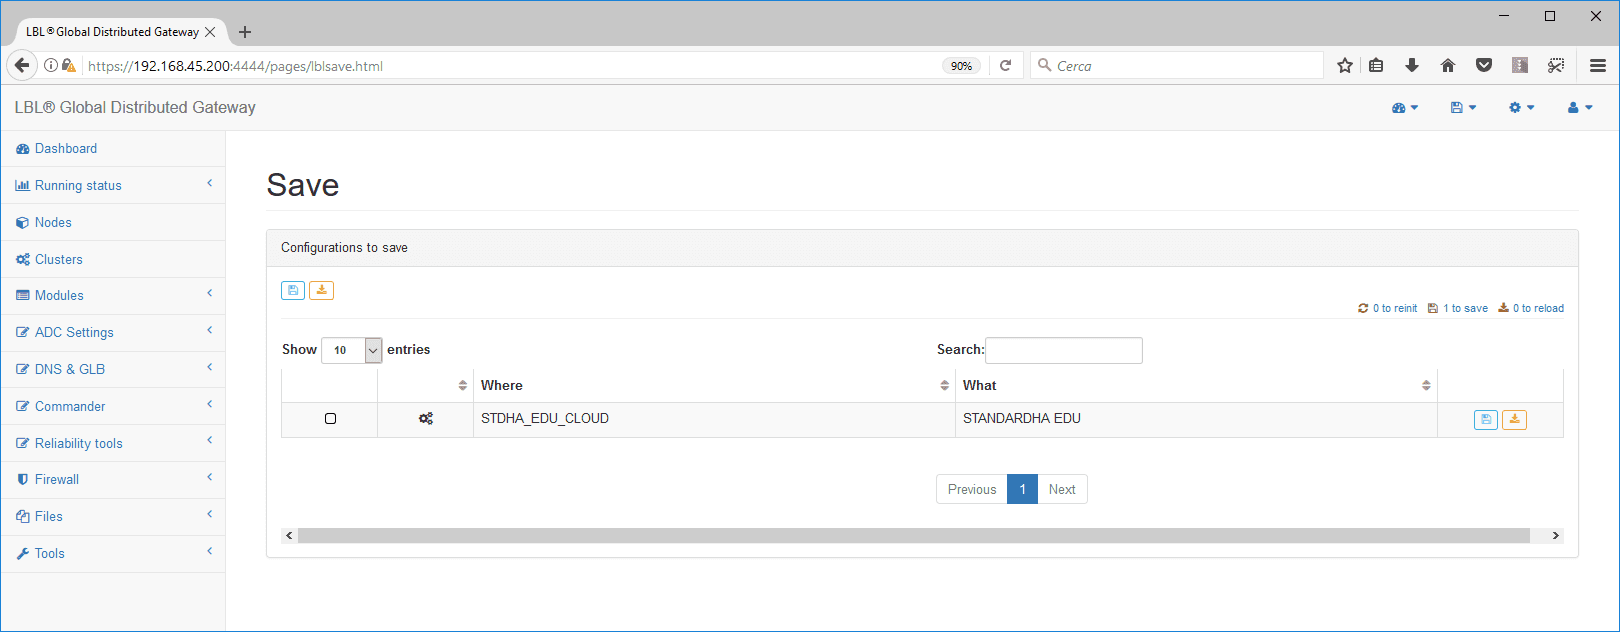
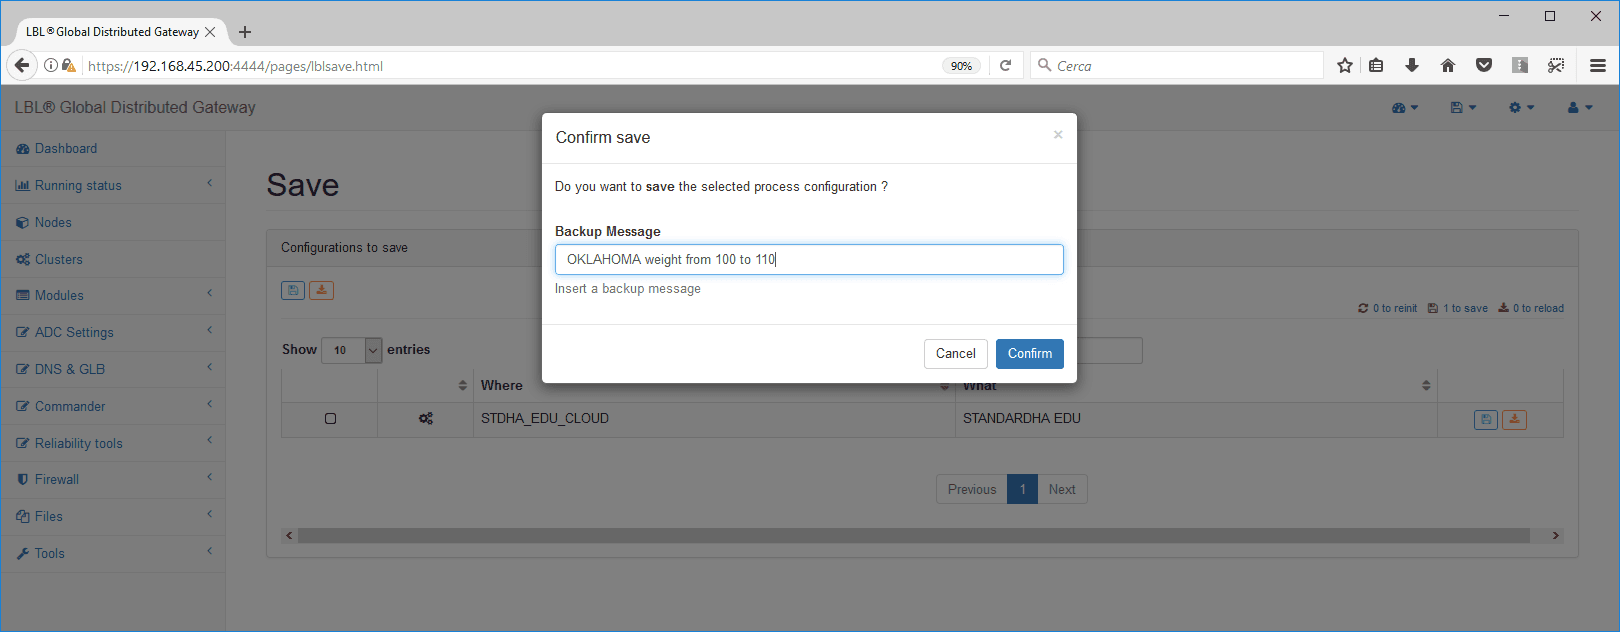
To determine in advance which node takes the master status at startup, simply change the “weight” of the node, which is set to 100 by default. In this example, the weight of the OKLAHOMA node is changed from 100 to 110.
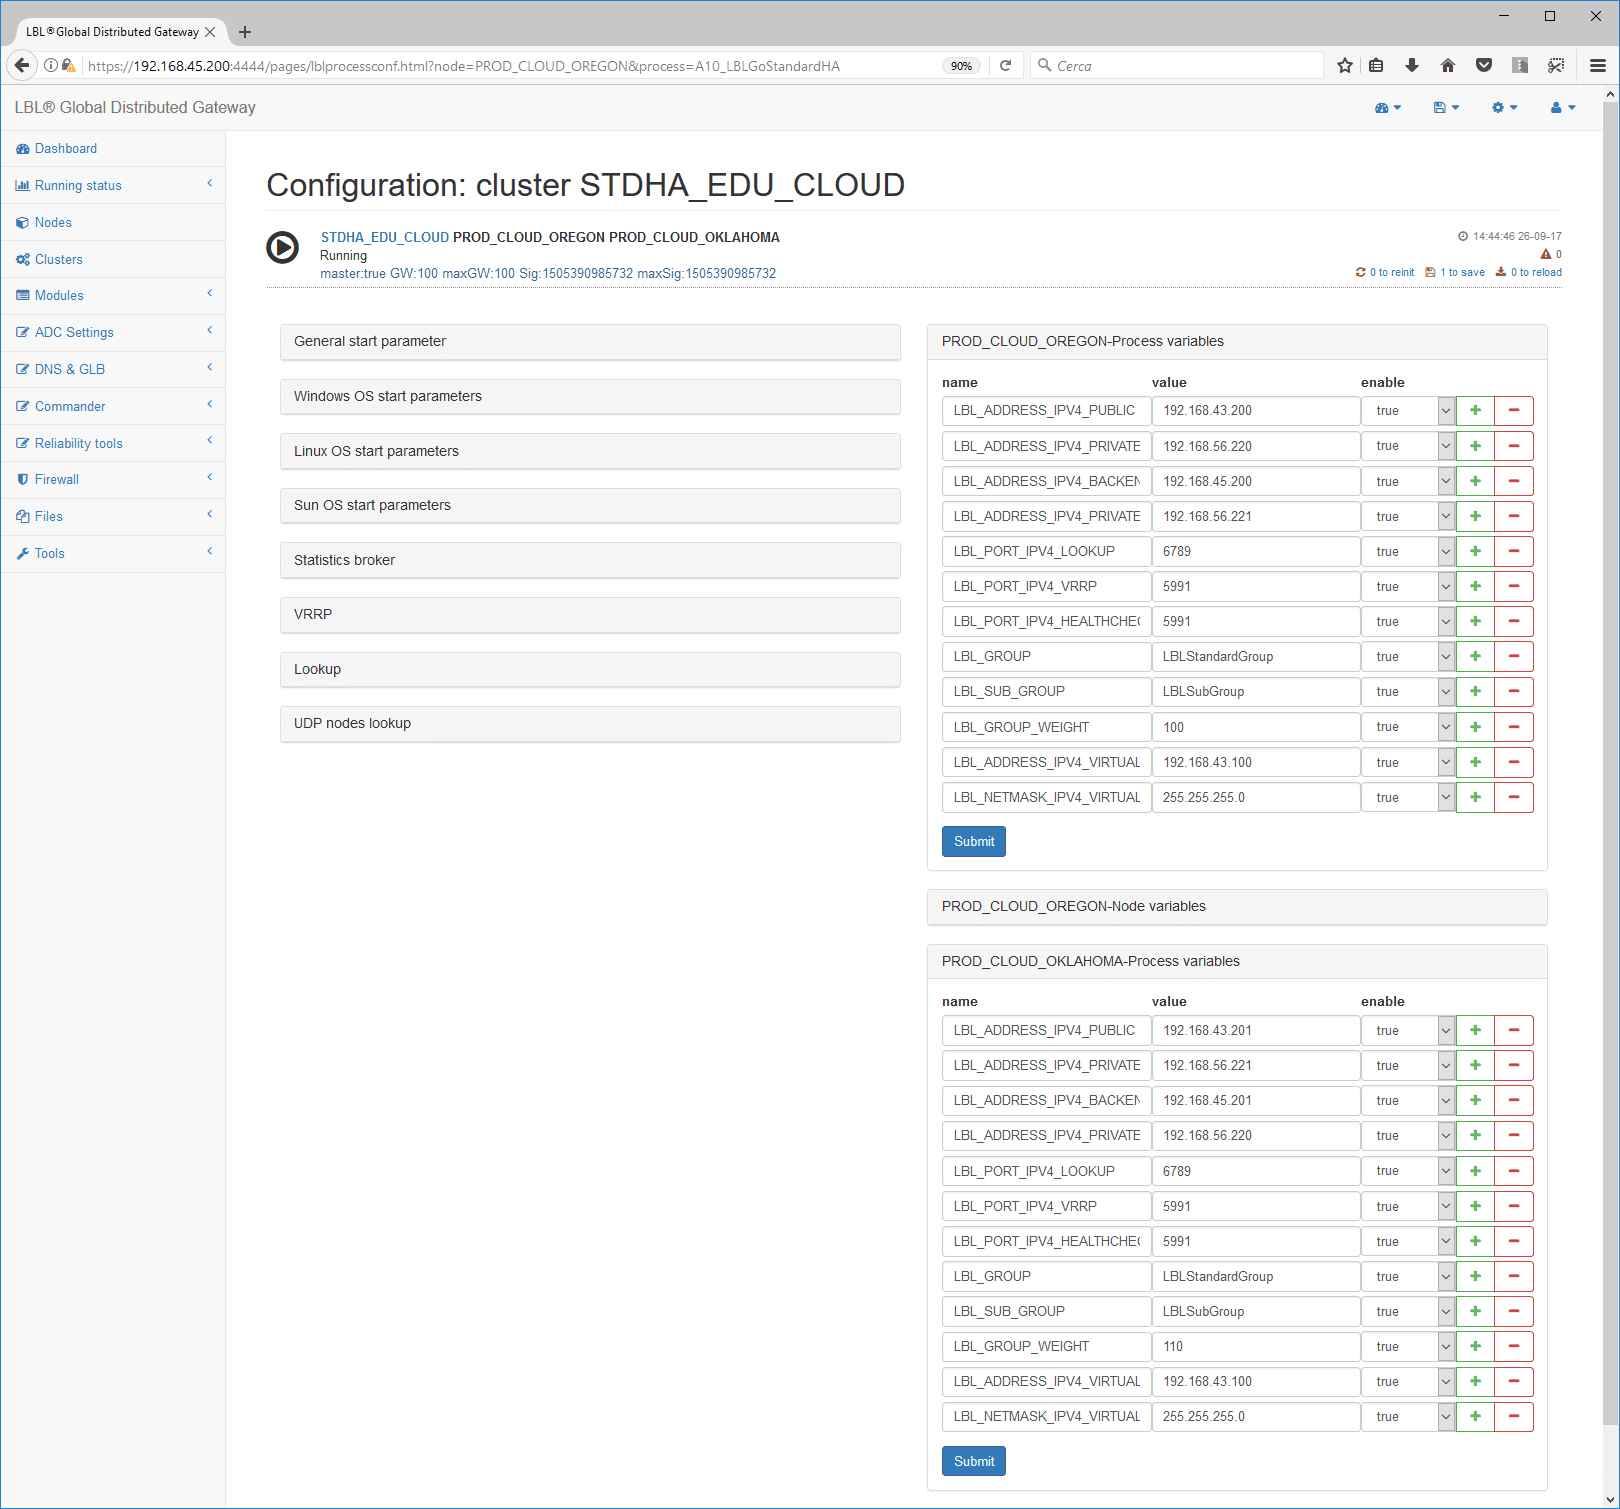
Save the change…
Describe the change…
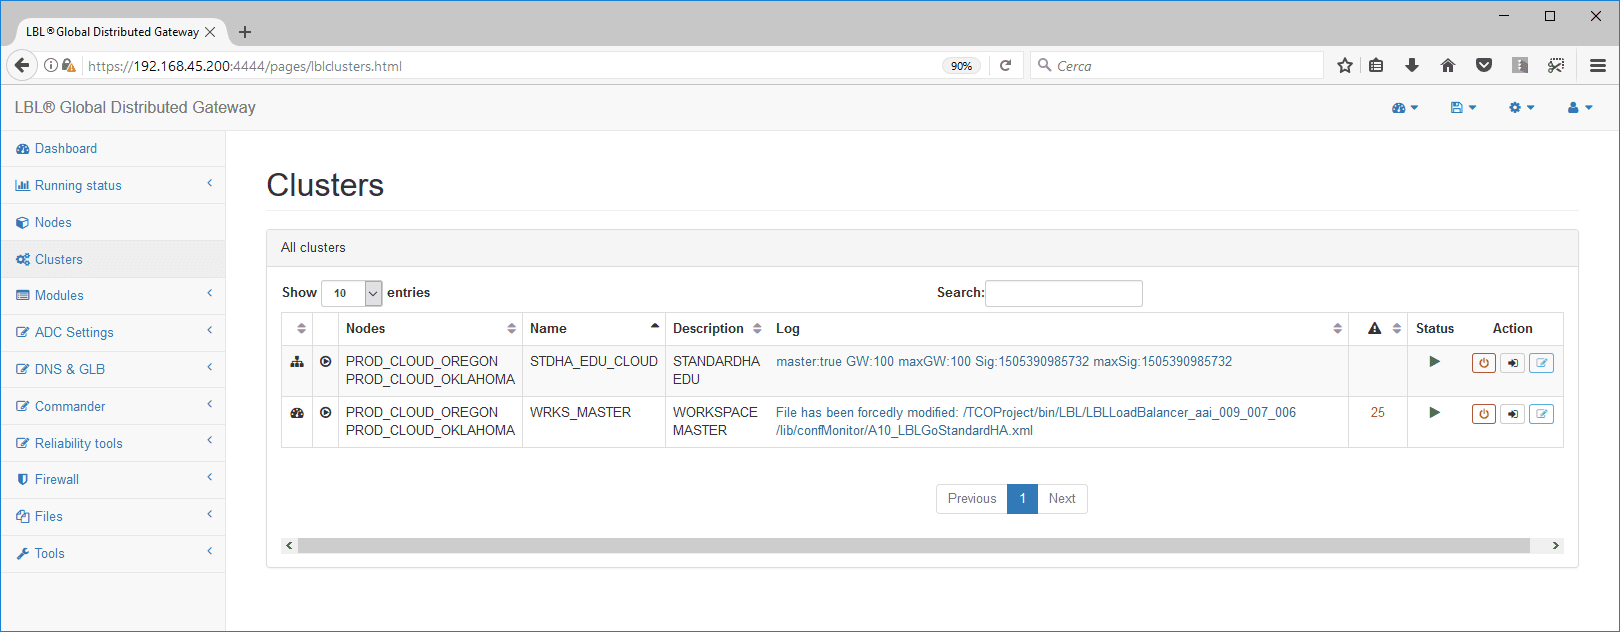
Re-initialize the services associated with determining the hierarchy.
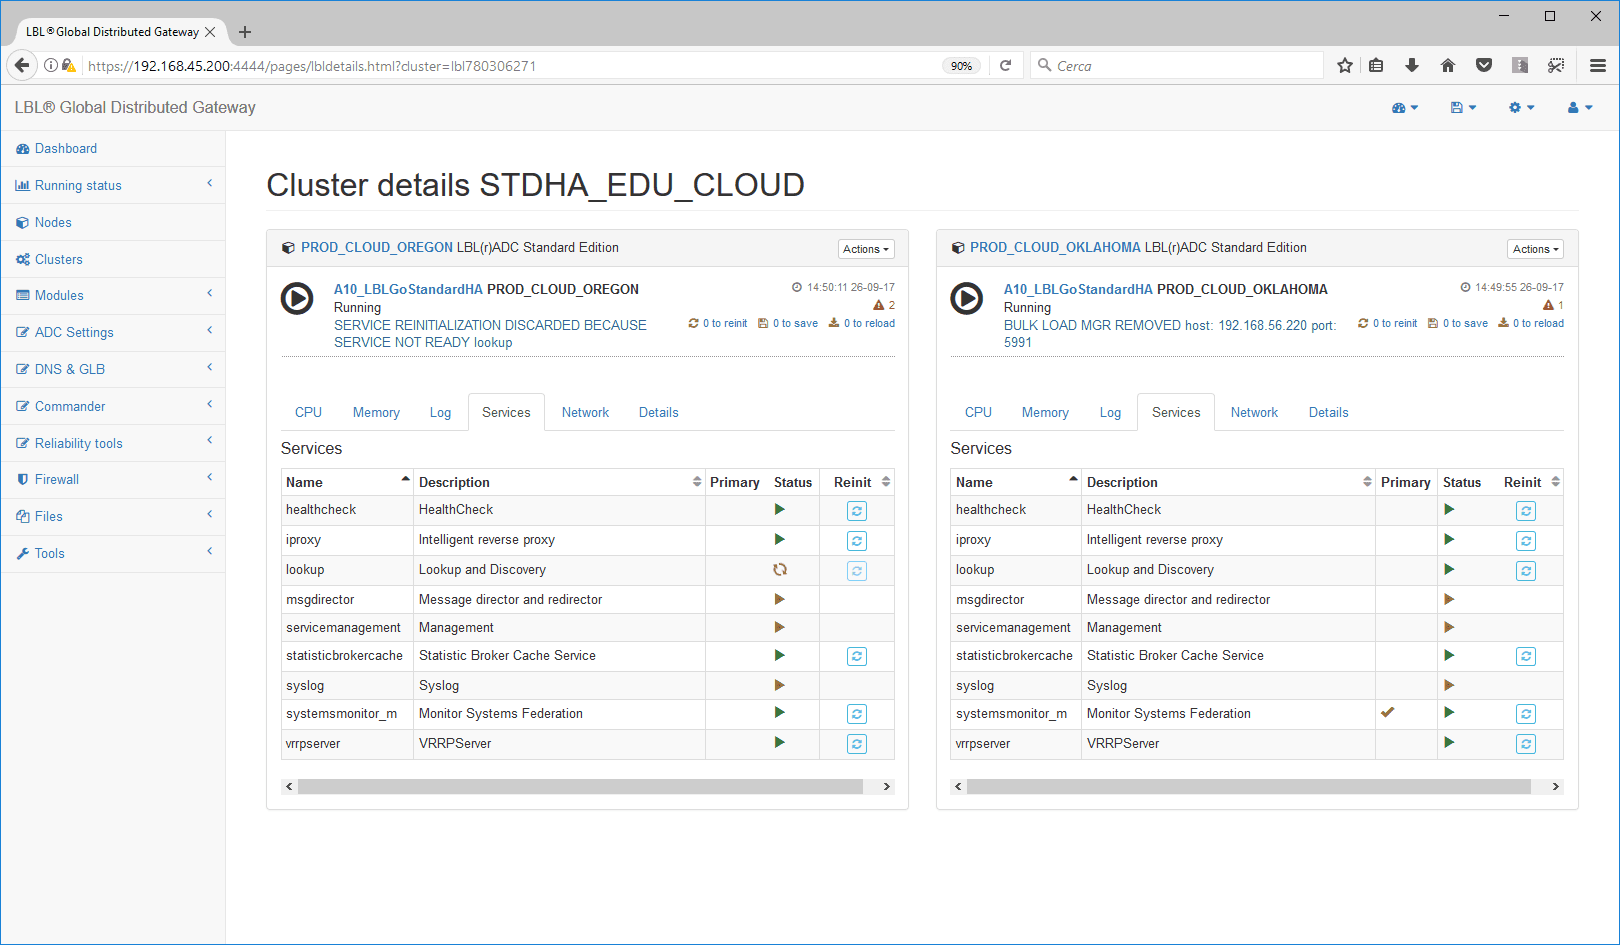
Reinit of the services associated with determining the hierarchy
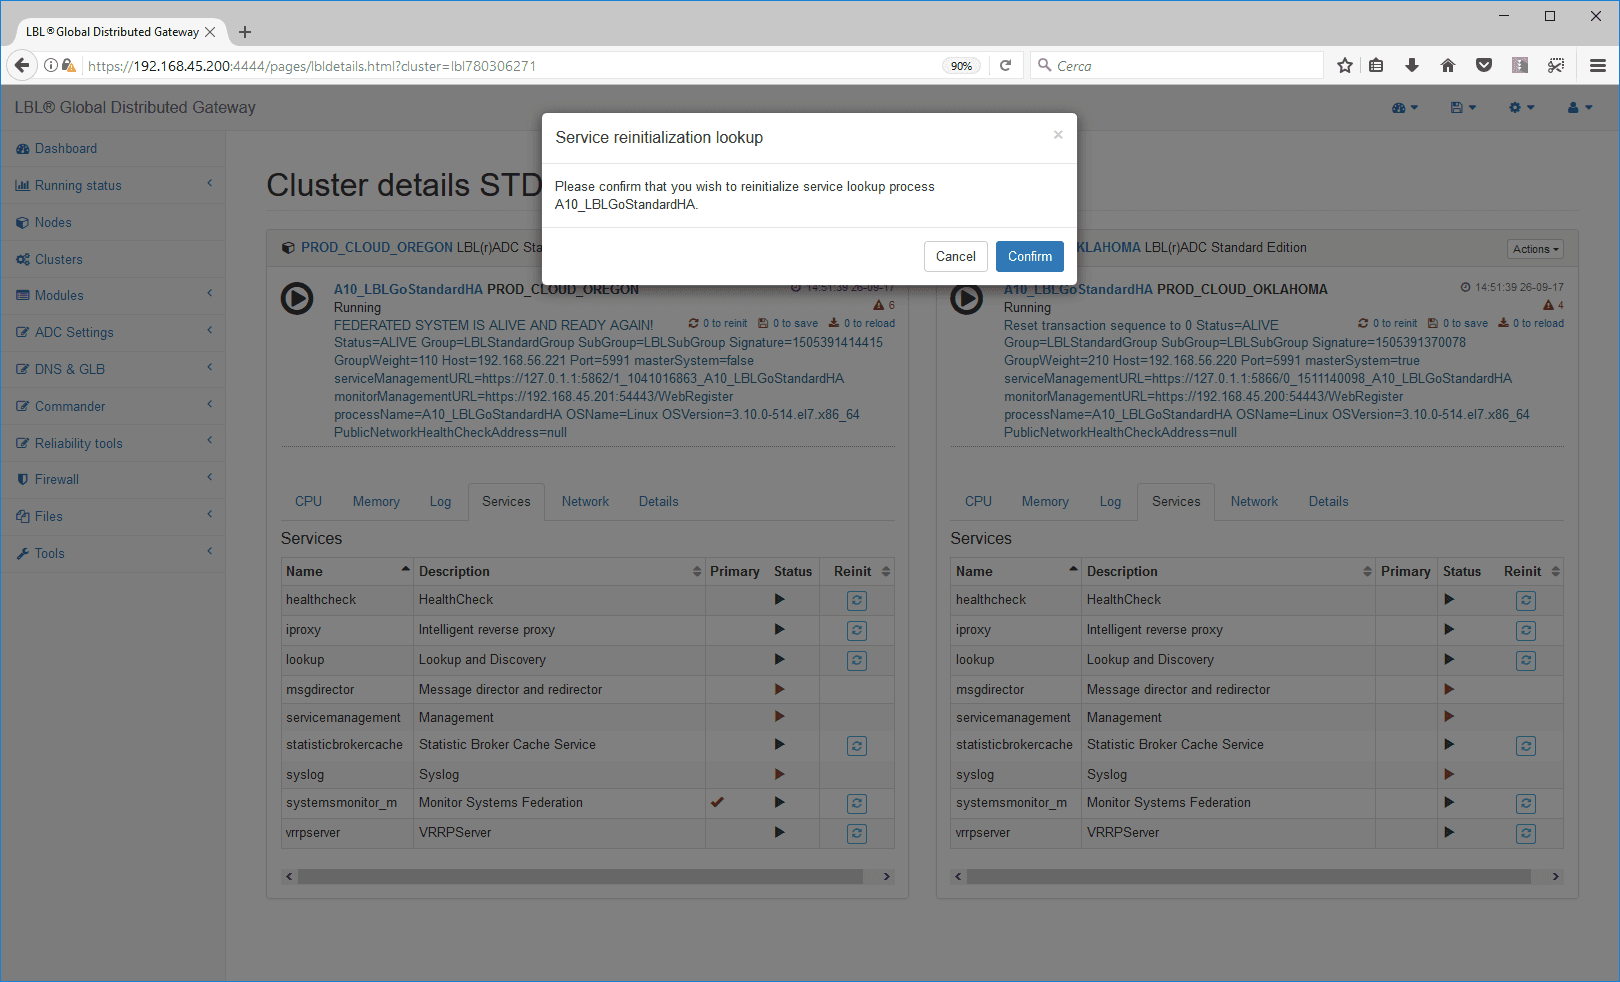
Confirm the operation
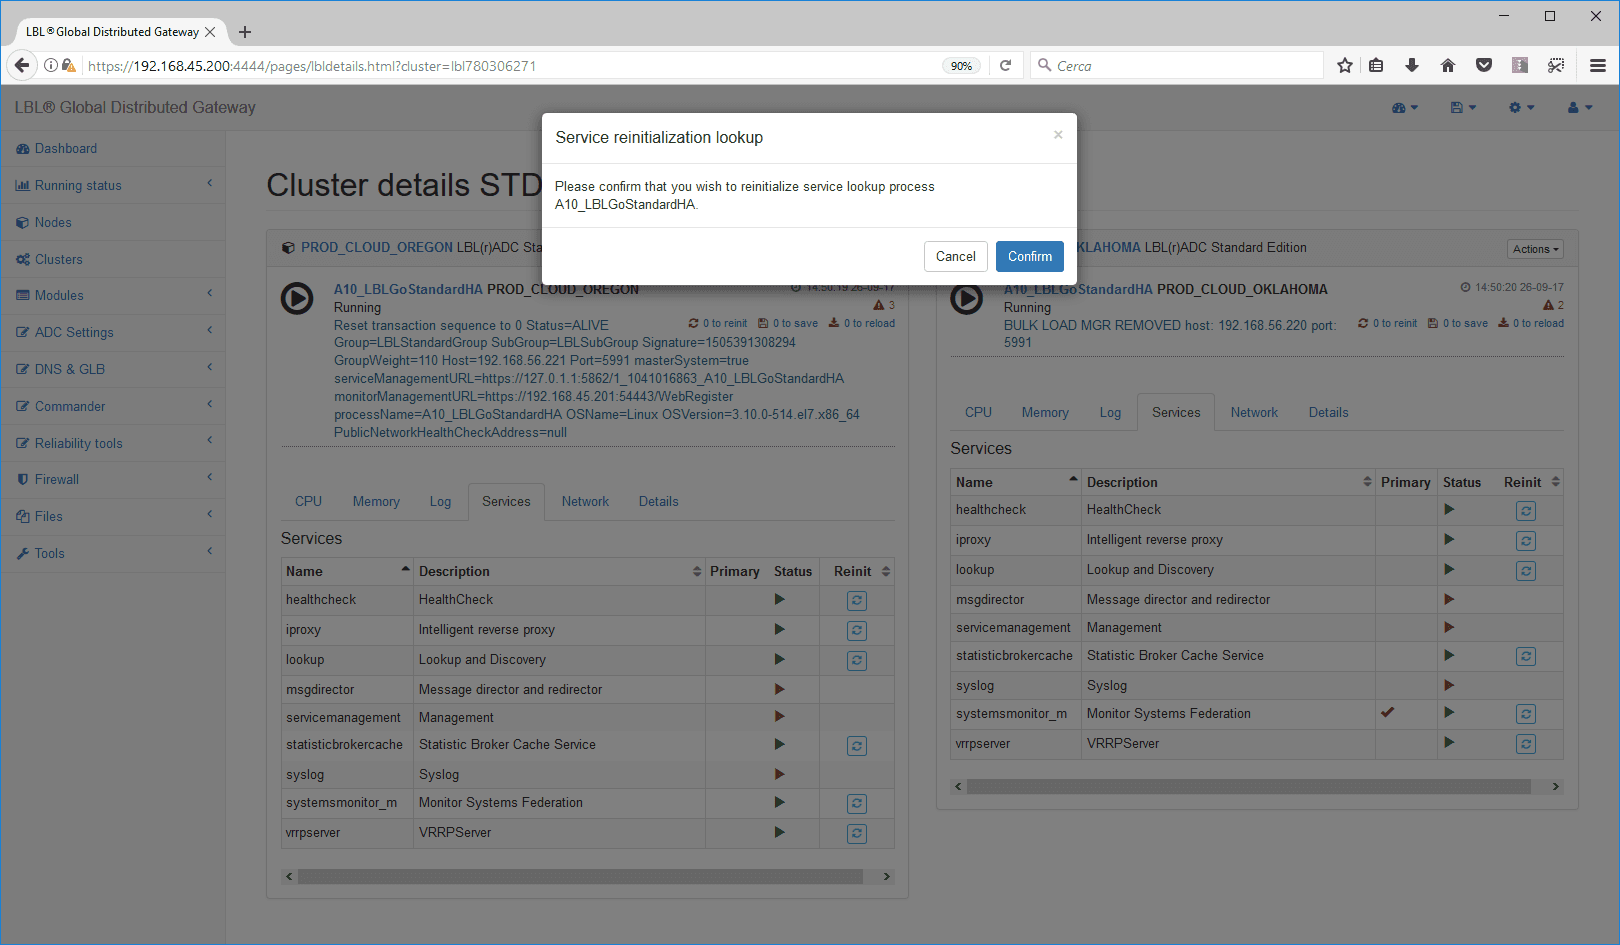
Reinit of the services associated with determining the hierarchy
Confirm the operation
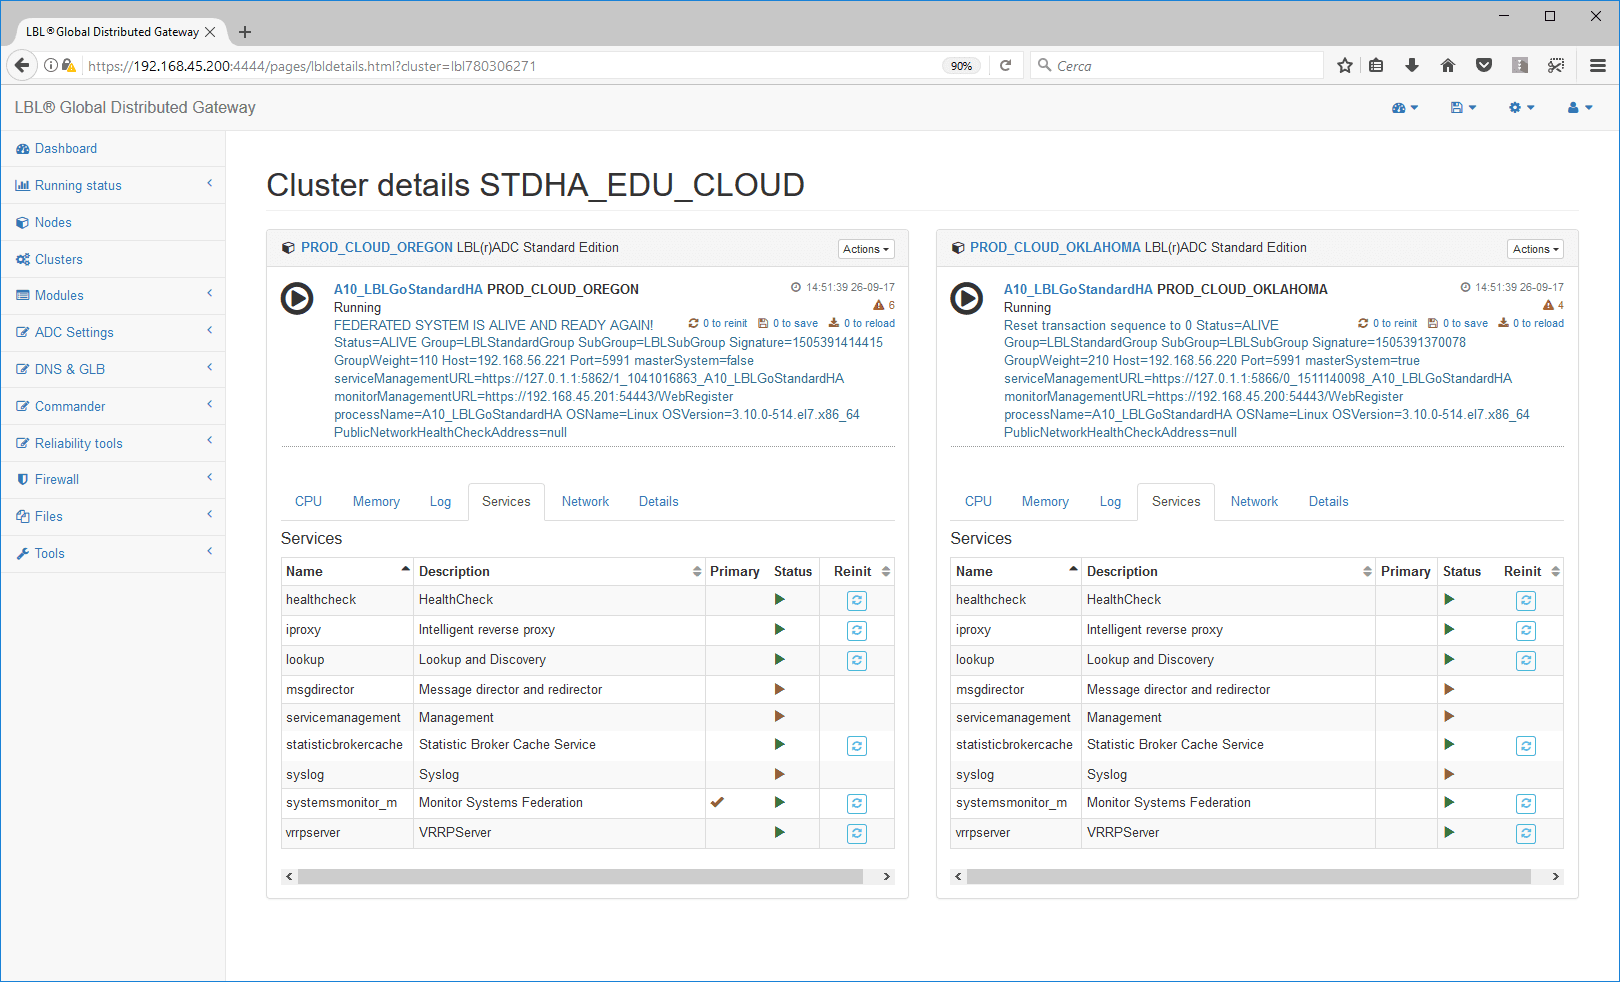
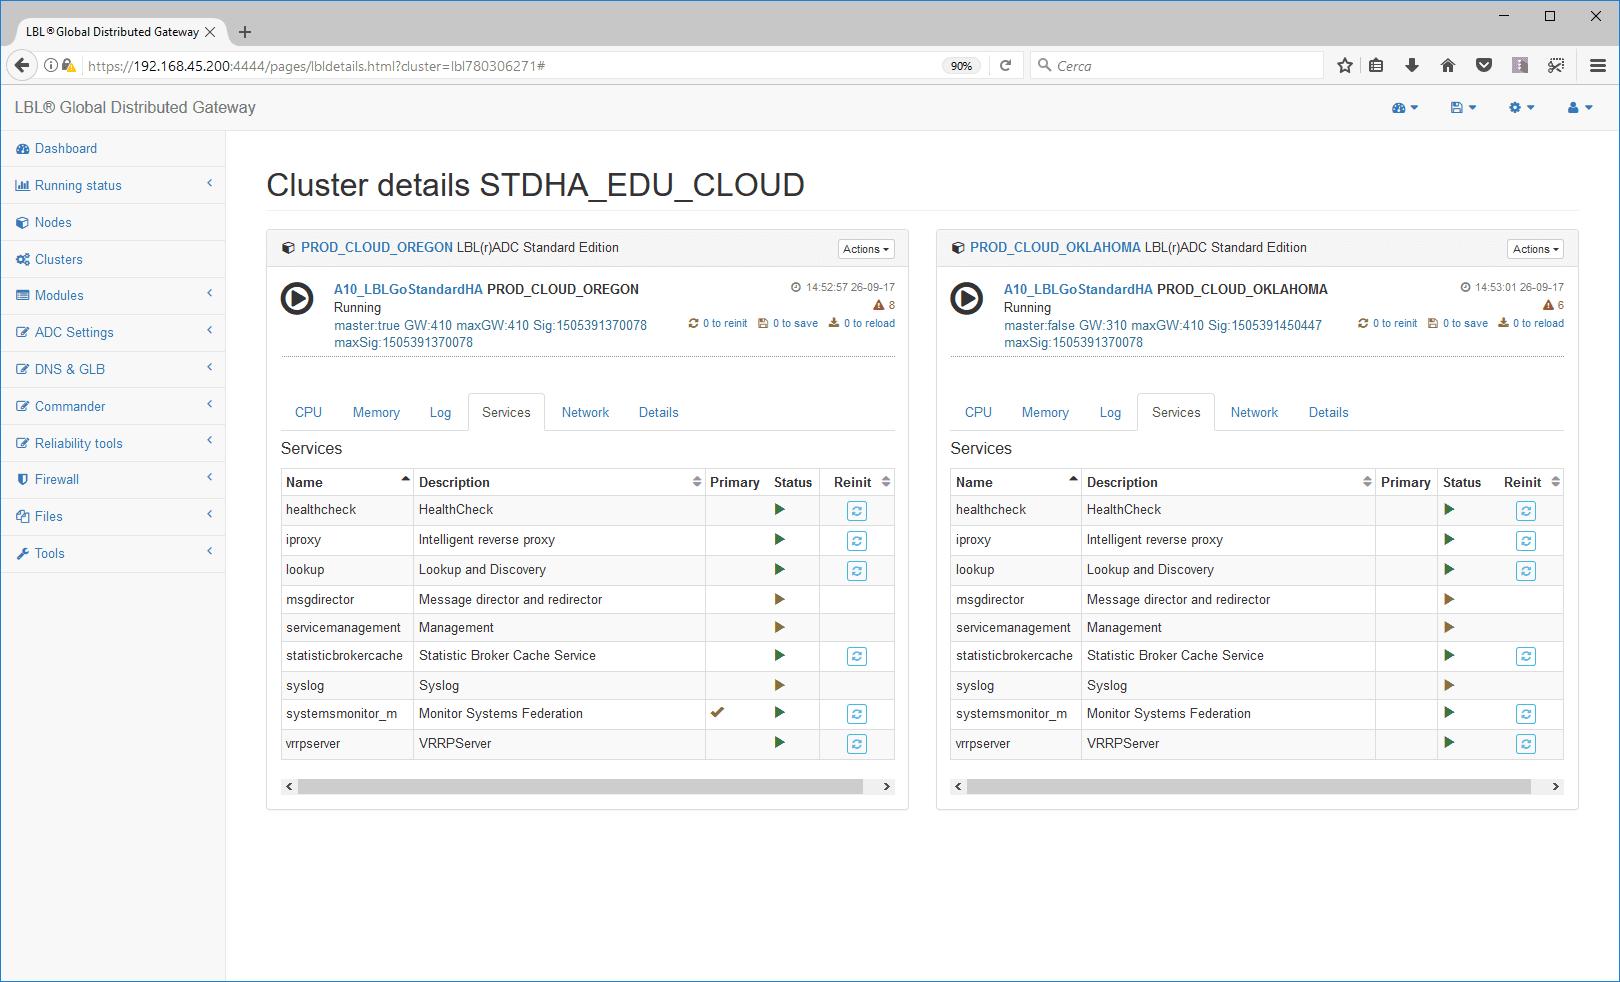
At the end of the service Reinit, the Virtual IP will be assigned to the node with the highest “weight”.
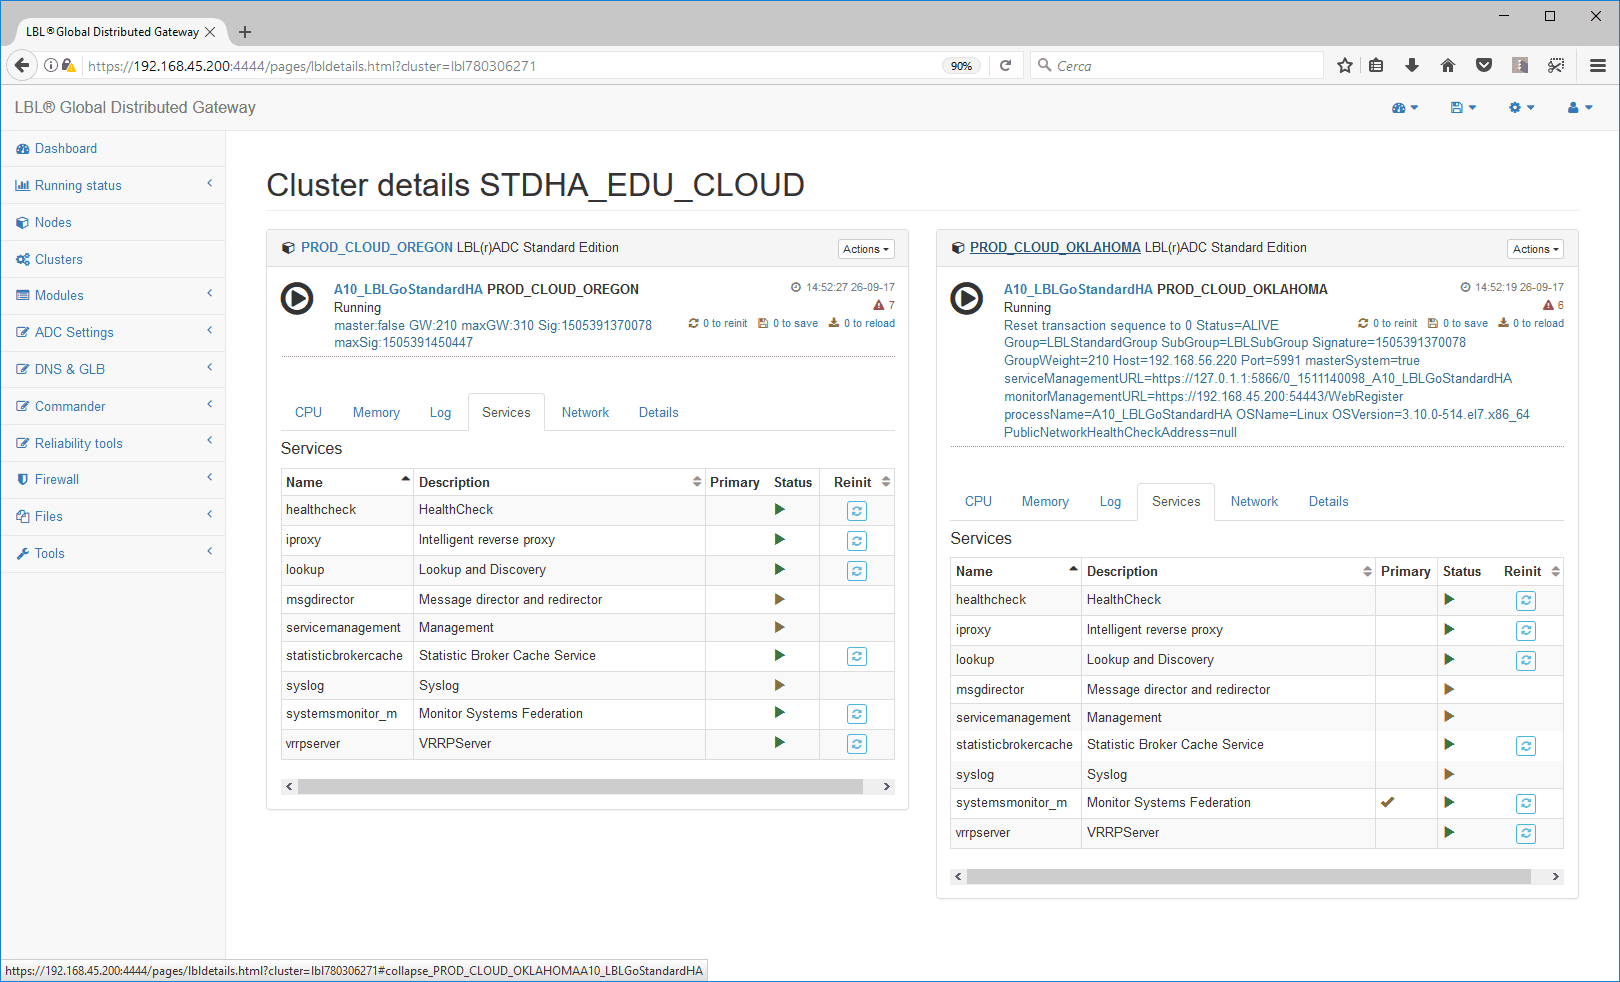
You can always manually reassign the VIP to the other node, until the next restart of the instances, with the Promote master command.
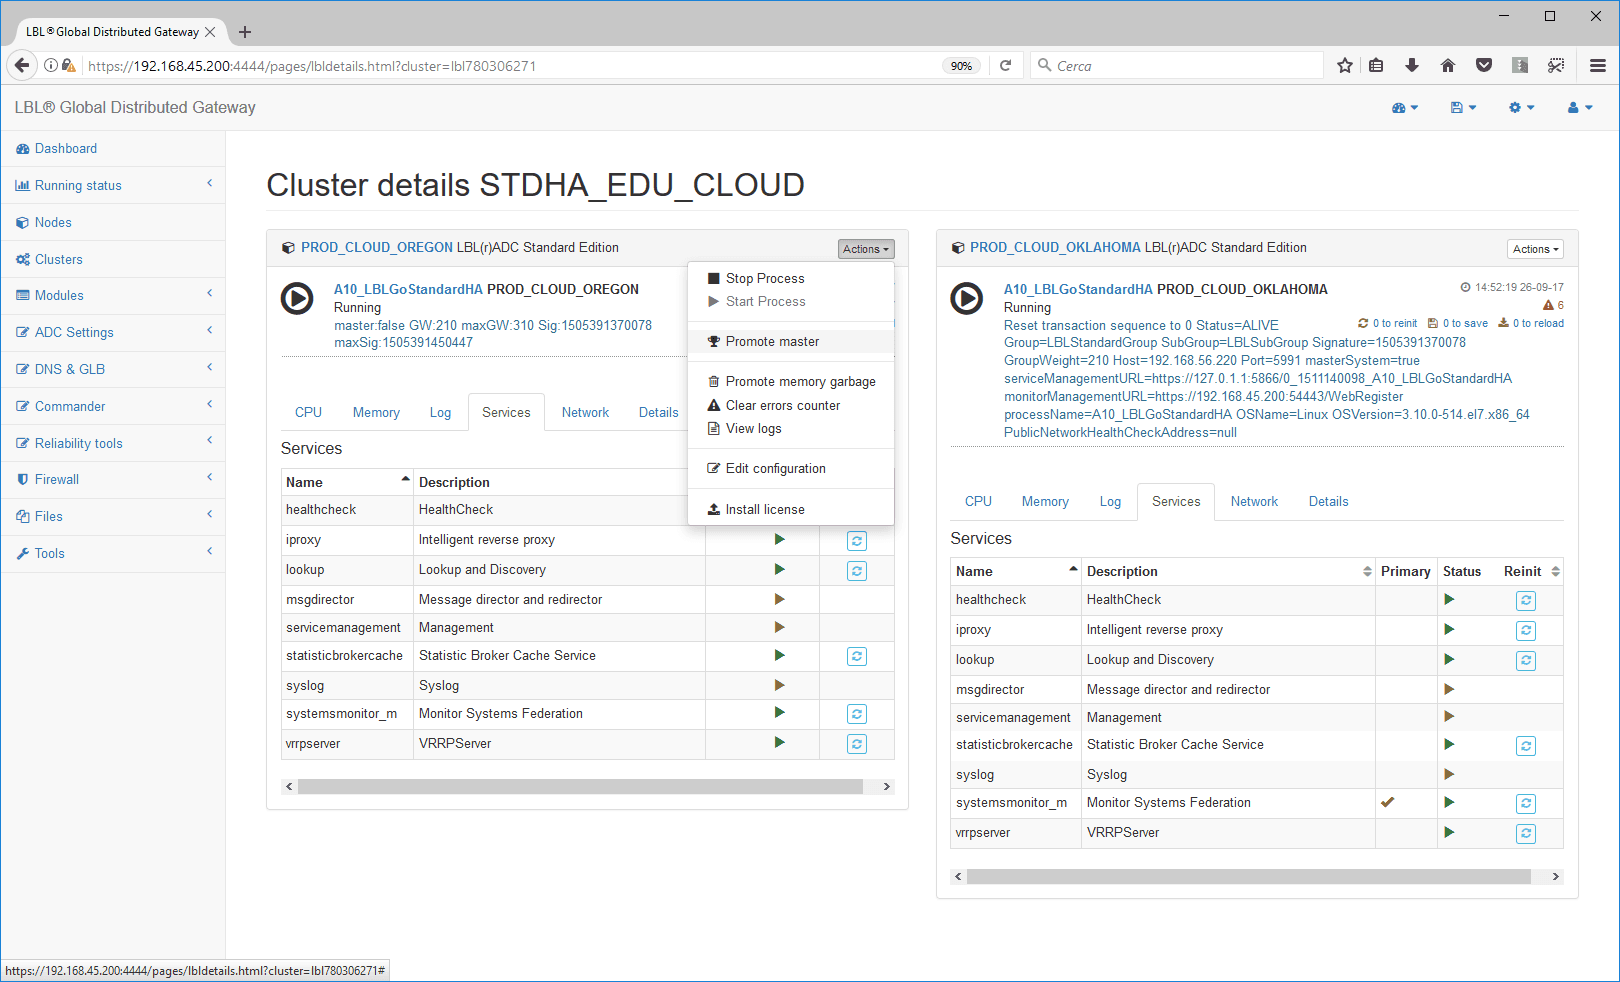
The Promote master command assigns the VIP to the selected node within a few moments.
Cluster certification in critical environments
In particularly critical environments, such as aircraft, ships and high-risk industrial plants, cluster certification can be carried out only by certified personnel holding a certificate digitally signed by OPLON NETWORKS SRL. In these environments, cluster certification requires sending OPLON NETWORKS the last page of the “installation and certification” form, which attests that the acceptance test has been passed.