Layer 2-3
Notes before use
Oplon Global Distributed Gateway ADC layer 2-3 is the layer 2-3 balancing feature that allows you to balance connections by performing DNAT of the source IP address.
To use the Oplon ADC layer 2-3 feature, you must use Oplon release 9.9.0 or later. If you are upgrading from a release earlier than 9.9.0, you must update to the new release with the utility available on the Oplon site (see the OPLON_GDG_InstallUpdate manual) and update the operating system over an Internet connection.
TCP and UDP Layer 2-3 packet management
Oplon ADC layer 2-3 uses the kernel packet routing queuing system, which is
configured through iptables commands; the packets are then processed by Oplon.
Two queues are used for each flow: the first receives packets from the client through one network interface, the second receives response packets from the endpoints through another network interface.
In the following example, two proxies receive layer 2-3 balanced traffic from within the datacenter and return the packets to the respective interfaces of the ADC system.
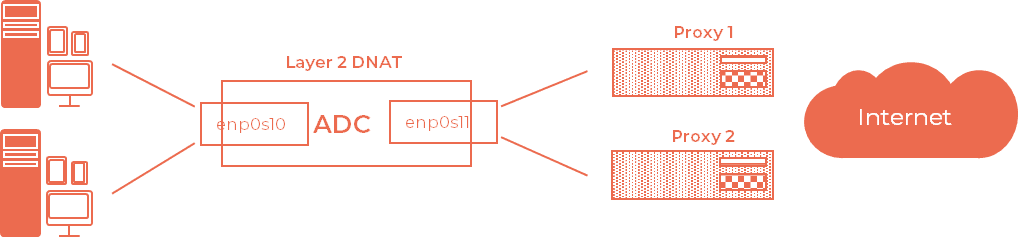
Requests that come from clients to the enp0s10 interface exit the
enp0s11 interface with the same IP as the client, modified by the ADC.
Once processed by the proxies, response packets are routed to the ADC, which
re-modulates the packets to deliver the response to the clients that
requested them.
The client and server request ports can be different: they are also changed by the ADC during the exchange.
To create the Layer 2-3 queues, you must act at 2 levels:
-
Generation of the input and output queues at IP stack level
-
Configuration of the queue usage by the ADC for packet processing
IP stack queue creation
To manage layer 2-3 packets and their routing, Oplon ADC uses the queue
manager built with iptables.
For each logical flow, Oplon ADC uses 2 queues, the first associated with the communication interface with clients, the second associated with the communication interface to the services. The queues are numbered for use by Oplon ADC.
Oplon ADC can handle countless flows associated with countless queues simultaneously.
The following diagram shows, as an example, the use of the Layer 2-3 component to load balance two proxies and make them highly available. Queue 0 is associated with the network adapter facing the clients, queue 1 with the network adapter facing the proxies.
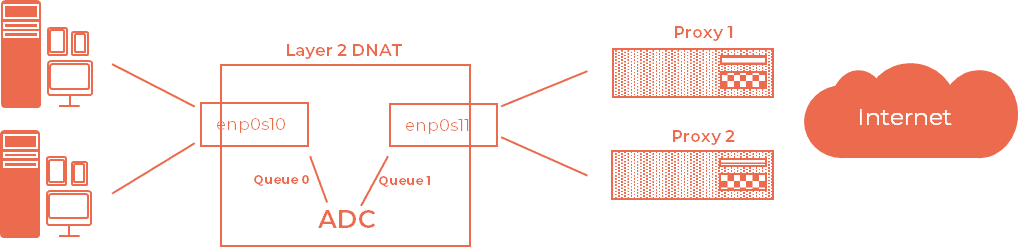
To set up the queues, run the following commands as root.
For TCP/IP
# iptables -t mangle -A PREROUTING -i enp0s10 -p tcp -s 192.168.43.0/24 -j NFQUEUE --queue-num 0# iptables -t mangle -A FORWARD -i enp0s17 -p tcp -s 192.168.31.0/24 -j NFQUEUE --queue-num 1For UDP/IP
# iptables -t mangle -A PREROUTING -i enp0s10 -p udp -s 192.168.43.0/24 -j NFQUEUE --queue-num 2# iptables -t mangle -A FORWARD -i enp0s17 -p udp -s 192.168.31.0/24 -j NFQUEUE --queue-num 3To check the packet flow at a low level, run the following commands, applied to the two queues, in two terminals. The commands display the packet flows with their direction:
Data flow on the interface facing the clients
# tcpdump -i enp0s10 port 80 or port 8080 or port 3128
Data flow on the interface facing the services
# tcpdump -i enp0s17 port 8080 or port 80 or port 3128
Another step is to set the socket stack to forward packets:
# sysctl net.ipv4.ip_forward=1
To check the list of assigned queues, run:
# iptables -t mangle --L
Chain PREROUTING (policy ACCEPT)
target prot opt source destination
NFQUEUE tcp -- 192.168.43.0/24 anywhere NFQUEUE num 0

Chain INPUT (policy ACCEPT)
target prot opt source destination
Chain FORWARD (policy ACCEPT)
target prot opt source destination
NFQUEUE tcp -- 192.168.31.0/24 anywhere NFQUEUE num 1

Chain OUTPUT (policy ACCEPT)
target prot opt source destination
Chain POSTROUTING (policy ACCEPT)
target prot opt source destination
To check the activity on the individual queues, run:
# cat /proc/net/netfilter/nfnetlink_queue
0 25214 0 2 65531 0 0 97 1
1 2691274501 0 2 65531 0 0 120 1
a- queue number
b- peer portid: most likely the process ID of the software listening to the queue
c- queue total: current number of packets waiting in the queue
d- copy mode: with 0 and 1, the message only provides metadata; with 2, the message provides a part of the packet, of size copy range.
e- copy range: length of packet data to put in the message
f- queue dropped: number of packets dropped because the queue was full
g- user dropped: number of packets dropped because the netlink message could not be sent to userspace. If this counter is not zero, try to increase the netlink buffer size. On the application side, you will see gaps in packet IDs if netlink messages are lost.
h- id sequence: packet ID of the last packet
i- 1
Scalability and parallelism
You can scale across multiple processors by setting up parallel queues, as in the example below, where 6 inbound queues and 6 outbound queues are created.
iptables -t mangle -A PREROUTING -i enp0s10 -p udp -d 192.168.43.0/24 -j NFQUEUE --queue-balance 2:7 --queue-cpu-fanout
iptables -t mangle -A FORWARD -i enp0s17 -p udp -s 192.168.31.0/24 -j NFQUEUE --queue-balance 8:13 --queue-cpu-fanout
From Oplon version 10.1.0 onwards, the layer2QueueIn and layer2QueueOut parameters can be set with the same ranges as the NFQUEUE settings in iptables, for example:
layer2QueueIn   2:7
layer2QueueOut  8:13
Broadcast blocking
In some circumstances it is advisable to block broadcast traffic from the endpoints, which would otherwise be propagated to the public network. To block broadcast forwarding, set:
iptables -A FORWARD -s 255.255.255.255 -i enp0s17 -j DROPAttaching the Packet Queue to ADC Routing
Oplon ADC forwards packets in DNAT while maintaining the session. To associate the queues with DNAT or DNAT_UDP processing by the ADC, simply use the templates already included in the distributions.
Template: DNAT and DNAT_UDP
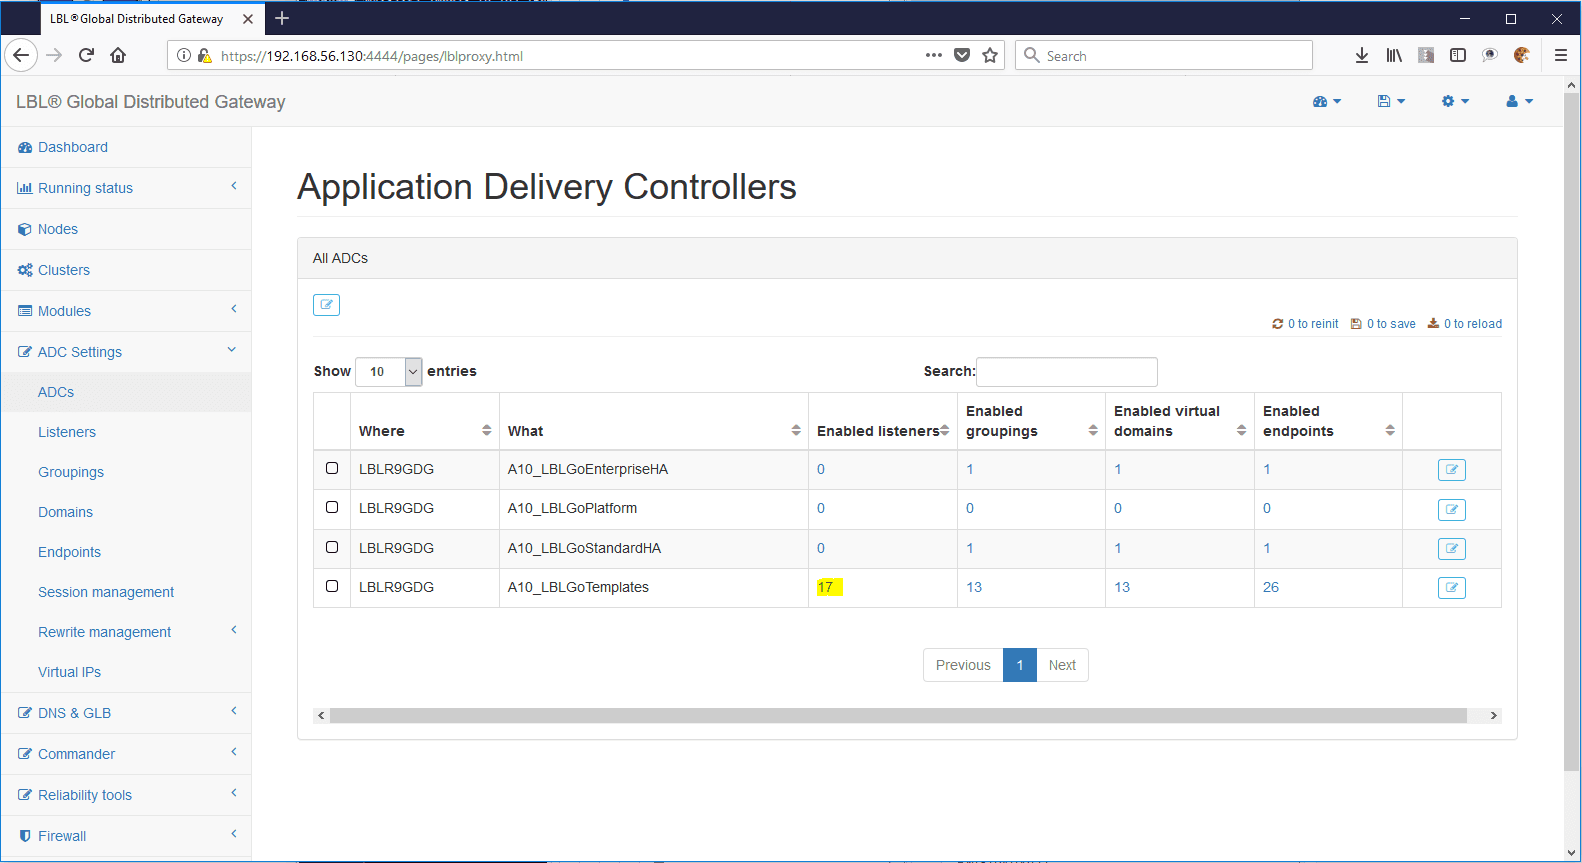
After logging in, go to ADC Settings > ADCs and select the template listeners:
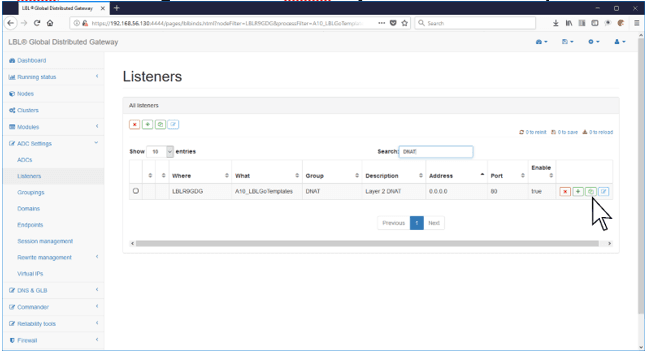
In the list of template listeners, type DNAT in the Search field:
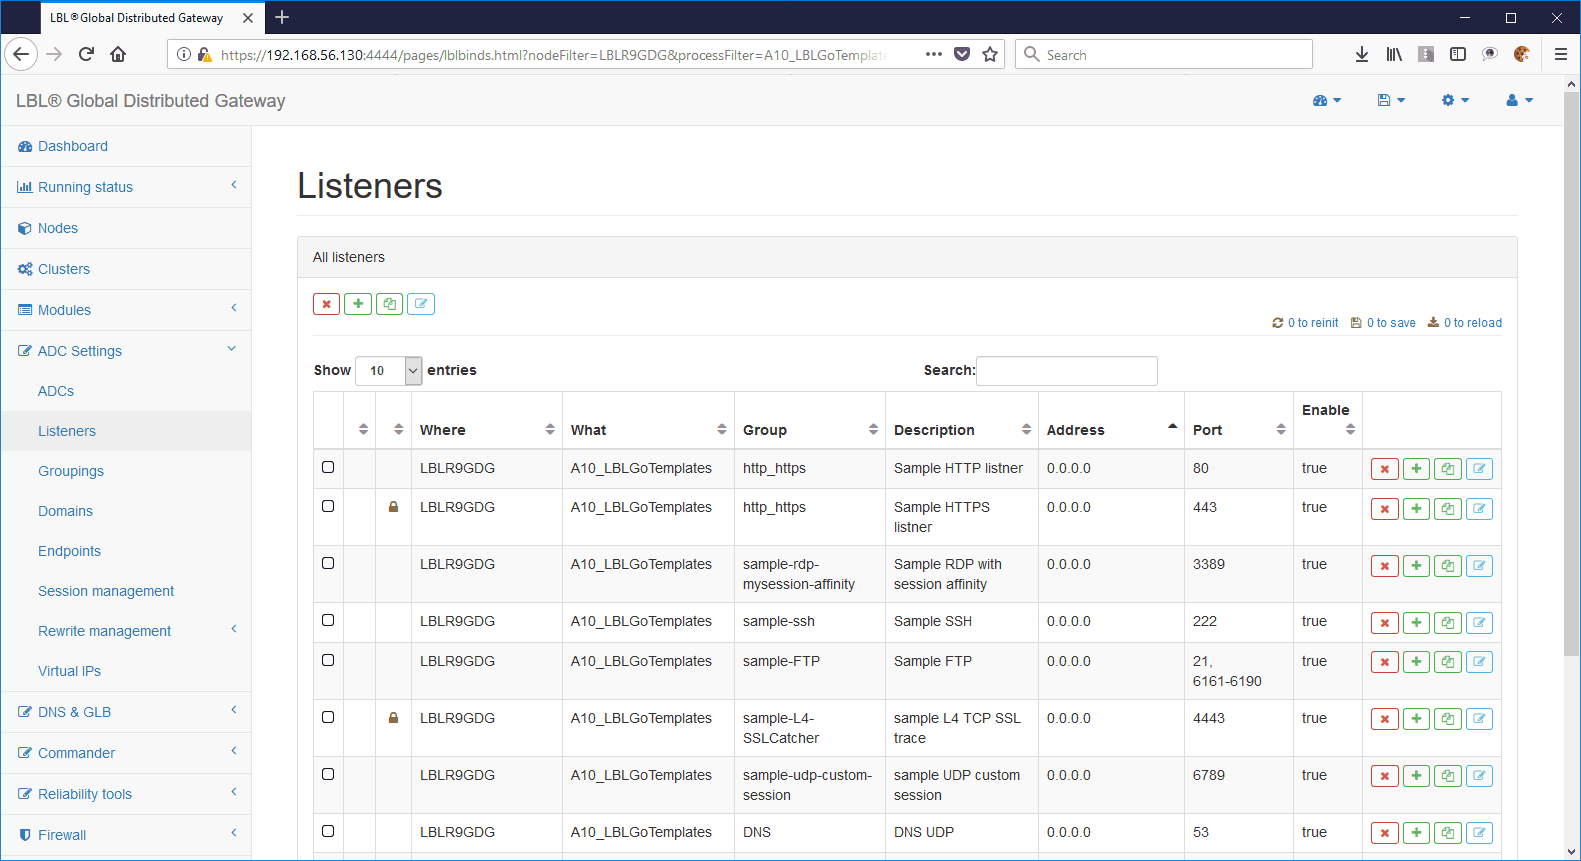
Searching for DNAT or DNAT_UDP highlights the template listener that binds
the Layer 2-3 queues:
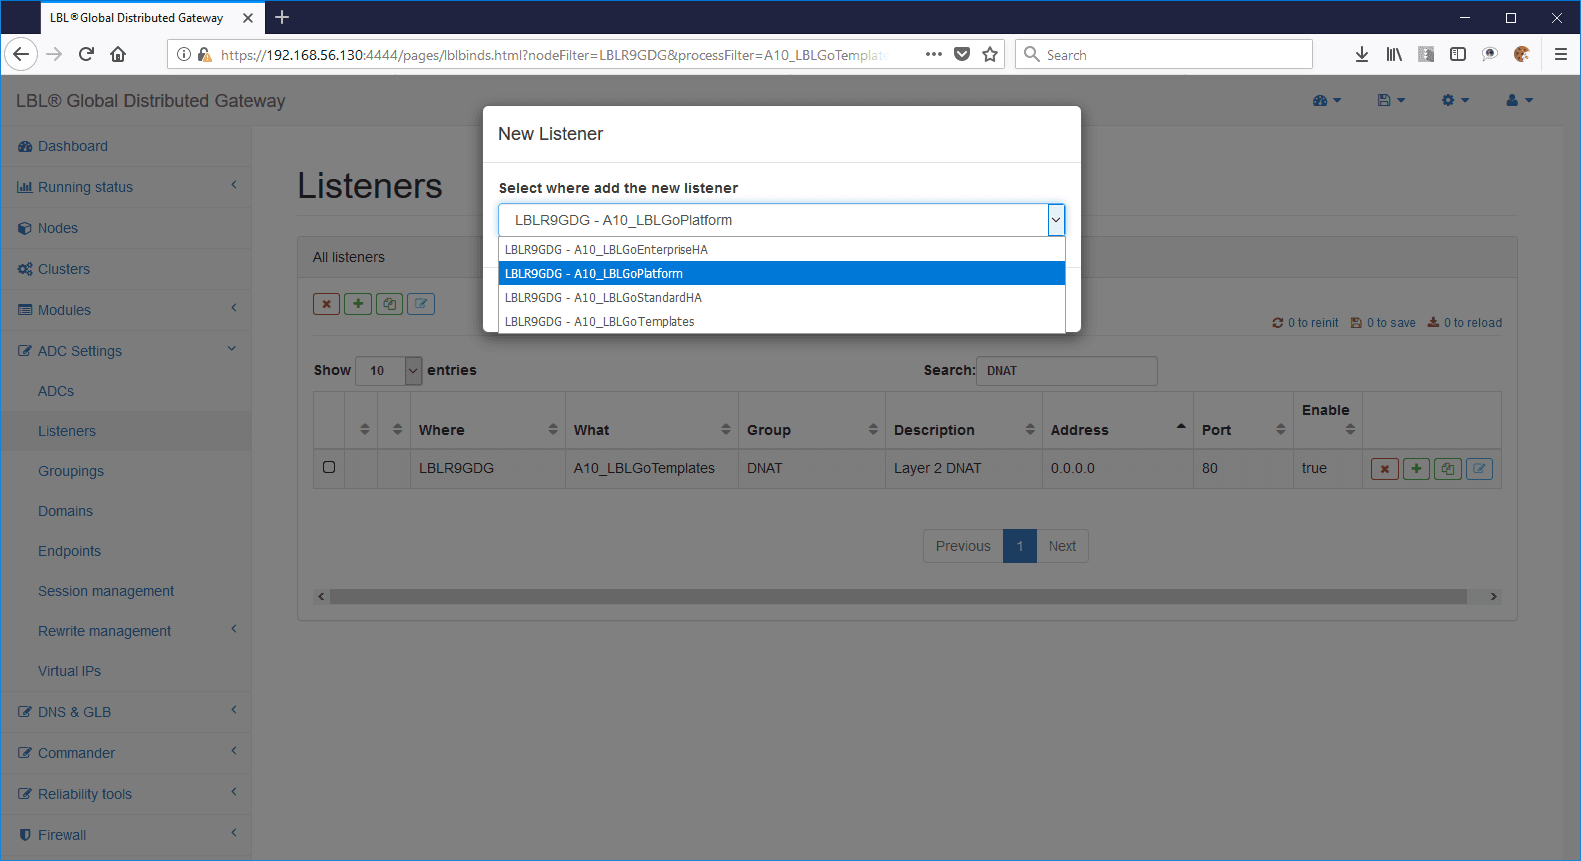
Copy the template listener to the module, in this case A10_LBLGoPlatform:
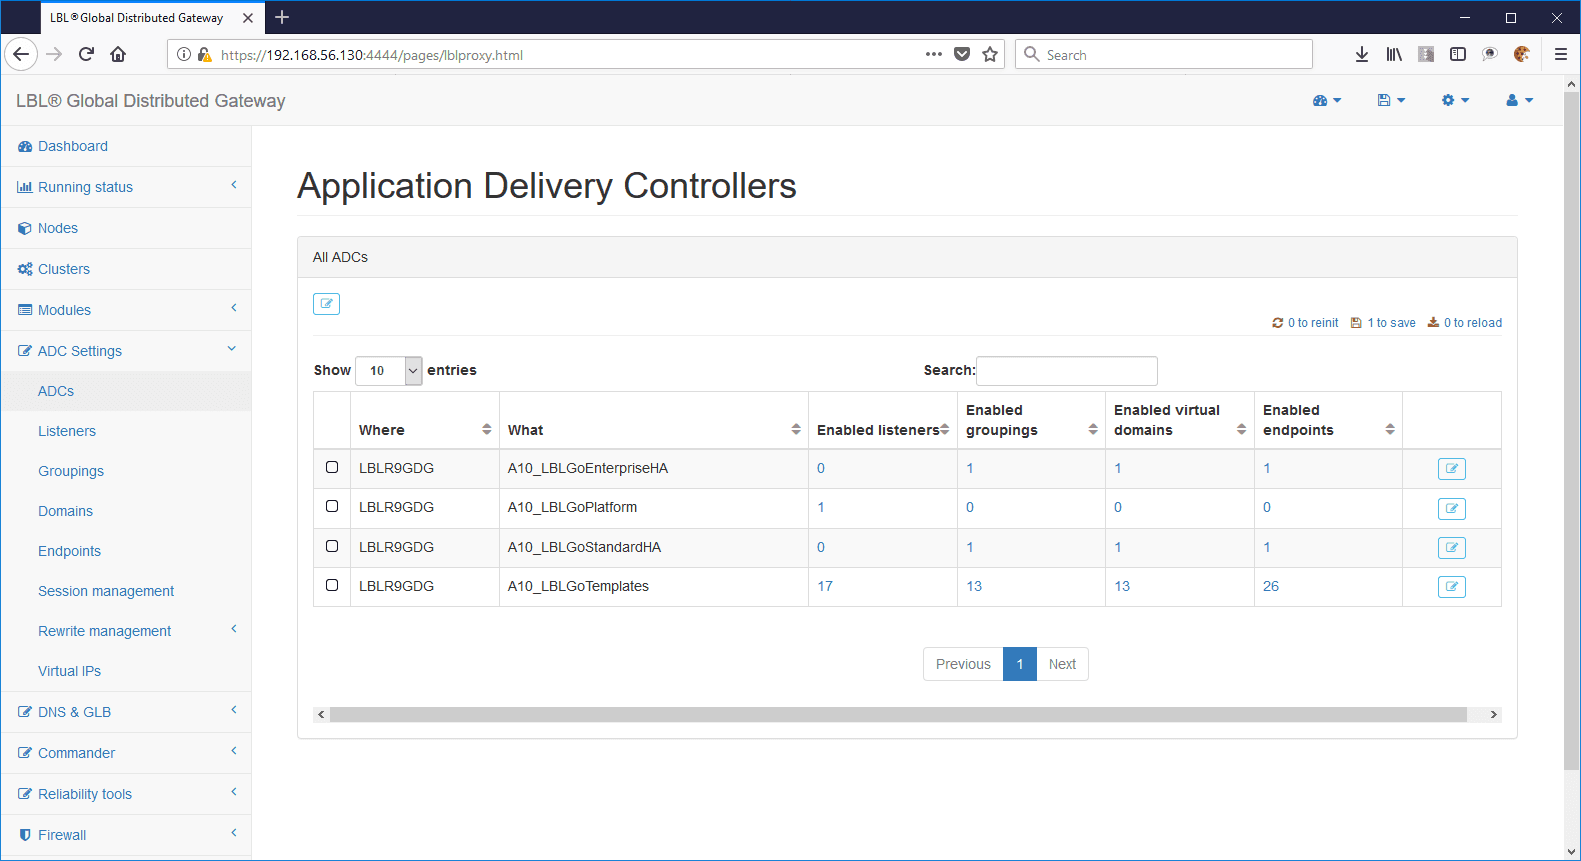
Returning to ADC Settings > ADCs, the result is as follows:
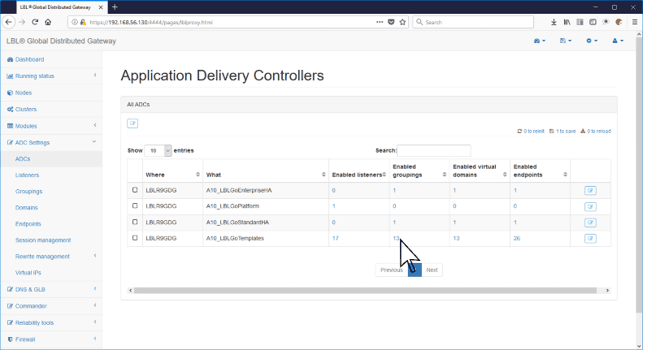
Repeat for the endpoint group as well:
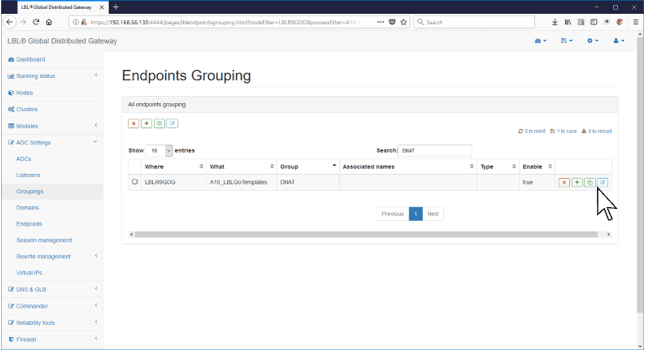
In the Search field, type DNAT or DNAT_UDP:
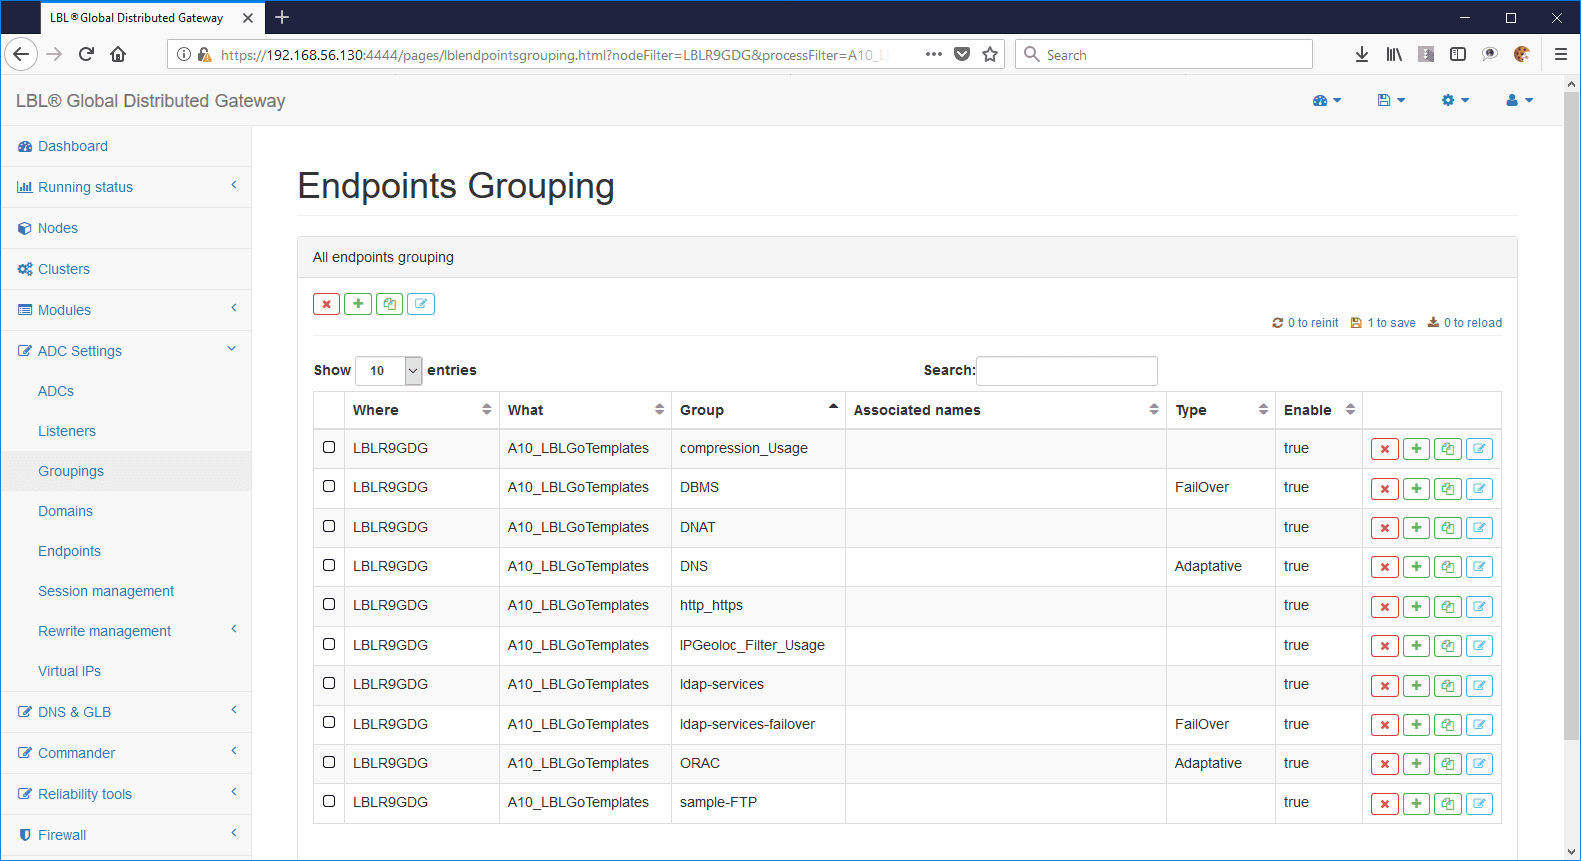
Once you have typed DNAT or DNAT_UDP, copy the template endpoint grouping to
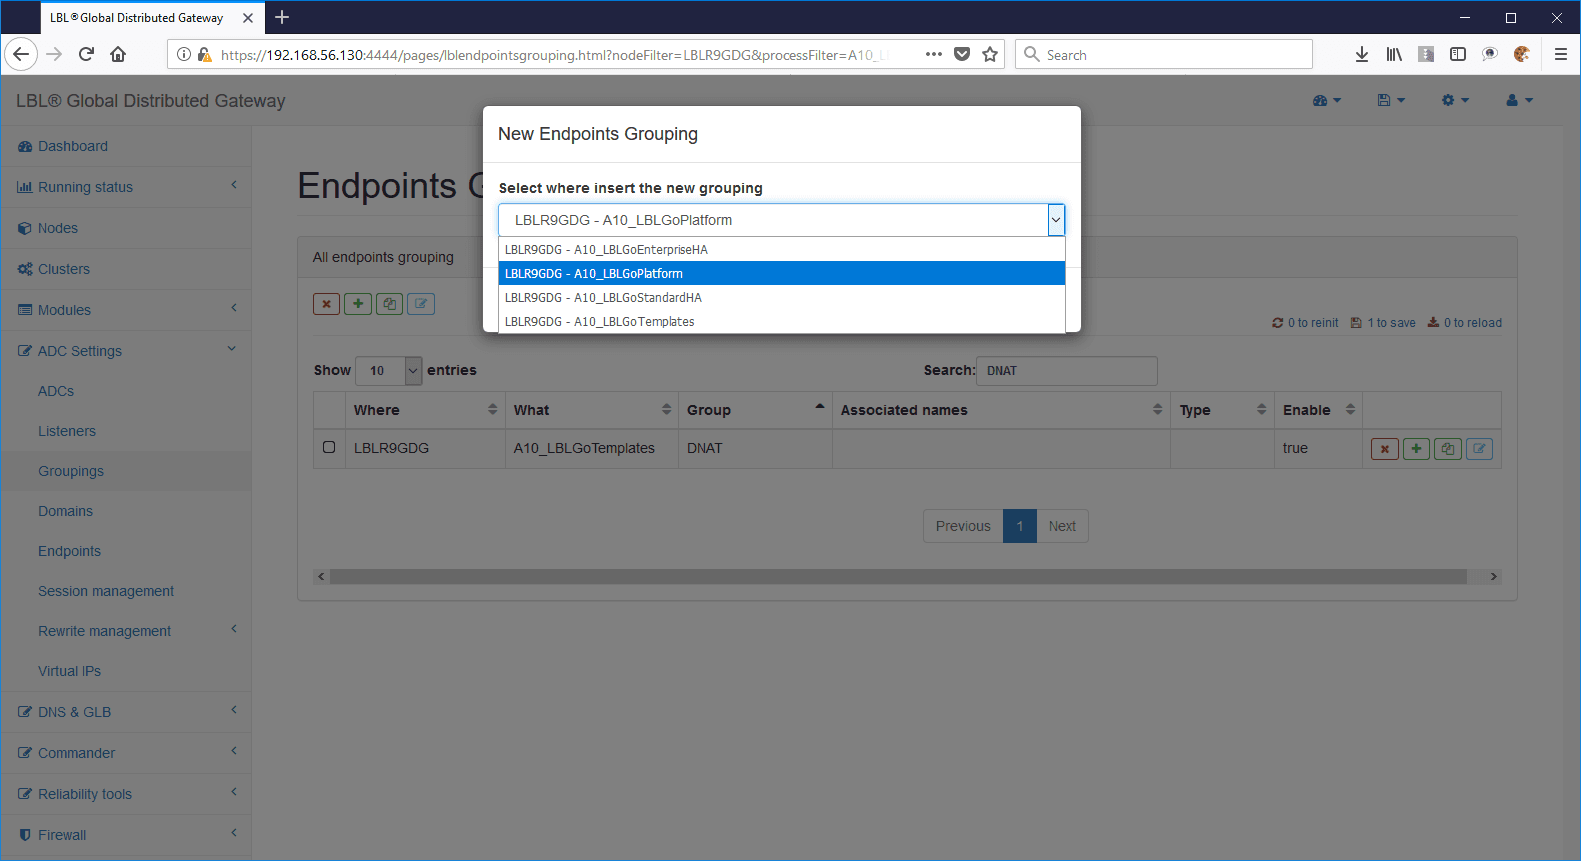
the module, in this case A10_LBLGoPlatform:
Copying the endpoint grouping to the module:
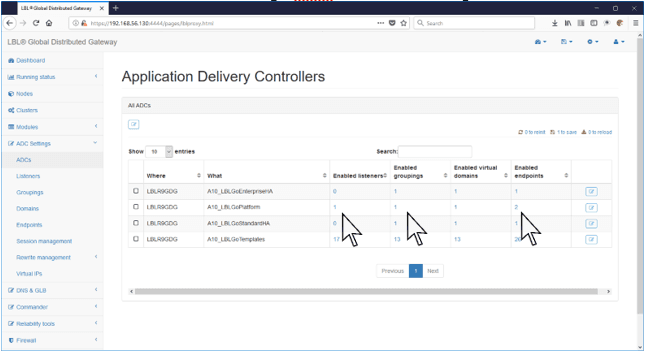
Returning to the ADC Settings > ADCs view, the situation is as follows:
Save your settings so far:
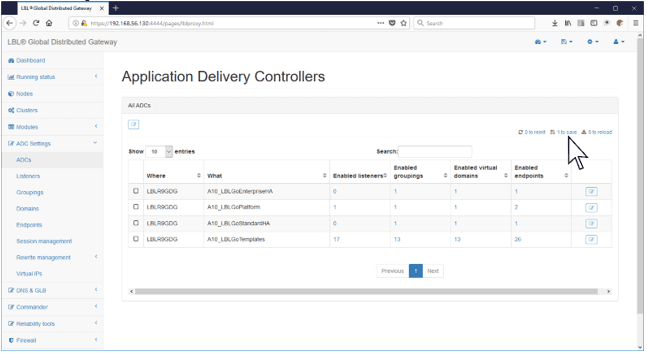
Save the proposed settings:
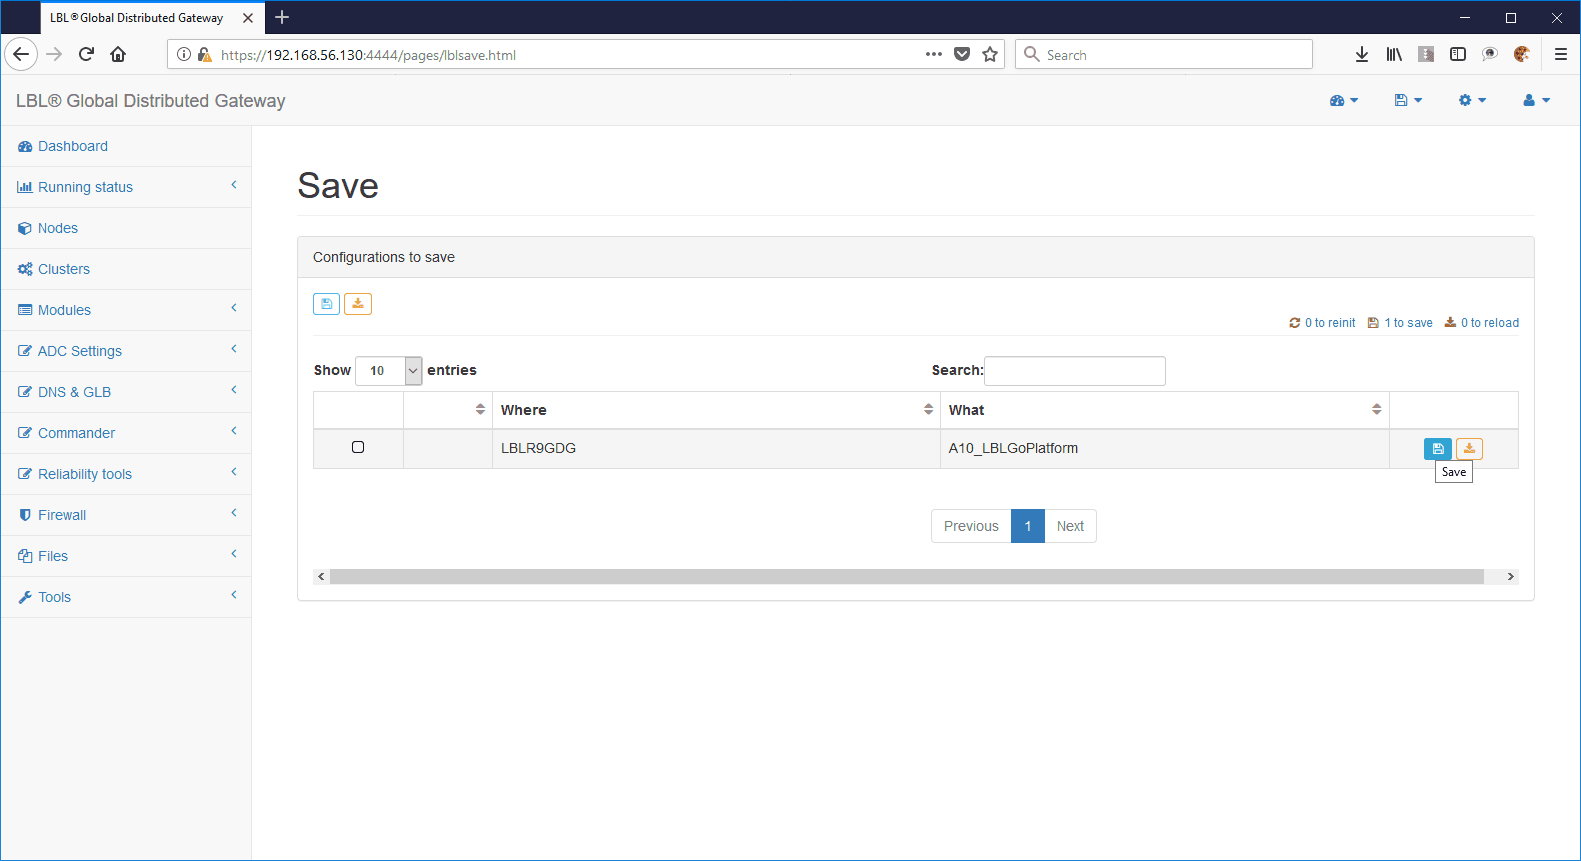
Indicate the reason for the save:
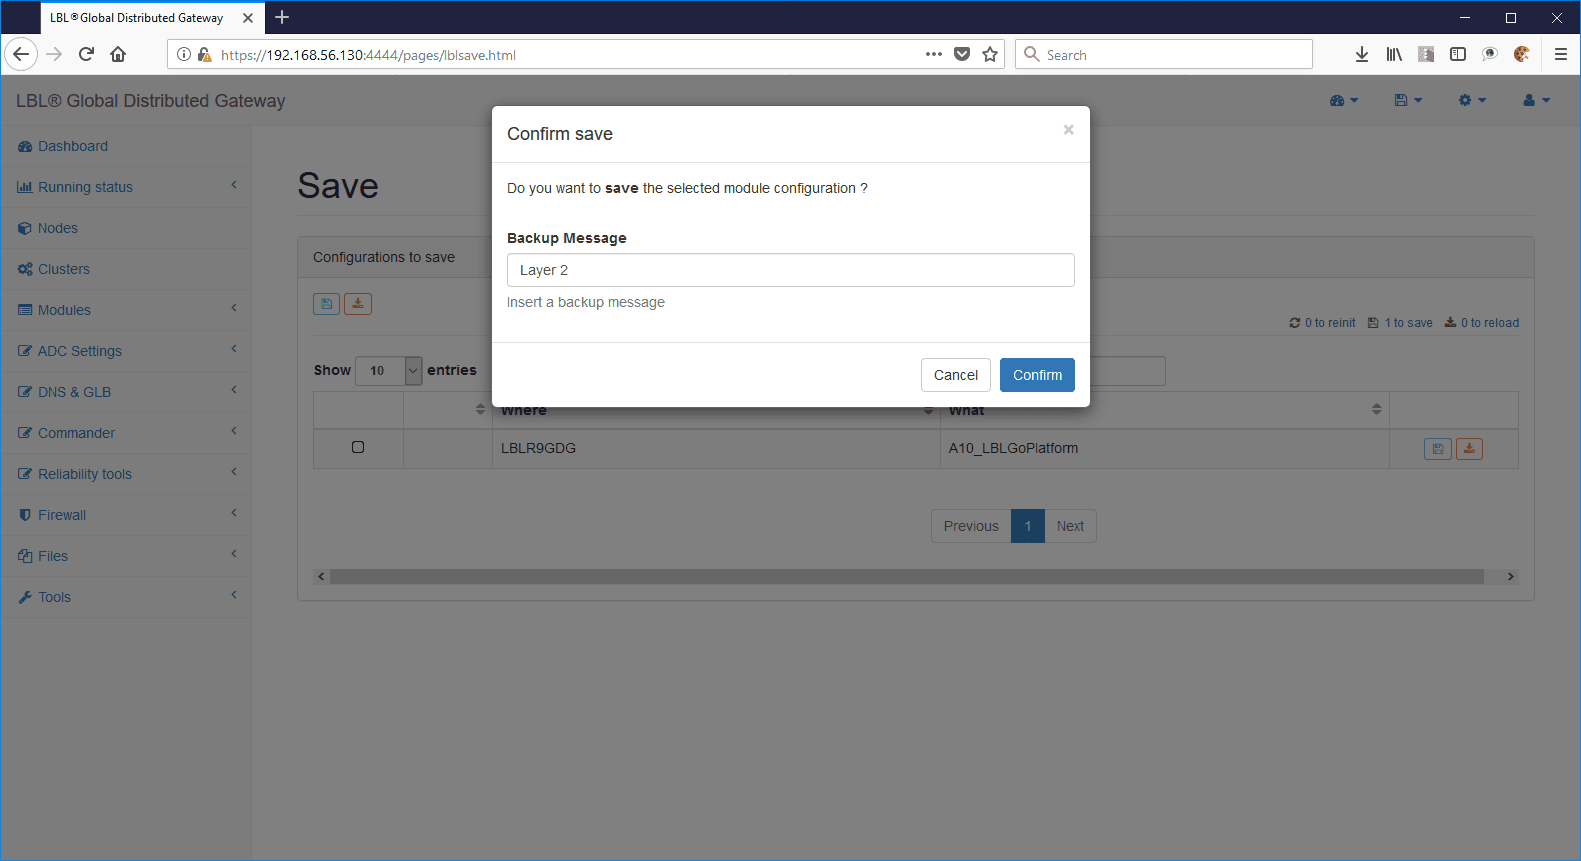
After you copy the Layer 2-3 templates to the module, associate the queues with the listener:
ADC Settings > ADCs > Edit on the module:
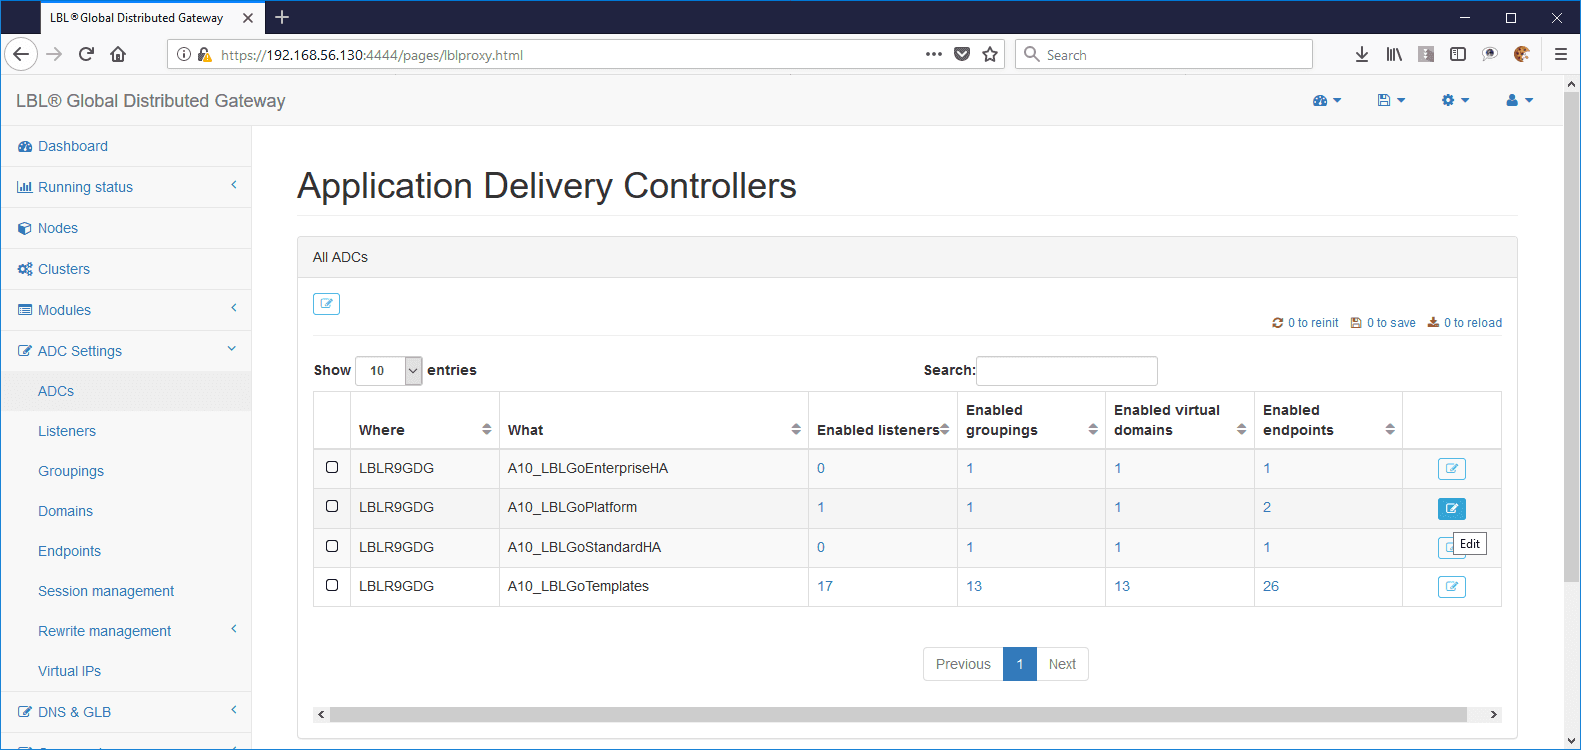
Expand the Listeners panel and click the See details button:
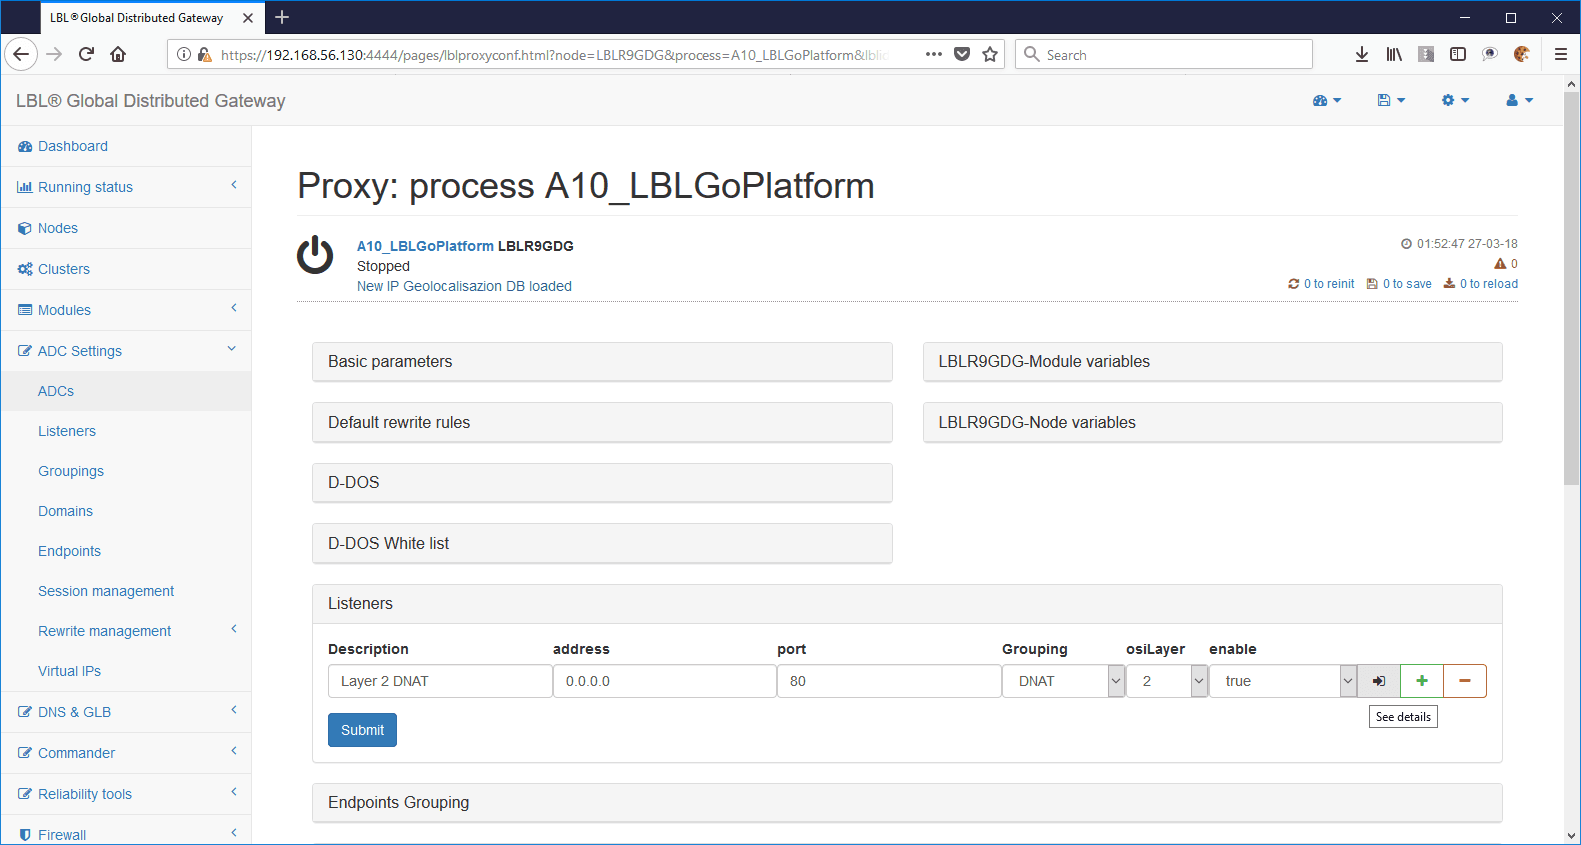
The listener has the following characteristics: osiLayer set to 2, layer2QueueIn set to 0 and layer2QueueOut set to 1. In this case you do not need to change the queues, as they were previously generated as 0 and 1 respectively.
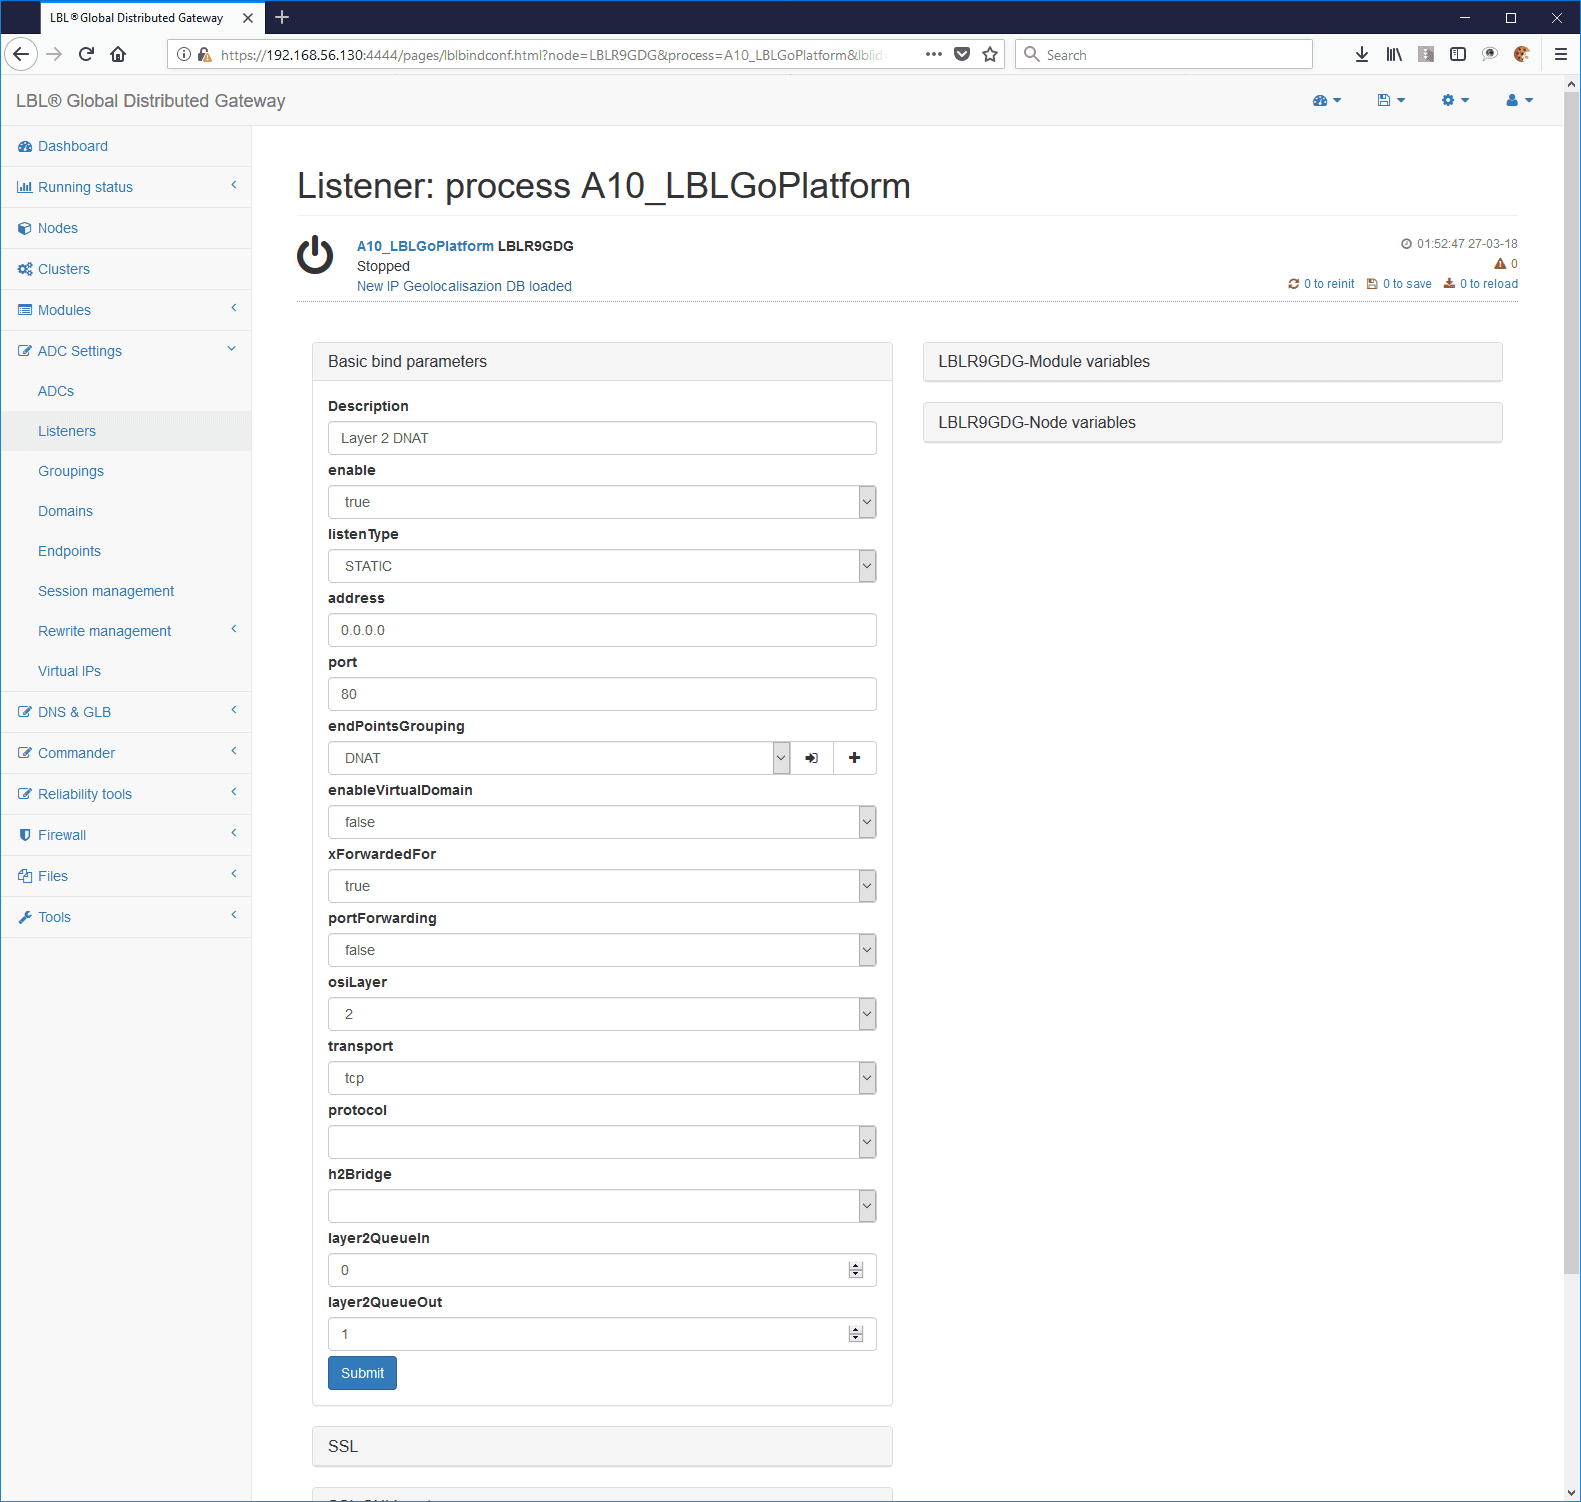
Also note that the listener address is set to 0.0.0.0 and the port
to 80. These values are not taken into account, because the traffic to
process is determined by the queues, created on a given NIC with specific filters. Oplon
ADC will in any case transparently perform any port rewriting needed if the
packets received and the packets forwarded to the services have
different ports.
Routing to the endpoints is handled exactly as for layer 4. You specify the addresses and ports on which the services respond:
IMPORTANT: if the endpoint port is less than or equal to 0, the forwarding engine performs port forwarding, keeping the same input port on the packet. You do not need to set port forwarding on the listener: it is performed automatically.
ADC Settings > ADCs > Edit on the relevant module > expand the Endpoints Grouping panel > See details:
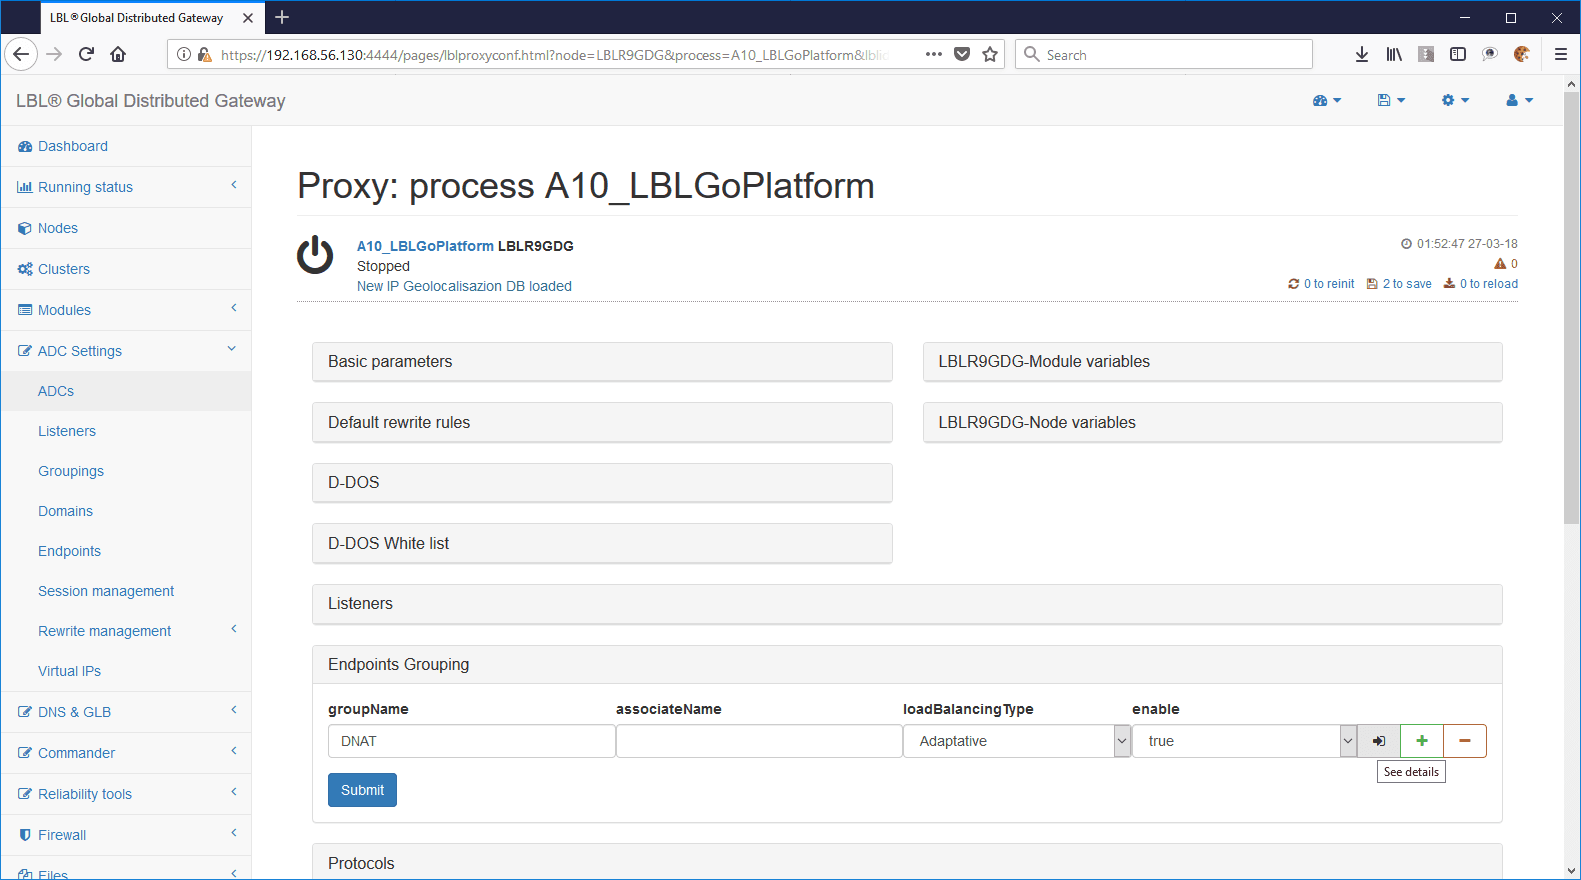
Go into the domain detail (which in this case is empty):
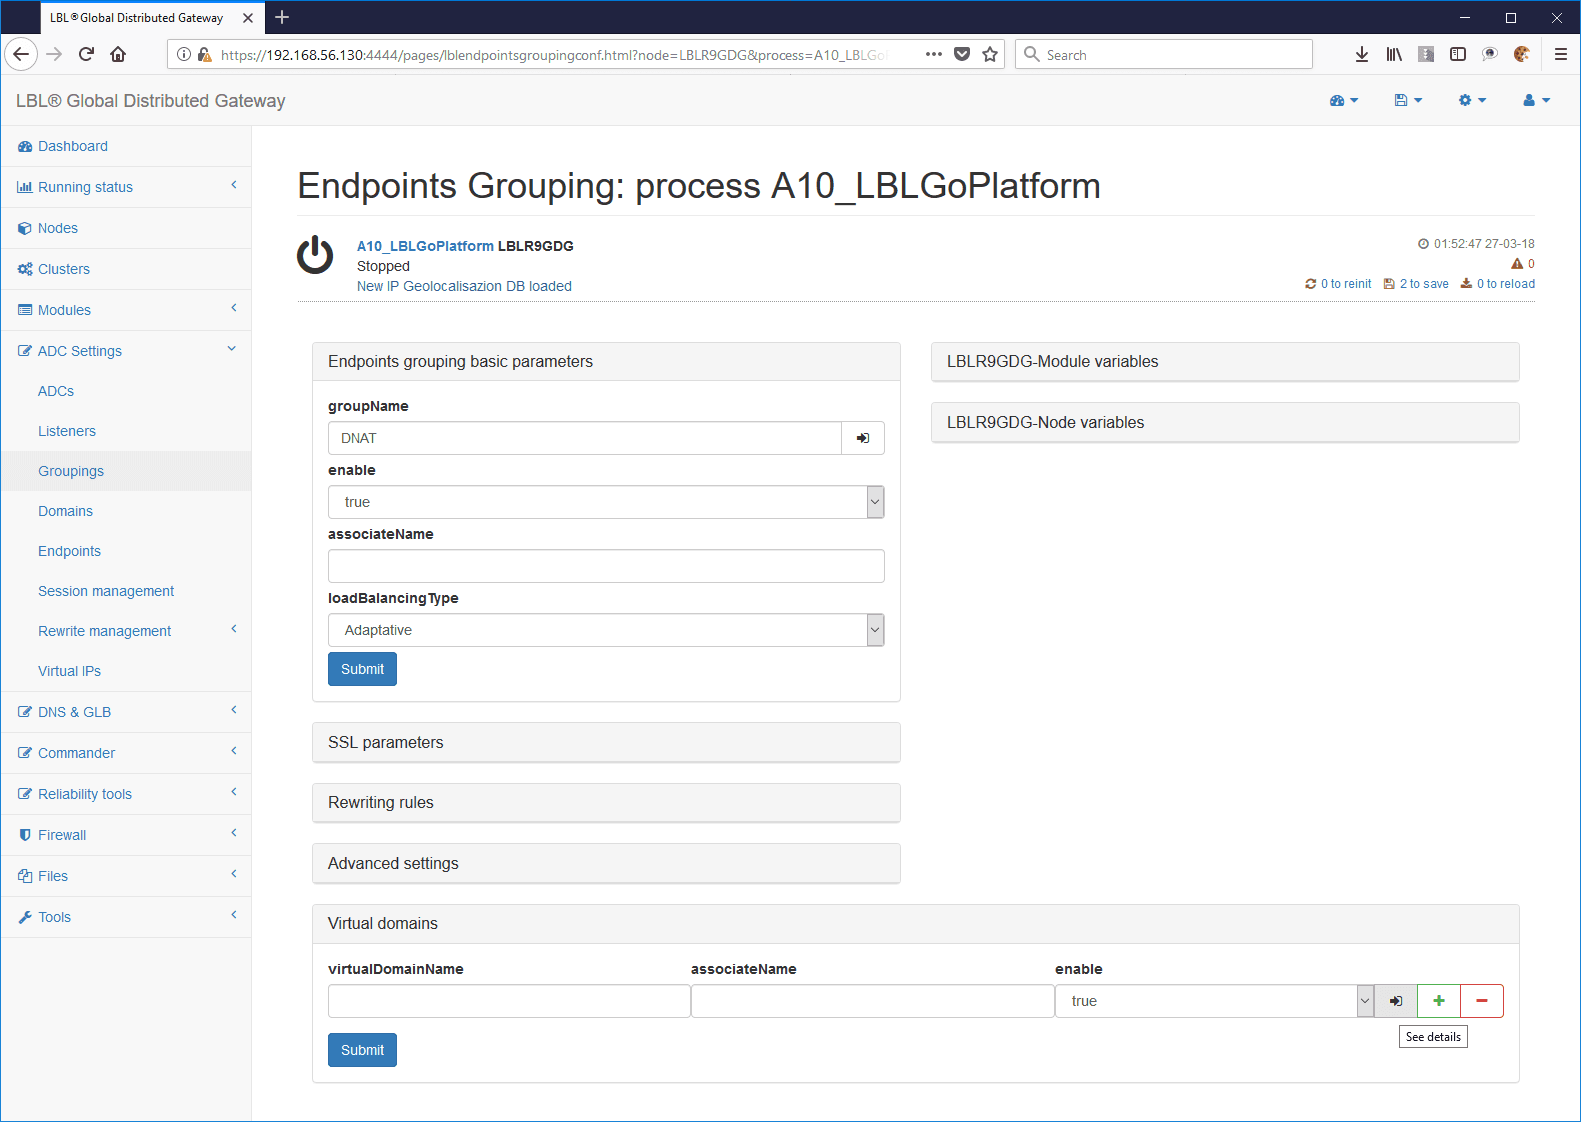
Edit, add, or remove endpoints. In this case there are two endpoints that respond on port 8080.
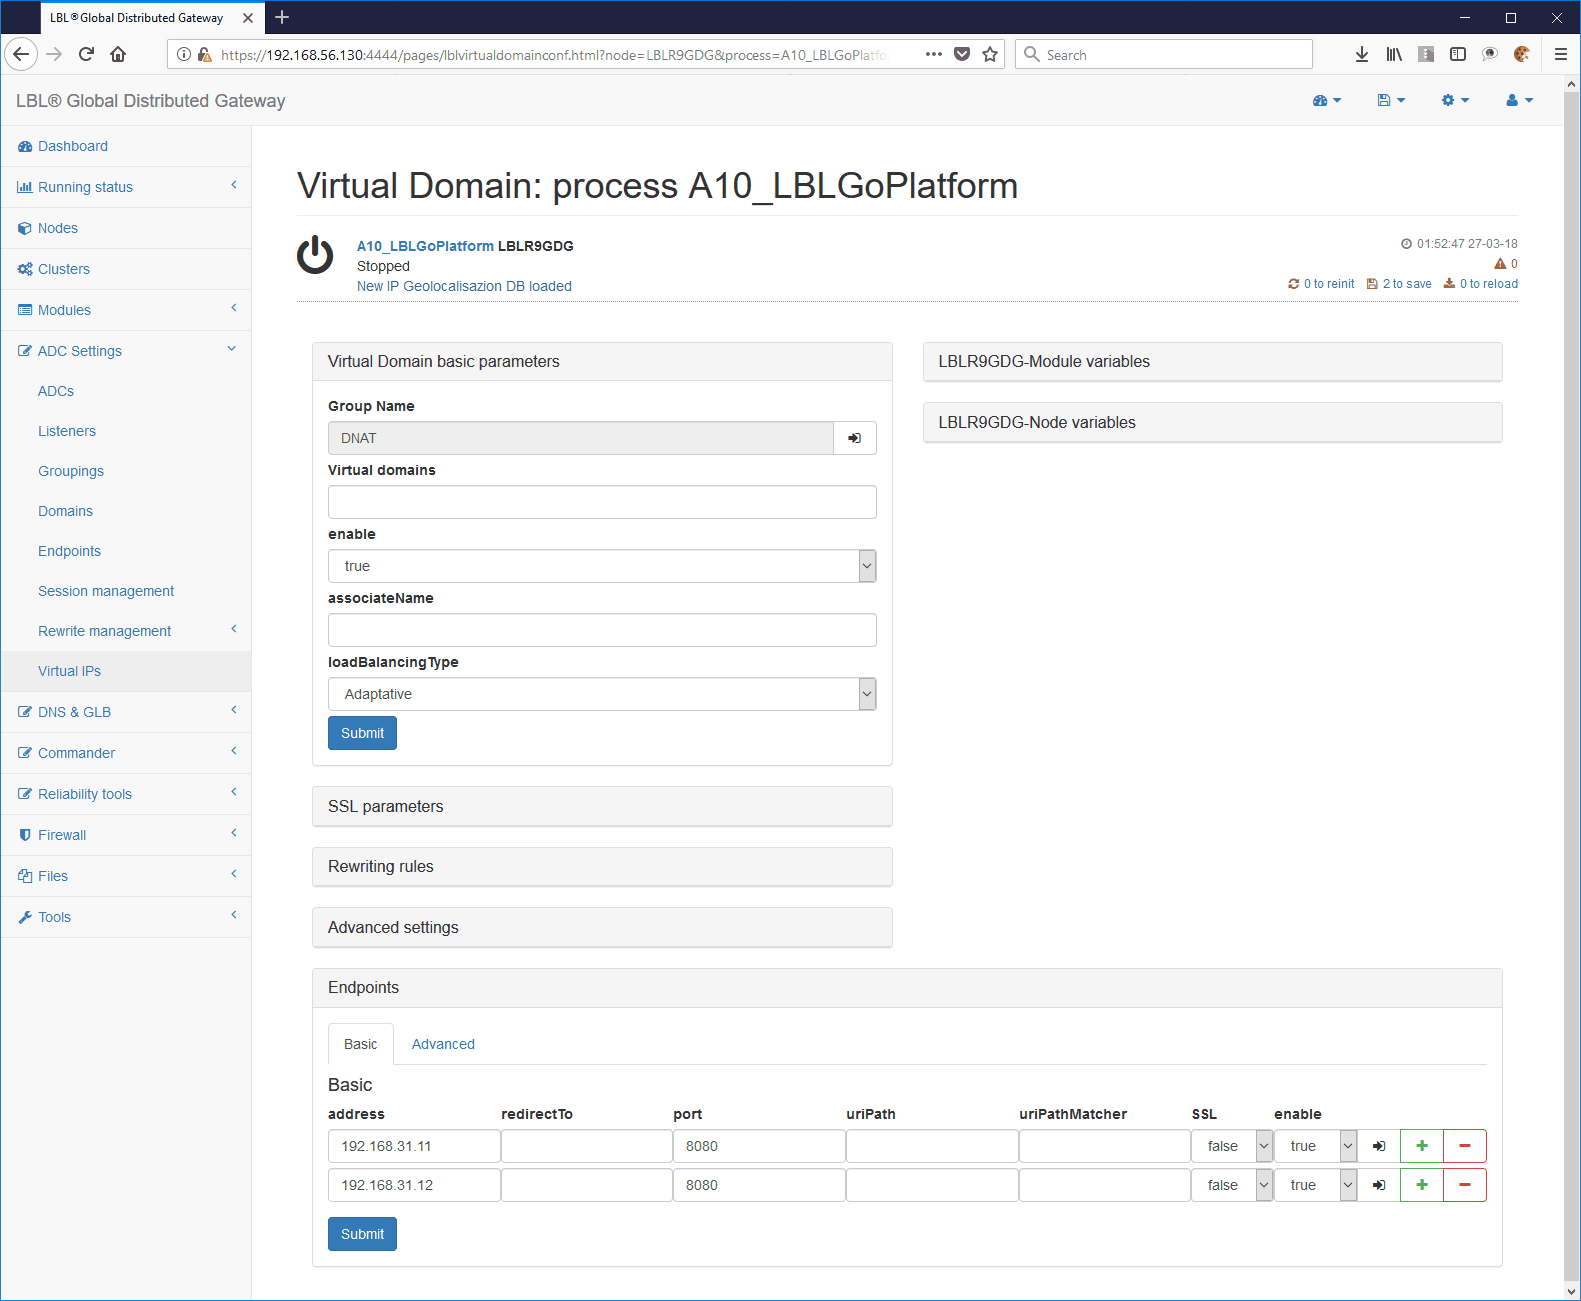
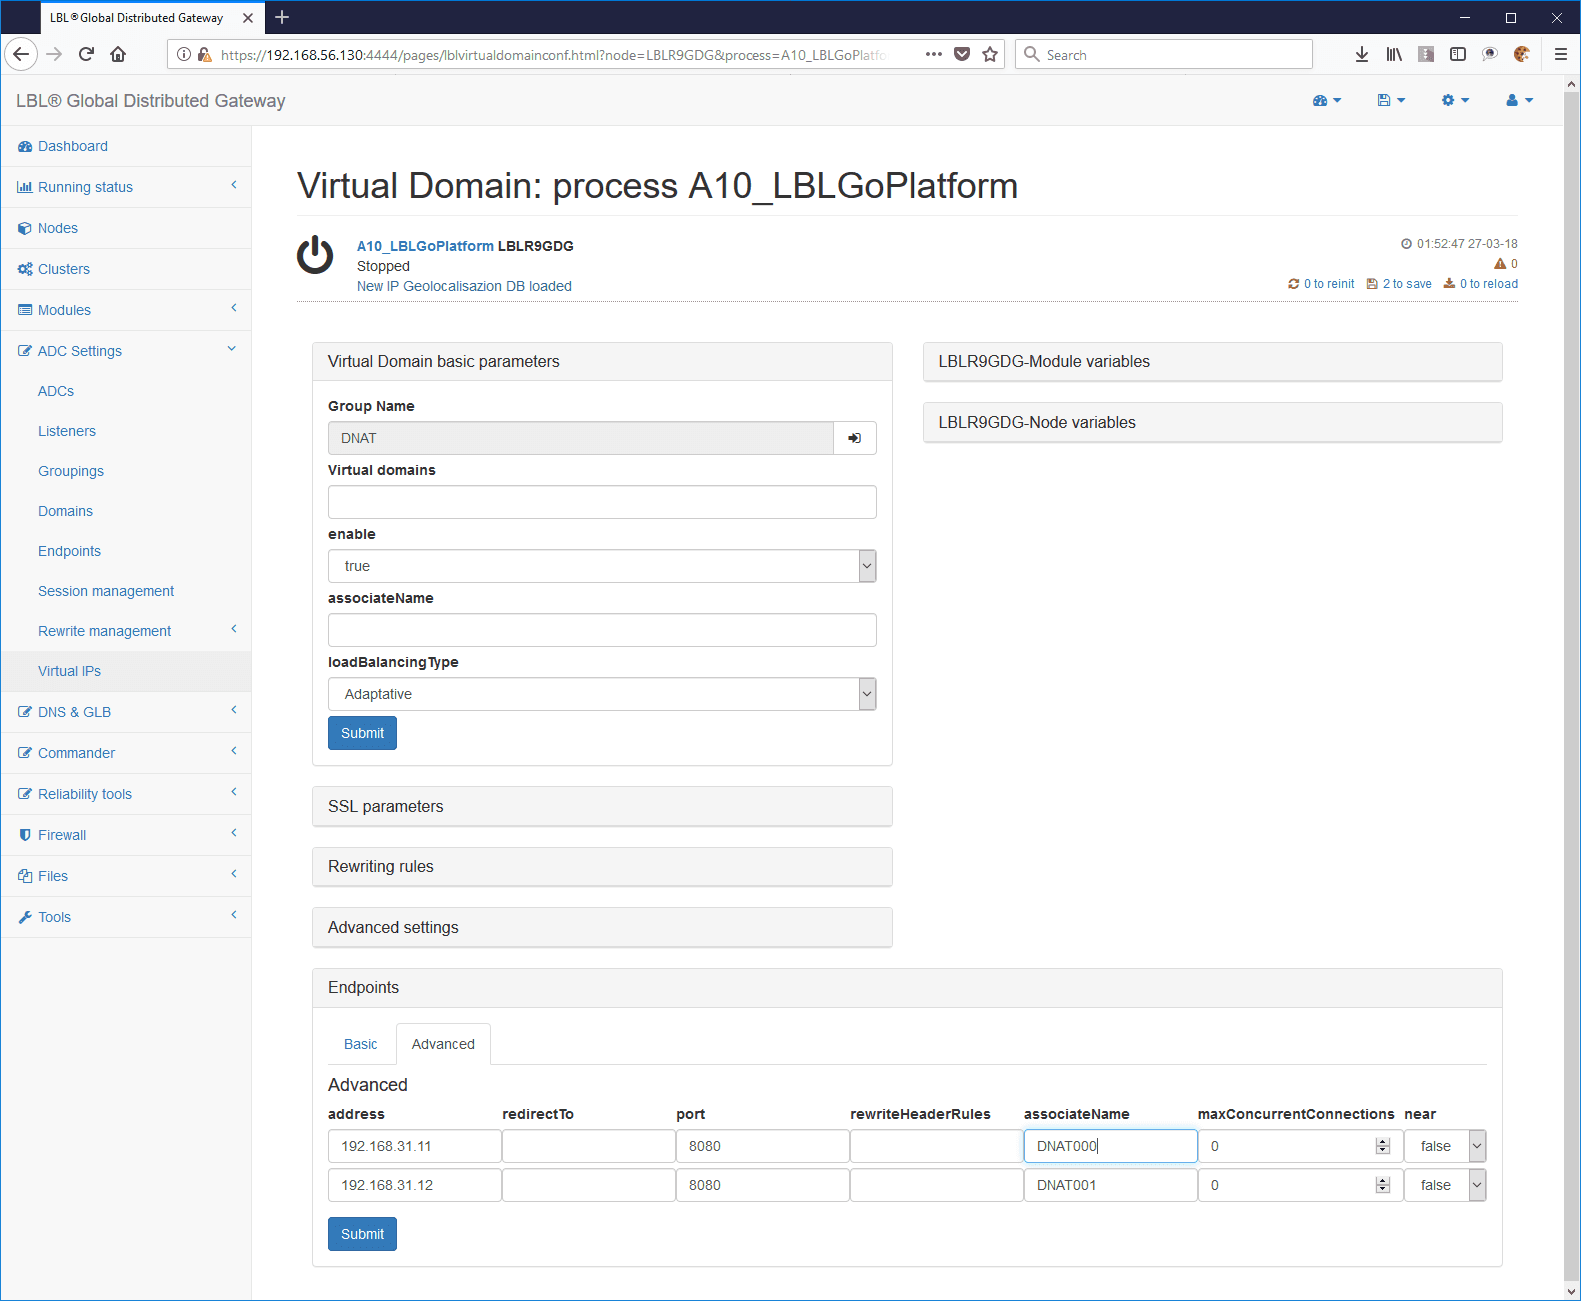
It is very important to assign associative names (associateName) to the endpoints, because they are needed to perform health checks and disable routing if one or more services become unreachable.
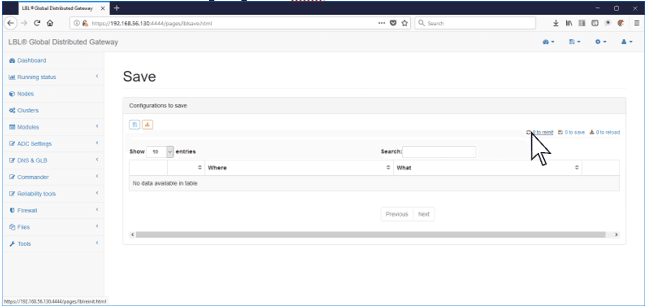
If the module is running, perform a reinit.
Service health check setting
The layer 2-3 system is able to redirect requests to the surviving services based on their availability. To check the availability of the services, set up the health checks through the module: Reliability tools > Services Check > Edit
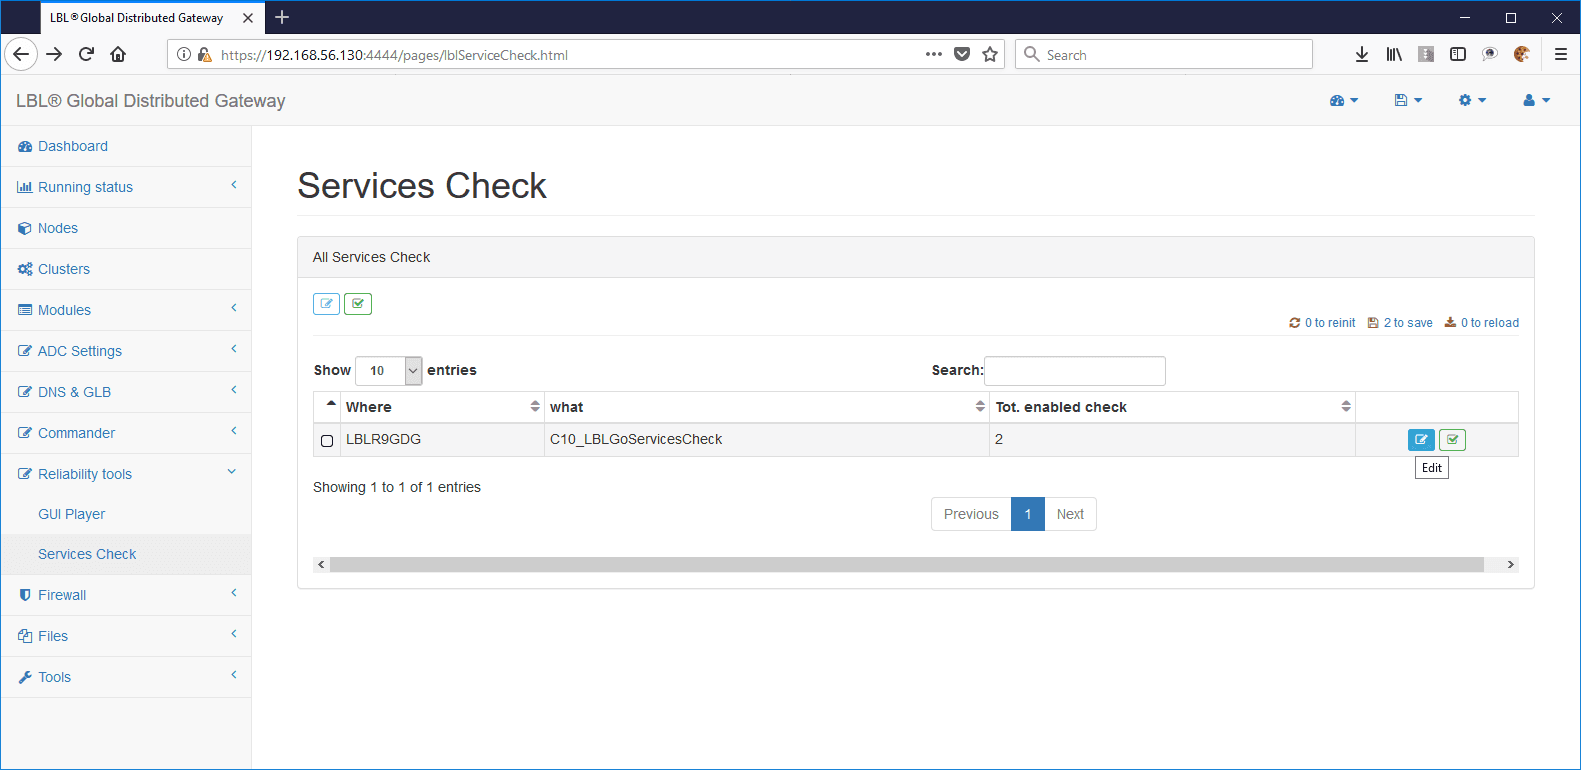
After selecting the module, set up health checks on the services by assigning the associative names:
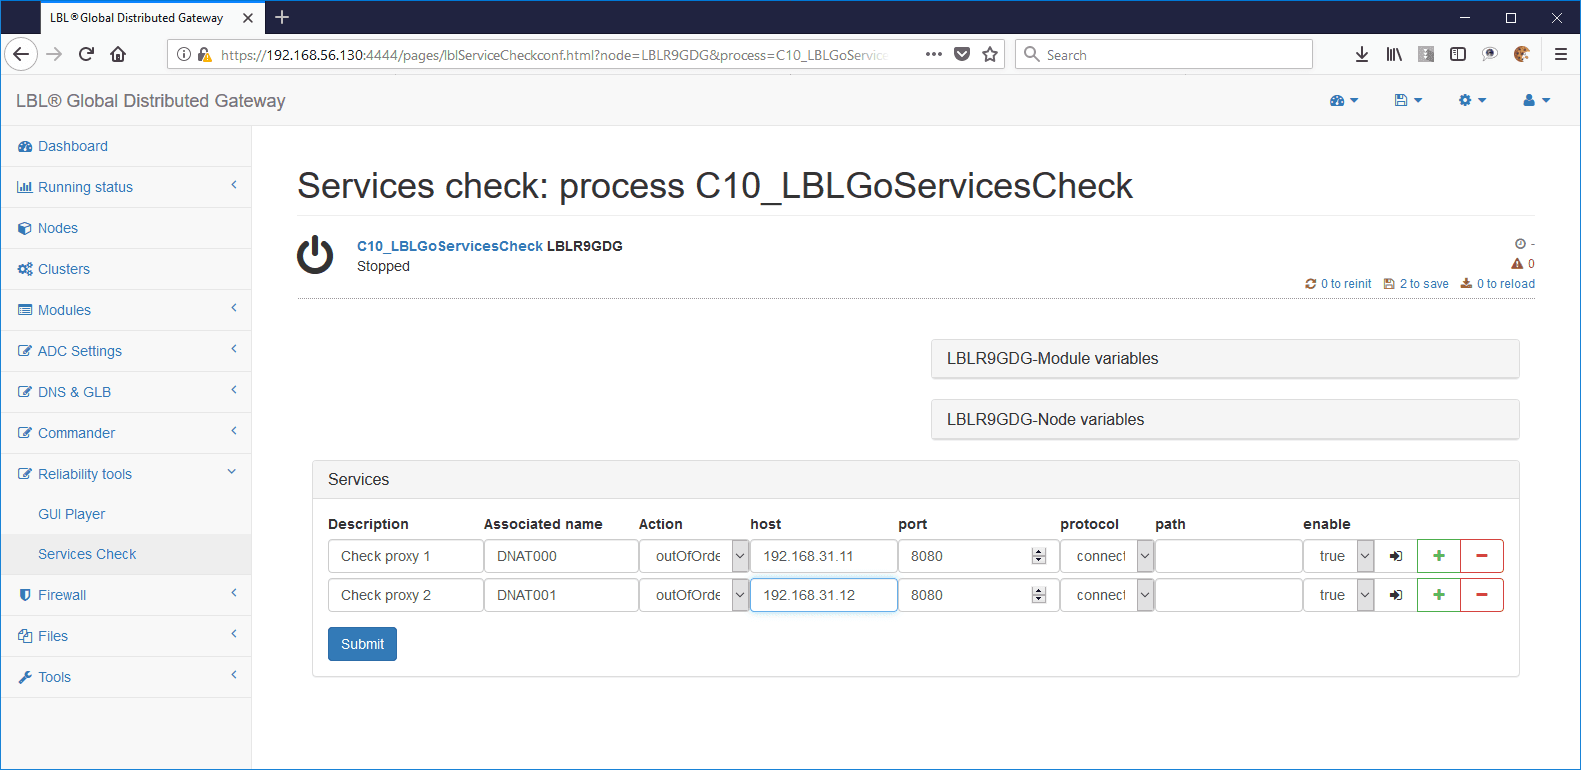
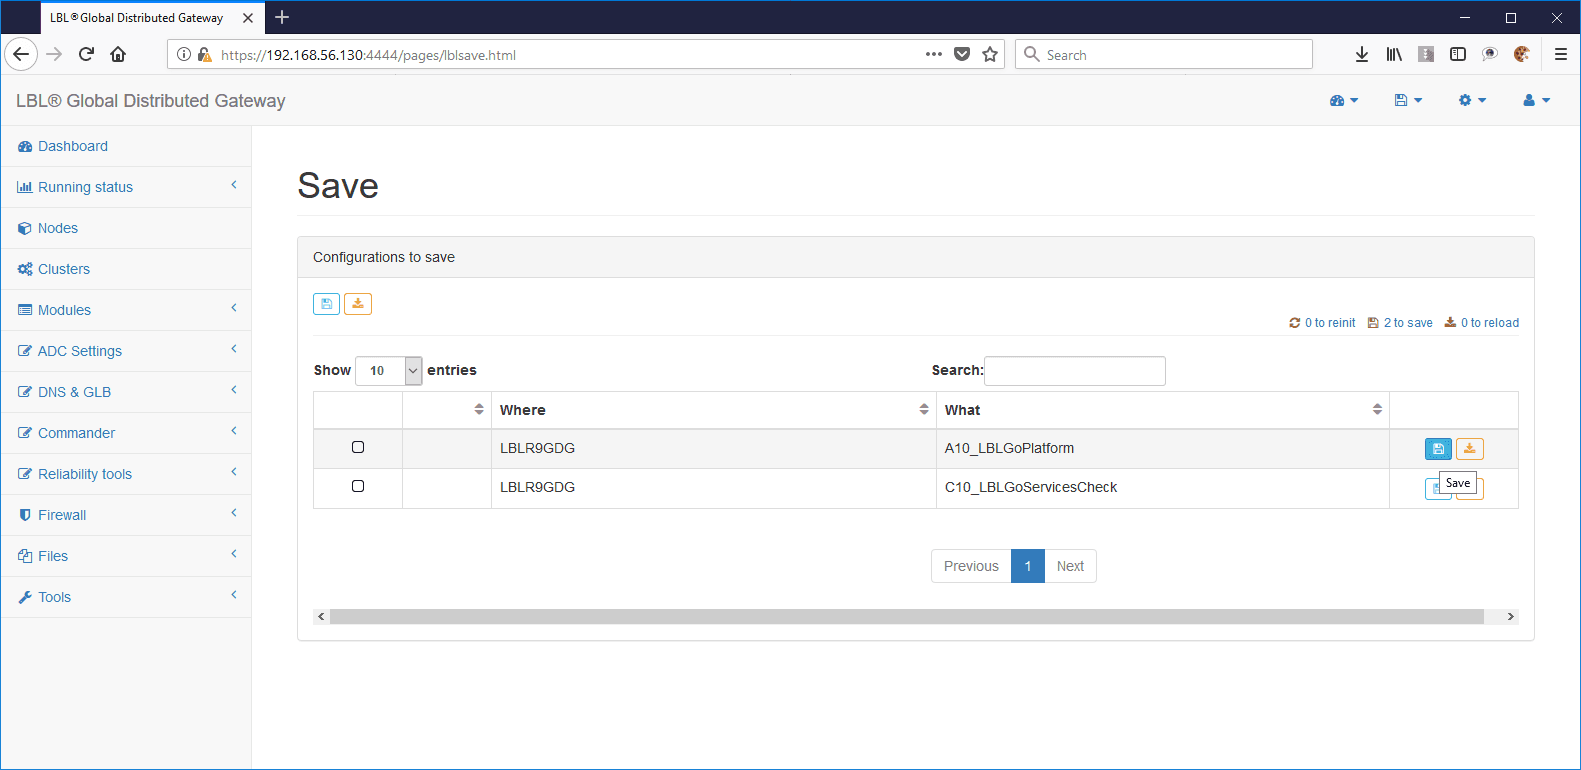
Save and perform the indicated reinits:
Service-side routing setup (Linux)
For the services to correctly route packets coming from the ADC, you must set up routing on the respective systems that host the services.
Using the tools provided by the individual vendors of the operating system or products, packets must be forced back to the NIC they came from. The following is a non-exhaustive example, useful for interpreting and adapting the configuration to individual installations:
Setting up two mnemonic tables, 1 rt_dnatnet and 2 rt_internet:
vi /etc/iproute2/rt_tables
#
# reserved values
#
255 local
254 main
253 default
0   unspec
#
# local
#
#1  inr.ruhep
1   rt_dnatnet
2   rt_internet
As the root user, set up the routing of packets coming from the ADC, using the ADC itself as the gateway:
# ip route add 192.168.31.0/24 dev enp0s17 src 192.168.31.11 table rt_dnatnet
# ip route add default via 192.168.31.1 dev enp0s17 tab rt_dnatnet
# ip rule add tab rt_dnatnet from 192.168.31.11
To check low-level traffic and packet directions, run the following command:
# tcpdump -i enp0s17 port 80 or port 8080 or port 3128
Resources and templates
As templates, you can find a series of Linux scripts for setting up routing, both at ADC level and at service level, in:
(LBL_HOME)/legacyBin/Linux/ProxyDNAT
+---CentOSNetConfProxy
|   +---System000
|   |       CentOS_Simmetric.sh
|   |       CentOS_SimmetricInternet.sh
|   |       CentOS_SimmetricView.sh
|   |       ifcfg-BACKEND
|   |       ifcfg-DNATNET
|   |       ifcfg-INTERNET_DHCP
|   |       ifcfg-WIRELESS
|   |       README.txt
|   |
|   \---System001
|           CentOS_Simmetric.sh
|           CentOS_SimmetricInternet.sh
|           CentOS_SimmetricView.sh
|           ifcfg-BACKEND
|           ifcfg-DNATNET
|           ifcfg-INTERNET_DHCP
|           ifcfg-WIRELESS
|           README.txt
|
\---NetConfVAPP
        CentOS_NFQUEUE.sh
        CentOS_NFQUEUEView0.sh
        CentOS_NFQUEUEView1.sh
        CentOS_NFQUEUEView2.sh
        CentOS_NFQUEUEView3.sh
Persist routing rules
WARNING: routing rules and queue settings must be made persistent, so that they are automatically applied and verified when the individual VAPPs or the individual operating systems that provide the services are restarted.